A set of three linear actuators set atop a green with yellow grid cutting mat. The electric actuator on the top of the image is silver and has a squarish tube. It is slender compared to the other two. A black, hydraulic actuator sits in the middle and is the largest of the three. A silver pneumatic actuator at the bottom of the image is the middle sized unit.

Linear Actuators 101

Linear actuators are a great help when you’re moving something along a single axis, but with so many options, how do you decide? [Jeremy Fielding] walks us through some of the high level tradeoffs of using one type of actuator over another.

There are three main types of linear actuator available to the maker: hydraulic, pneumatic, and electric. Both the hydraulic and pneumatic types move a cylinder with an attached rod through a tube using pressure applied to either side of the cylinder. [Fielding] explains how the pushing force will be greater than the pulling force on these actuators since the rod reduces the available surface area on the cylinder when pulling the rod back into the actuator.

Electric actuators typically use an electric motor to drive a screw that moves the rod in and out. Unsurprisingly, the electric actuator is quieter and more precise than its fluid-driven counterparts. Pneumatic wins out when you want something fast and without a mess if a leak happens. Hydraulics can be driven to higher pressures and are typically best when power is the primary concern which is why we see them in construction equipment.

You can DIY your own linear actuators, we’ve seen tubular stepper motors, and even a linear actuator inspired by muscles.

Continue reading “Linear Actuators 101”

Yesterday’s Drill Press Packed With Tomorrow’s Upgrades

Those who hibernate in their workshops have a habit of re-imagining their relationship to tools. And [Marius Hornberger] is no exception, but the nine upgrades he’s added to his grandfather’s old drill press puts this machine on a whole other level.

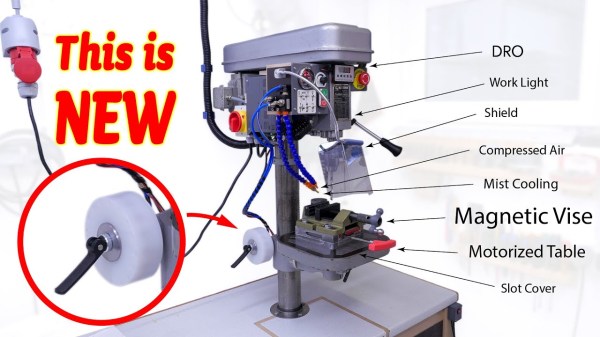
In proper storytime fashion, [Marius] steps us through each upgrade, the rationale, and the time and effort that went into crafting the solution. Some of these upgrades, like a digital readout (DRO), add modern features to an old-school device. Others, like an oil mist cooling system and a compressed air chip blower, borrow from other machines with similar setups. Some, like the chip guard, are nice personal touches. And a few, like the motorized table with automatic clamp, transform the entire operator experience. On the whole, these upgrades follow a gentle theme of personalizing the machine to [Marius’] tastes, giving him a delightful, more personal operator experience that’s tuned through his everyday use. Amid the sheer volume of tweaks though, we’re convinced that you’ll find something that tickles your tinkering fancy.

It’s worth mentioning that the pneumatic table clamp alone (at 4:28) makes the entire video worth the watch. If you’ve ever had the mishap of pinching your finger or struggling to hold the table steady while clamping it in place, this little upgrade takes all of that away, replacing the swivel handle with a homebrew pneumatic cylinder made in the shop. With a single button press, a swoosh of compressed air either clamps or releases the table. Best of all, the setup still sports a hand clamp if [Marius] is operating without a compressed air source.

It’s also worth mentioning that a couple of [Marius’] upgrades completely skip the CAD step altogether. Instead, [Marius] creates templates directly off the drill press with tracing paper and then immediately transfers them onto stock materials. It’s a nice reminder that not every small project needs to start with a 3D model.

If all these upgrades are getting you ready to modify your machine, look no further than the video description where he’s courteously posted inks to key components behind these upgrades.

The story of many-a-workshop often involves reinventing your machine tools. If you’re looking for more tales of tool upgrades, have a look at resurrecting a machine from literal ashes or a machine that improves itself.

Continue reading “Yesterday’s Drill Press Packed With Tomorrow’s Upgrades”

Industrial Robot Repurposed To Make S’Mores

It’s summer time in the Northern Hemisphere, and that means campfires for cooking hot dogs, keeping the mosquitoes away, and of course, making s’mores. For our far-flung friends, that’s a fire roasted marshmallow and a square of chocolate smashed between two graham crackers. So called because when you’re done, you’ll want s’more. It’s an easy enough recipe that any child can tell you how to make it. But what if you’re not a child? What if you don’t even have hands, because you’re an industrial robot? This is the challenge that [Excessive Overkill] has taken on in the video below the break.

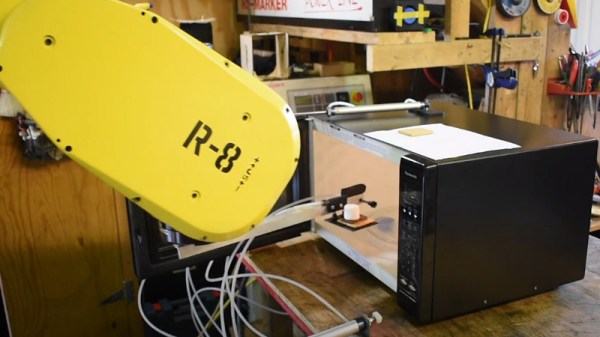
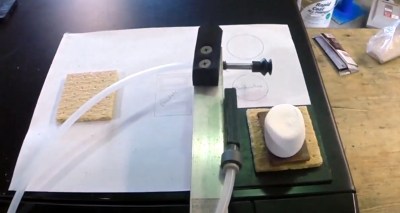
Starting with a Fanuc S-420 i W industrial robot built in 1997, [Excessive Overkill] painstakingly taught his own personal robot how to make S’Mores. Hacking the microwave with pneumatic cylinders to get the door open was a nice touch, and so are the vacuum grippers at the business end of the S’More-bot.

We know, we said you were supposed to make them on a campfire — but who wants to risk cooking their vintage robotic arm just to melt some chocolate?

There’s a lot of story behind this hack, and [Excessive Overkill] explains how they acquired, transported, and three phase powered an out of date industrial robot in another of their videos. Of course, this is Hackaday so it’s a subject that’s come up before in the reverse engineering of an industrial robot that we covered some time back.

Continue reading “Industrial Robot Repurposed To Make S’Mores”

Pneumatic Actuator Made Out Of Lasercut Plastic

Pneumatics are a great solution for all kinds of actuators, and can even be used for logic operations if you’re so inclined. Typically, such actuators rely on nicely machined metal components with airtight rubber seals. But what if you did away with all that? [Richard Sewell] decided to investigate.

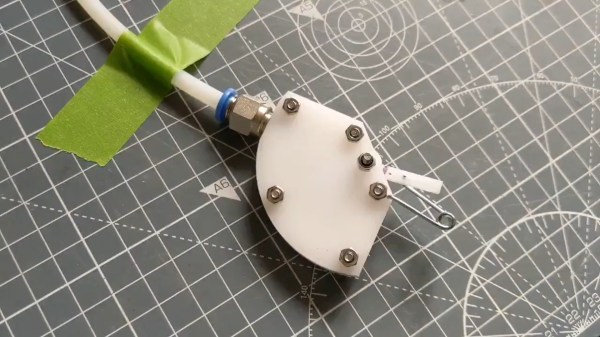
The result is a pneumatic actuator built out of lasercut acetal parts. The mechanism consists of of two outer layers of plastic acting as the enclosure, and a cut-out middle layer which creates the air chamber and houses the actuating arm itself. It’s a single-acting design, meaning the air can push the actuator one way, with a spring for return to the neutral position. The action is quite fast and snappy, too.

[Richard] aims to tweak the design further by improving the registration between the features of each layer and reduce the rubbing of the actuator’s rotor on the surrounding parts. If you’ve got the know-how, sound off in the comments. Alternatively, consider looking into soft pneumatics as well. Video after the break.

Continue reading “Pneumatic Actuator Made Out Of Lasercut Plastic”