Fail Of The Week: The Demise Of Lil’ Screwy

fotw-demise-of-lil-screwy

The subject of this Fail of the Week installment is entertaining if nothing else. [Chris] decided to see what kind of forces his home-built 100 ton press could stand up to. Turns out the press failed at punching a 1.5″ hole through 1/2″ plate steel.

If you didn’t see it back in February make sure you take a gander at the premier of Lil’ Screwy. The diminutive press packed quite a bit of punch, using four hand-cranked screws to knock out holes in metal. [Chris] decided to tie-one-on and take his lathe for a spin to machine the larger 1.5″ punch set.

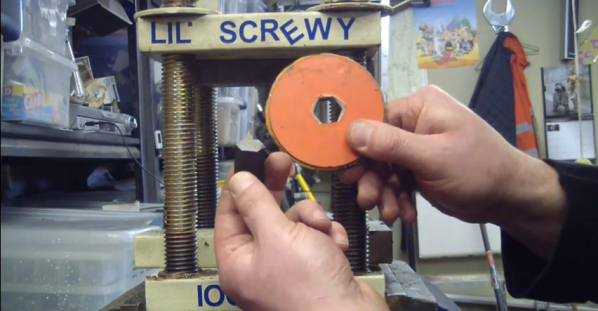
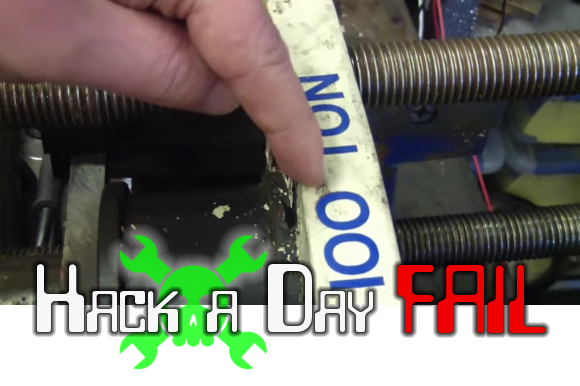
He probably should have known when he switched from a 4-foot ratchet to a crescent wrench with a 12-foot pipe for leverage that this was going to be more than the press could handle. The bottom plate seen in the image above is beginning to cup, which in turn jams up the screws in the off-kilter threads.

We fell a bit guilty in admitting we love to see equipment pushed to the point of failure like this. But perhaps that’s part of what this column is all about. Our favorite is still the PCB shear failure, but this comes in at a close second. Check out the video presentation after the break; just be warned that there’s a bit of rough language as part of the narrative.

Continue reading “Fail Of The Week: The Demise Of Lil’ Screwy”

Behold Lil’ Screwy, A Homebrew 100-Ton Press

Here we have a magnificent example of the power of the inclined plane. [Chris] has built Lil’ Screwy, a 100-ton home-built press for about $35 plus scrap on hand. He demonstrates its frightening power by punching a 17-mm hole through 8mm-thick steel using an Allen key.

As [Chris] explains in his hilarious video waiting for you after the jump, the force comes from using really big screws. Lil’ Screwy uses four 1-inch L7-rated ready rods with eight threads to the inch. The bolts run between two 1″ steel plates to form the press. In the top plate, he drilled 1″ holes. The bottom holes are drilled out 7/8″ and tapped so the two plates clamp together with awesome crushing power when you twist the giant coupling nuts.

[Chris] milled a pocket in the underside of the top plate for a big neodymium magnet that will keep, for instance, a 17-mm Allen key in place while you punch a piece of steel with it. He has a ring of smaller ones embedded into the bottom plate to hold supports in place for broaching.

As a special bonus, [Chris] shows you how to stick it to the man when it comes to using that last bit of Never-Seez in the can, and also how to make your decals temporarily repositionable.

Continue reading “Behold Lil’ Screwy, A Homebrew 100-Ton Press”

Briquette Press For Rocket Stove Fuel

briquette-press-for-rocket-stove

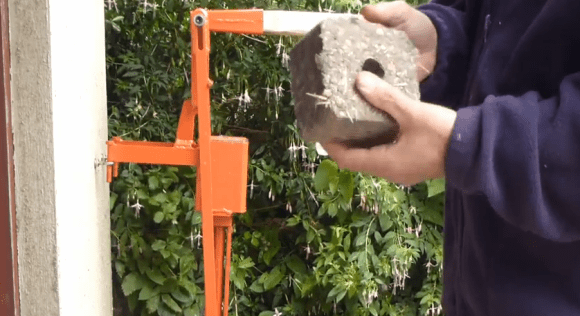
[Gregory] uses a rocket stove for heating when it’s cold outside. He’s been trying out all kinds of different materials as fuel when the idea of making his own briquettes from waste materials came to mind. Obviously the project works. As you can see in the image above, he has just formed a lump of fuel using a mixture of newspaper pulp and sawdust.

The orange device with the ax handle seen in the background is his own creation. You can see the device in action in the video after the break. In the video comments he also links to a CAD file if you’re interested in building your own.

If it’s a rocket stove you’re interested in there’s always the option of building your own.

Continue reading “Briquette Press For Rocket Stove Fuel”

Via Press Crushes Copper To Make A Mechanical Connection

via-press-in-action

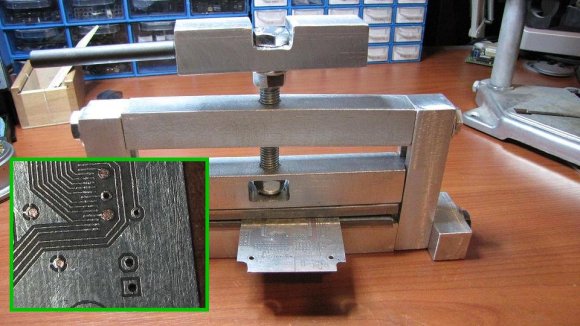
[Jay] was looking for a way to make his own vias on homemade double-sided PCBs when he stumbled across this post from about five years ago. The technique shown here makes mechanical vias and was developed by [Retromaster]. There’s no soldering involved, instead he uses some solid core copper wire and a press to crush it tightly against the board.

The press is made from aluminum stock, with a couple of plates of stainless steel which come in contact with the board. The aluminum stock is easy to work with, but it’s relatively soft which is the reason for the addition of steel. He uses copper wire which already fits tightly in the hole through the substrate. After clipping off the excess as near to the board as possible a trip through the press leaves each side flat as shown in the inset image.

We looked through some of the other projects we’ve seen from [Retromaster] like the Atari 2600 in an FPGA and this emulated Amiga floppy drive. But we didn’t see any diy boards where he used this crushing technique.

Olin College Penny Press

Olin Penny Press

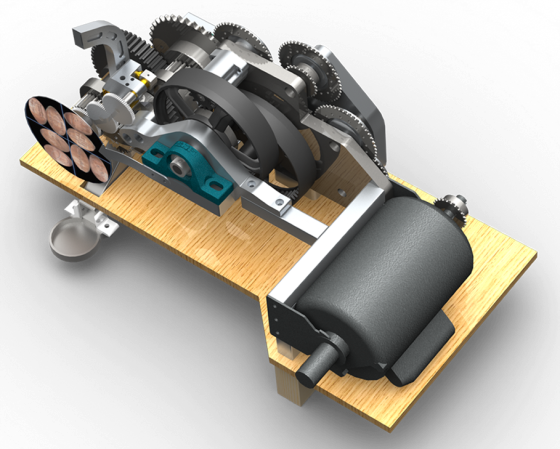
Inspired by souvenir penny presses, [Robert] built the Olin College penny press. This machine stamps out coins with the school’s name and a variety of other patterns. He built it as part of a mechanical structures course, with the goal of designing something that used large forces.

Crushing a penny takes about five tons of force. To deliver that force, [Robert] used a 1 horsepower motor coupled to a custom 1190:1 reduction drive train, which consisted of sprockets, gears, and chains. The aluminium frame supporting the drive train also had to be designed to withstand large forces.

This required of a lot of custom parts, which were made using a CNC mill, a water jet cutter and a mill. All of the CAD drawings are available for anyone who wants to replicate the design.

This beast of a machine weighs about 90 pounds and can squish 12 pennies every minute. Olin College installed the penny press on their campus for anyone to use for free.

PCB Drill Press On A Budget

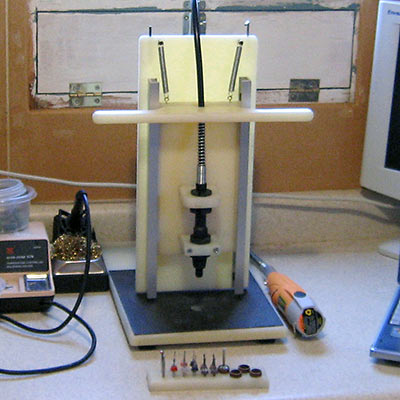
An accurate drill press is an essential tool for making your own through-hole printed circuit boards at home. Reader [Josh Ashby] offers up a solid design using scrap bin materials.

A major issue with PCB drilling is that even the slightest horizontal play will snap the delicate carbide drill bit. Hobbyist-grade tools such as Dremel’s drill press attachment are usually too sloppy for this task, while a more precise instrument might set you back a couple hundred bucks.

[Josh’s] design uses a nylon “sled” moving vertically in an aluminum u-channel track. Most of these materials were salvaged or were acquired inexpensively from a local hardware store, and assembled in less than a day. Surprisingly, this low-tech approach has proven sufficiently smooth that he’s yet to break a bit while drilling. And the entire setup, including the knockoff Harbor Freight rotary tool, cost less than the wobbly name-brand accessory alone.

Drilling Perfectly Centered Holes

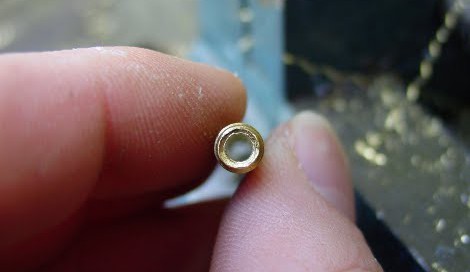
If you’ve ever been caught in the situation of needing to drill a clean straight hole down the center of a bolt or rod, you’ve probably tried and ended up with a broken bit or tilted hole, and a ton of cursing to boot.

[Vik] let us know about this nifty trick for drilling ‘down the middle’ using a simple hobby drill press and vice. He claims it’s ‘physics guiding the bit’ but in reality its just crafty use of a chuck. Either way the quick trick works, and will hopefully save a lot of hackers some headaches in the future.

Let us know in the comments if you have any simple quick tips that you use when you’re out in the shop.