Raspis With Double The RAM In The Wild

There is buzz all over the reddits and Element 14 discussion boards about an updated version of the Raspberry Pi that bumps the amount of RAM from 256 MB to 512 MB.

This new update comes after the announcement of an upgraded version of the yet-to-be-released Raspi Model A (from 128 MB of RAM to 256 MB), and a few slight modifications to the Model B that include fixing a few hardware bugs (nothing serious) and adding mounting holes.

After perusing the Element 14 and Raspberry Pi discussion boards, a few things become apparent. Firstly, it appears this new upgrade to double the amount of RAM was initiated by manufacturers. It seems 512 MB RAM chips are cheap enough now to include in the Raspi without impacting the cost of components. Secondly, 512 MB seems to be the upper limit for the Raspberry Pi, at least for this iteration of hardware. Not enough address lines, they say, but you’re welcome to try and hack your own RAM to a Raspi CPU.

So far, attentive Raspi enthusiasts have found Raspberry Pis with double the amount of RAM on the UK Farnell site and the Australian Element 14 site. Nothing so far on the US Element 14 site, although we’ll gladly update this post when a Hackaday reader finds the relevant link.

EDIT: Here’s the link for the US version of Newark. No, there aren’t any in stock. Also, Hackaday beat the official Farnell/Element 14/Newark press release and the Raspberry Pi blog to the punch. Woo, go us.

Playing Around With MRAM

For the longest time, hardware tinkerers have only been able to play around with two types of memory. RAM, including Static RAM and Dynamic RAM, can be exceedingly fast but is volatile and loses its data when power is removed. Non-volatile memory such as EPROMS, EEPROMS, and Flash memory retains its state after power is removed, but these formats are somewhat slower.

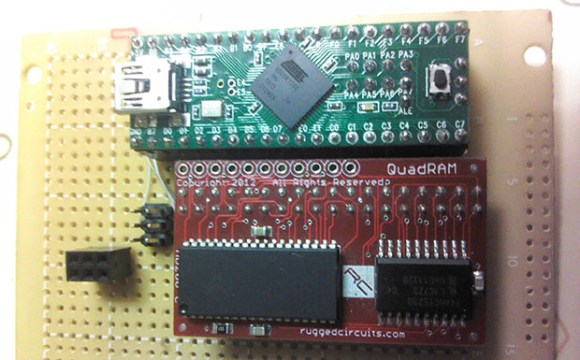
There have always been competing technologies that sought to combine the best traits of these types of memory, but not often have they been available to hobbyists. [Majenko] got his hands on a few MRAM chips – Magneto-Resistive RAM – and decided to see what they could do.

Magneto-Resistive RAM uses tiny pairs of magnetic plates to read and write 1s and 0s. [Majenko] received a sample of four MRAM chips with an SPI bus (it might be this chip, 4 Megabits for $20, although smaller capacity chips are available for about $6). After wiring these chips up on a home-made breakout board, [Majenko] had 16 Megabits of non-volatile memory that was able to run at 40 MHz.

The result was exactly what the datasheet said: very fast write and read times, with the ability to remove power. Unlike EEPROMS that can be destroyed by repeated reading and writing, MRAM has an unlimited number of write cycles.

While MRAM may be a very young technology right now, it’s a wonderful portent of things to come. In 20 (or 30, or 40) years, it’s doubtful any computer from the largest server to the smallest microcontroller will have the artificial separation between disk space and memory. The fact that any hardware hacker is able to play around with this technology today is somewhat amazing, and we look forward to more builds using MRAM in the future.

Programming The 6502 One Nibble At A Time

[Quinn Dunki] keeps rolling with her 6502 based computer build. This time around she’s added some memory to store the programs, but needed a way to get that code into the device. Above is her solution, a bank of hex switches used to program the 8-bit command and 16-bit address for each line of machine code.

This is a continuation of her Veronica project. The last time we saw it she had hardwired the logic levels for the data bus, but that’s no fun since nothing can actually be computed. [Quinn] picked up an SRAM chip which will store the program. It’s compatible with the 6502’s memory bus, but needs a bit of extra circuitry for her to be able to hand program it with this switch bank. She used some tri-state buffers to switch between connections to the processor, and to the hex switches. This way, she disconnects the RAM from the processor using the buffers, uses the switches and push button to clock in the program, then patches the RAM back into the computer.

Seeing this process in the video after the break certainly gives you an appreciation for what an improvement the punch-card system was over this technique. Still, seeing this is a delight that we’d like to try! Continue reading “Programming The 6502 One Nibble At A Time”

RAM Upgrade For WRT300N Router

[Heli] had a WRT300N wireless router sitting around collecting dust. He decided to squeeze at bit more entertainment value out of it by seeing if he could pull off a RAM upgrade. He managed to double the router’s RAM and posted a walk through (translated) to help you do the same.

Swapping out surface mount RAM chips isn’t the easiest thing in the world and you must wondering what prompted this. It seems he wanted to run the LuCI package on the router but it was slow (or even incapable) of booting with the stock hardware’s 16 Mb. He first sourced some pin-compatible replacement chips from an old Pentium III computer. While his soldering iron was hot, he also wired up a JTAG header, which connects via the red wires just visible to the left. When he first fired up the unit he was happy that it was able to boot, but it still only detected 16 Mb.

It turns out you’re going to need to roll your own kernel to get it to take advantage of the upgrade. Source code for OpenWRT is easy to find and there’s plenty of guides for compiling it. If you try this, make sure to read [Heli’s] post carefully as he’s got some important configuration information that will help you to avoid bricking your router.

Upgrading RAM In An Arduino Mega

[Andy] stuffed some more RAM onto an Arduino Mega and his three-part walk through on the design, construction, and software is a great read and one of the more ‘hard core’ Arduino builds we’ve seen.

The build is centered around a 512K × 8 SRAM module [PDF warning]. Because the RAM is divided up into about 512,000 chunks of 8 bits, the Arduino has to access the RAM through 16 ‘address lines’, then send the data through 8 ‘data lines’. [Andy] didn’t want to use up 24 pins on his Arduino, so he used a latch to multiplex the lowest 8 address lines and the data lines together. With the 512KB RAM expansion installed, the Mega is able to address a whopping 520 Kilobytes.

We’ve seen a few builds that have been limited by the amount of RAM available in the Arduino, like capturing video and some robot hacks, and adding some more RAM to those builds would be great. Multiplexing data and address lines using a latch can be expanded even further, but 520KB ought to be enough for anybody.

Speed Up Web Browsing In Linux

In modern computer systems, the biggest bottleneck of information tends to be in communicating with the hard disks. High seek times and relatively slow transmission rates when compared to RAM speeds can add up quickly. This was a necessary evil back when RAM space and costs were at a premium, but now it is not uncommon to see 4GB of RAM on laptops, and even 12GB on desktops. For  users whose primary computer use is browsing the internet (either for work, writing articles, or lolcats) and have some extra RAM, moving the browser cache to the RAM from the hard disk is a definite option for increasing speed.

In Linux systems (specifically Fedora and Ubuntu systems), this can be achieved for Chrome and Firefox by creating a larger ramdisk, mounting the ramdisk after boot, and then setting the browser of choice to use that ramdisk as a cache. The necessary commands to do this are readily available (internet archive) on the internet, which makes life easy. Using ramdisks for performance boosts are not exclusive to browsers, and can be used for other software such as Nagios for example.

We have previously covered a tool called Espérance DV for moving cache to RAM in Mac OSX, and for any Windows users feeling left out, there are ways of making Firefox bend to your will. Obviously you will see an increase in RAM use (duh), but this shouldn’t be a problem unless you are running out of free RAM on your system. Remember, free RAM is wasted RAM.

External RAM For An ATmega128

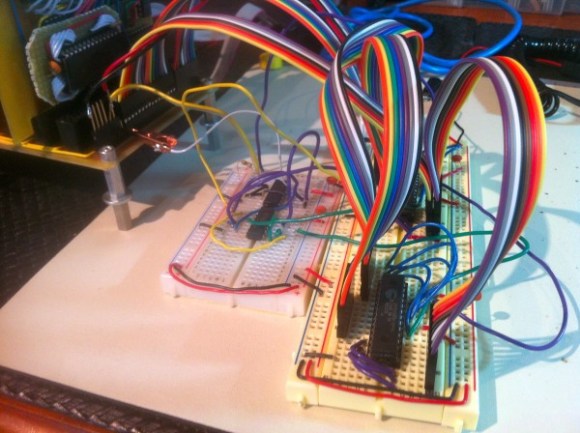
Those who are familiar with Atmel’s line of 8-bit AVR microcontrollers should already know that some of them have support for external RAM. But have you ever actually used this feature? We haven’t. Now you can learn how it’s done by reading through this guide. It touches on all of the hardware, but doesn’t dwell on it. Instead, you’ll get the background you need on how to write to, read from, and test an external module like the one sticking up in the image above. The test routine shows how to make sure everything’s working correctly with your memory mapping before you begin developing firmware around this increased capacity.

[Thanks Spman]