[Bjørn Karmann]’s Objectifier is a device that lets you control domestic objects by allowing them to respond to unique actions or behaviour, using machine learning and computer vision. The Objectifier can turn on a table lamp when you open a book, and turn it off when you close the book. Switch on the coffee maker when you place the mug next to the pot, and switch it off when the mug is removed. Turn on the belt sander when you put on the safety glasses, and stop it when you remove the glasses. Charge the phone when you put a banana in front of it, and stop charging it when you place an apple in front of it. You get the drift — the possibilities are endless. Hopefully, sometime in the (near) future, we will be able to interact with inanimate objects in this fashion. We can get them to learn from our actions rather than us learning how to program them.
The device uses computer vision and a neural network to learn complex behaviours associated with your trigger commands. A training mode, using a phone app, allows you to train it for the On and Off actions. Some actions require more human effort in training it — such as detecting an open and closed book — but eventually, the neural network does a fairly good job.
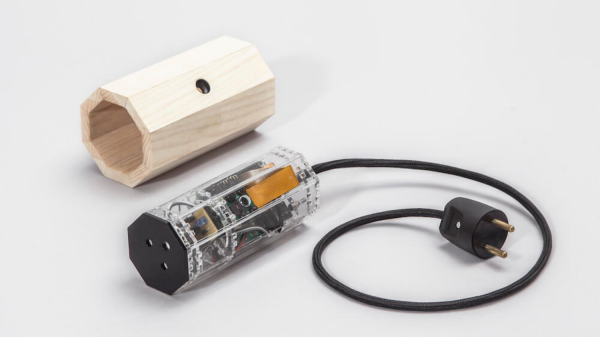
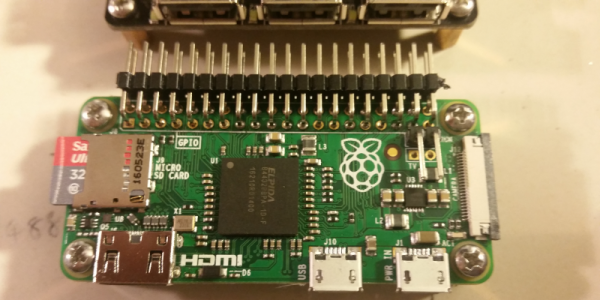
The current version is the sixth prototype in the series and [Bjørn] has put in quite a lot of work refining the project at each stage. In its latest avatar, the device hardware consists of a Pi Zero, a Raspberry-Pi camera module, an SMPS power brick, a relay block to switch the output, a 230 V plug for input power and a 230 V socket outlet for the final output. All the parts are put together rather neatly using acrylic laser cut support pieces, and then further enclosed in a nice wooden enclosure.
On the software side, all of the machine learning part is taken care of using “Wekinator” — a free, open source software that allows building musical instruments, gestural game controllers, computer vision or computer listening systems using machine learning. The computer vision is handled via Processing. All the code is wrapped using openframeworks, with ml4A providing apps for working with machine learning.
All of the above is what we could deduce looking at the pictures and information on his blog post. There isn’t much detail about the hardware, but the pictures are enough to tell us all. The software isn’t made available, but maybe this could spur some of you hackers into action to build another version of the Objectifier. Check out the video after the break, showing humans teaching the Objectifier its tricks.
Continue reading “Objectifier: Director Of Domestic Technology” →