Should You Run Servo Horns Or Direct Couplings In Your RC Planes?

Whenever you buy a servo, it usually comes with a little baggie full of various plastic horns. Most of us pick our favorite and use it in our projects. Some of us hack them up, glue them back together, and do all kinds of weird things with them. And others skip them entirely, going for direct drive instead. In a new video, [Dynamix Systems] explores when going direct drive is the right solution.

The video primarily concerns servos as they’re used in the context of aero modeling. In this regard, the video points out that while stock servo horns are easy to use, they can be cumbersome and clumsy. For example, you often end up with horns and control linkages protruding out into the airstream, adding drag and generally making things a bit inelegant. They can also snag on things and easily damage your servos or controls.

Using direct shaft couplers can be a much tidier solution in some respects. The servo can be coupled directly to the axis of motion, allowing it to be hidden inside a wing or tail surface. It can require a little more finesse in installation and design, but they’re much less likely to snag on things or be damaged. There’s also a drag benefit if you do it right. [Dynamix Systems] notes that you’ll want to source some shaft couplers to do this properly, which you can make yourself or buy online fairly easily.

It’s great to see how tidy direct drive really is. We’ve seen some other nifty servo tricks of late, too. Video after the break.

Continue reading “Should You Run Servo Horns Or Direct Couplings In Your RC Planes?”

Build A Super Cheap RC Trainer Plane With Foam

Once upon a time, RC planes were expensive models that took months to build and big money to equip with electronics. Since the 20th century though, powerful batteries have become cheap, as have servos and radio controllers. Combine them with a bit of old packing material and you can get a little RC trainer up and running for peanuts, as [Samm Sheperd] demonstrates.

[Samm] started referring to this as the “$5 trainer,” though he admits that it will cost more than that if you don’t have some bits and pieces laying around. He demonstrates how to cut cheap foamboard with a hot guitar string, and how to form it into a viable wing. That’s the most crucial part, with the fuselage and tail surfaces relatively simple by comparison. With that complete, it’s as simple as bolting on a motor, some servos, and control horns, and you’re up and running. You can even whip up a landing gear if you’re so inclined! Then, figure out your center of gravity, get it right, and then you’re pretty much ready to fly.

It’s a great primer on how to build a basic RC model, and if you do it right, it should have pretty forgiving handling, too. Plus, it’s so cheap that it should be easy to repair if you crash. Happy modelling! Video after the break.

Continue reading “Build A Super Cheap RC Trainer Plane With Foam”

A painted RC plane made of cardboard. It has an orange propeller and camo-esque markings along with concentric blue, white, and red circles near the wingtips.

Cardboard R/C Plane Actually Flies

Many makers start by building mock-ups from cardboard, but [Alex-08] has managed to build an R/C plane that actually flies, out of cardboard.

If you’ve been thinking of building an R/C plane from scratch yourself, this guide is an excellent place to start. [Alex-08] goes through excruciating detail on how he designed and constructed this marvel. The section on building the wings is particularly detailed since that’s the most crucial element in making sure this plane can get airborne.

Some off-the-shelf R/C parts and 3D printed components round out the parts list to complement the large cardboard box used for most of the structural components. The build instructions even go through some tips on getting that vintage aircraft feel and how to adjust everything for a smooth flight.

Need a wind tunnel instead? You can build that out of cardboard too. If paper airplanes are more your thing, how about launching them from space? And if you’re just trying to get a head start on Halloween, why not laser cut an airplane costume from cardboard?

Building A Rad Super Capacitor RC Plane

[Tom Stanton] is a fan of things like rubber band planes, and has built many of his own air-powered models over the years. Now, he’s built a model powered by a supercapacitor for a thoroughly modern twist on stored-energy flying toys.

It’s not a wholly original idea; [Tom] was inspired by a toy he bought off-the-shelf. His idea, though, was to make one that could be hand-cranked to charge it to make it more like the rubber-band planes of old. He thus built his own geared generator for the job using a big pile of magnets and 3D printed components. It’s capable of putting out around 17 volts when cranked at a reasonable speed. Hooked up to the toy plane, his hand-crank generator was able to fully charge the plane in just a few turns.

His generator was really overkill for the small toy, though. Thus, he elected to build himself a much larger supercapacitor-powered model. He wired up a pack of six supercapacitors in series, designed for roughly 18 volts. The pack was given balance leads to ensure that no individual capacitor was charged beyond its 3.0 V rating. The pack was placed inside a nice aerodynamic printed fuselage. The plane was then given a brushless motor and prop, speed controller, servos, and an RC receiver. Indeed, far from a simple throwable model, it’s a fully flyable RC plane.

The plane is quite a capable flyer with plenty of power, but a fairly short run time of just under two minutes. Though, with that said, it can be recharged in just about that same amount of time thanks to its supercapacitor power supply. [Tom] reckons it should be capable of a 1:1 crank time to flight time ratio in ideal conditions.

Supercapacitors are super cool, but we don’t see enough of them. They’ve popped up here and there, and obviously have many important applications, but we’re not sure they’ve had a real killer app in the consumer space. XV Racers were killer fun, though. Continue reading “Building A Rad Super Capacitor RC Plane”

Hackaday Prize 2023: Tiny RC Aircraft Built Using Foam And ESP12

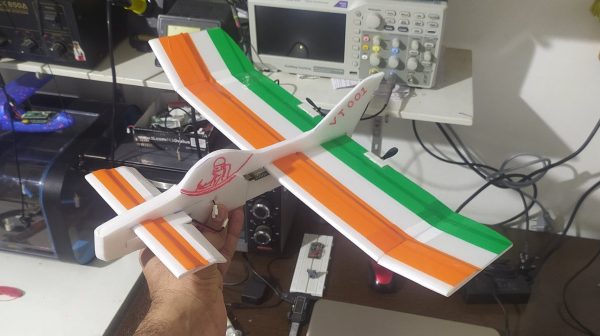
Once upon a time, a radio controlled plane was a hefty and complex thing. They required small nitro engines, support equipment, and relatively heavy RC electronics. Times have changed since then, as this lightweight RC build from [Ravi Butani] demonstrates.

The body of the plane is lightweight foam, and can be assembled in two ways. There’s a relatively conventional layout, using a main wing, tailplane, and rudder, or a pusher model with the main wing at the rear and a canard up front. The open hardware electronics package, which [Ravi] calls VIMANA, consists of an ESP12 module with a pair of MOSFETs to act as two independent motor drivers — allowing the plane to be flown and steered with differential thrust.

For more advanced flight control, it can also command a pair of servos to control ailerons, a rudder, canards, or elevons, depending on configuration. There’s also potential to install an IMU to set the plane up with flight stabilization routines.

Thanks to the low-cost of the VIMANA board, [Ravi] hopes it can be used in STEM education programs. He notes that it’s not limited just to aircraft, and could be used for other motorized projects such as boats and cars. We’ve featured an early version of his work before, but the project has come a long way since then.

Continue reading “Hackaday Prize 2023: Tiny RC Aircraft Built Using Foam And ESP12”

VTOL Tailsitter Flies With Quadcopter Control Software

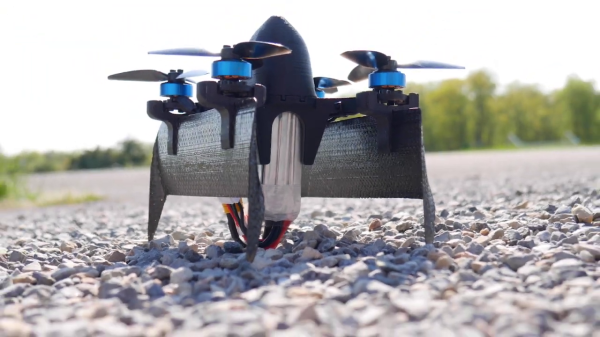
Quadcopters are great for maneuverability and slow, stable flight, but it comes at the cost of efficiency. [Peter Ryseck]’s Mini QBIT quadrotor biplane brings in some of the efficiency of fixed-wing flight, without all the complexity usually associated with VTOL aircraft.

The Mini QBIT is just a 3″ mini quadcopter with a pair of wings mounted below the motors, turning it into a “tailsitter” VTOL aircraft. The wings and nosecone attach to the 3D printed frame using magnets, which allows them to pop off in a crash. There is no need for control surfaces on the wings since all the required control is done by the motors. The QBIT is based on a research project [Peter] was involved in at the University of Maryland. The 2017 paper states that the test aircraft used 68% less power in forward flight than hovering.

(Editor’s Note: [Peter] contacted us directly, and he’s got a newer paper about the aircraft.)

Getting the flight controller to do smooth transitions from hover to forward flight can be quite tricky, but the QBIT does this using a normal quadcopter flight controller running Betaflight. The quadcopter hovers in self-leveling mode (angle mode) and switches to acro mode for forward flight. However, as the drone pitches over for forward flight, the roll axis becomes the yaw axis and the yaw axis becomes the reversed roll axis. To compensate for this, the controller set up to swap these two channels at the flip of a switch. For FPV flying, the QBIT uses two cameras for the two different modes, each with its own on-screen display (OSD). The flight controller is configured to use the same mode switch to change the camera feed and OSD.

[Peter] is selling the parts and STL files for V2 on his website, but you can download the V1 files for free. However, the control setup is really the defining feature of this project, and can be implemented by anyone on their own builds.

For another simple VTOL project, check out [Nicholas Rehm]’s F-35 which runs on his dRehmFlight flight control software. Continue reading “VTOL Tailsitter Flies With Quadcopter Control Software”

How To Slice Lightweight Aircraft Parts For 3D Printing

Historically, remote control aircraft were produced much like their early full-sized counterparts. Wooden structures were covered with adhesives and taut fabric membranes. Other techniques later came to the fore, with builders looking to foam and other materials. Of course, these days 3D printers are all the rage, so perhaps one can simply print out a whole plane? As [sahevaantaneja] discovered, it’s not that easy!

One of the foremost problems is the process of slicing. This is where 3D geometry is transformed into the G-code which defines the path taken by the 3D printer during production of a component. Slicer software is generally optimised for working with mostly-solid objects, and some tweaks can be required when working with thin-walled designs.

These challenges come to bear with an aircraft design, which, by necessity must be lightweight. [sahevaantaneja] does a great job of explaining the journey of discovery in which their design was optimised to work with conventional slicers. This allowed the various components to be printed without errors, while retaining their strength to survive in flight.

The design was successful in test flights –  a great reward after much experimentation. We’ve seen other 3D printed designs take flight, too. Video after the break.

Continue reading “How To Slice Lightweight Aircraft Parts For 3D Printing”