Reflow Solder Your Micro SD To Ensure It Doesnt Go Anywhere

SD cards are great inexpensive storage for your embedded project. Using SPI,  they only take a few wires to hook up, and every micro-controller has a FAT file system interface to drop in your project. Problem with SD cards are the connectors.

Usually connectors cost more than the brains of your project,  and the friction fit, spring loaded contacts are not ideal for temperature swings, humidity and high vibration applications. Wouldn’t it be nice if you could just solder the thing down, especially if you know you are never going to remove it?

[Timothée] decided to try and succeeded in reflow soldering a Micro SD card direct to a breakout board. While starting as a what if experiment, the PCB was laid out in Ki-Cad and sent off to a fab. Once returned the Micro SD was fluxed, tinned and fluxed again, then reflowed using an IR setup.

The end result is a handy breakout board where you never have to worry about someone swiping the card to jam in their camera, and is ready for any breadboard project.

Toner Transfer And Packing Tape

The toner transfer process of producing PCBs has evolved tremendously over the last few years. It started out by printing PCB layouts onto magazines with a laser printer, then some clever people figured out that glossy inkjet photo paper would work just as well. Now there’s a new substrate for you – packing tape – and it seems to work pretty well.

[David] was designing a cheap board for a robot kit for a workshop and needed 100 tiny PCBs. They were simple boards, and perfectly suited for home PCB manufacturing. He started off by printing directly onto glossy magazine paper, but this wasn’t an ideal solution. During one run, some of the toner landed on the packaging tape he was using to secure the boards. A bit of serendipity came into play and [David] discovered packaging tape is usable in the toner transfer process.

The technique is simple enough: put some packaging tape on a piece of paper, print a board layout (reversed!) on a laser printer, and go through the usual clothes iron/laminator/etching process. [David] is actually using a hair straightener for transferring the toner over to the copper clad board – interesting, and in a pinch you can use the same tool for reflowing SMD components.

REFLOW CHÂTEAU

[Will] had a few reasons for turning a toaster oven into a reflow oven – he needed a project for an ECE lab, the lab’s current reflow oven was terrible, and the man is trying to keep [Will] down by not allowing toaster ovens in dorm rooms. What was born out of necessity actually turned into a great project – a reflow oven with touchscreen controls.

The toaster oven used for this build is a model [Will] picked up at Sears. It’s actually pretty unique, advertised as a ‘digital toaster’. This isn’t marketing speak – there’s actually a thermistor in there, and the stock toaster is closed loop. After disassembling the toaster and getting rid of the guts, [Will] whipped up a PCB for a Teensy 3.1 and the Adafruit capacative touch shield.

With the Teensy and touch screen, [Will] came up with an interface that looks ten times better than anything you would find on a Chinese auction site. It’s a great build, and since it’s kept in the electronics lab, will certainly see a lot of use.

Improving The T-962 Reflow Oven

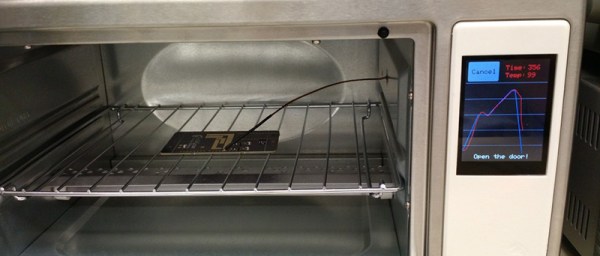
The T-962A is a very popular reflow oven available through the usual kinda-shady retail channels. It’s pretty cheap, and therefore popular, and the construction actually isn’t abysmal. The controller for this oven is downright terrible, and [wj] has been working on a replacement firmware for the horribly broken one provided with this oven. It’s open source, and the only thing you need to update your oven is a TTL/UART interface.

[WJ] bought his T-962A even after seeing some of the negative reviews that suggested replacing the existing controller and display. This is not in true hacker fashion – there’s already a microcontroller and display on the board.

The new firmware uses the existing hardware and adds a very necessary modification: stock, the oven makes the assumption that the cold-junction of the thermocouples is at 20°C. The controller sits on top of an oven with two TRIACs nearby, so this isn’t the case, making the temperature calibration of the oven slightly terrible.

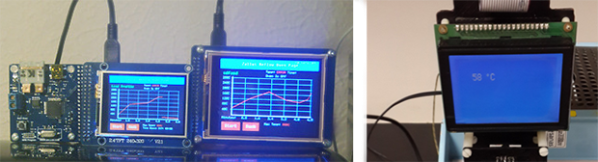
After poking around the board, [WJ] found an LPC2000-series microcontroller and a spare GPIO pin for a 1-wire temperature sensor. The temperature sensor is placed right next to the terminal block for the thermocouples for proper temperature sensing.

All the details of updating the firmware appear on a wiki, and the only thing required to update the firmware is a serial/USB/UART converter. A much better solution than ripping out the controller and replacing it with a custom one.

Toaster Oven Reflow Controllers

With a lot of people who are suddenly too cool for through hole and of course the a few generations of components that are only available in SMD packages, it’s no surprise the humble toaster oven has become one of the mainstays of electronic prototyping. You’re gonna need a controller to ramp up those temperatures, so here are two that do the job quite nicely.

[Nathan]’s Zallus Oven Controller is a bit different than other reflow controllers we’ve seen on Kickstarter. He’s offering three versions, two with different sized touch screen displays, and one that is controlled with a PC and push buttons. The display for these is beautiful, and of course you can program your own temperature profiles.

If Kickstarter isn’t your thing, [Dirk] created his own reflow controller. Like the Zallus, this has a graphical display, but its homebrew lineage means it should be simpler to maintain. It uses a K-type thermocouple, and unlike every other reflow controller we’ve ever seen, [Dirk] is actually checking the accuracy of his temperature probe.

No, reflow oven controllers aren’t new, and they aren’t very exciting. They are, however, tools to build much cooler stuff, and a great addition to any lab.

Reflowing With A Hair Straightener

final

Around here, reflow ovens usually mean a toaster oven, and if you’re exceptionally cool, a thermistor and PID controller. There are, of course, a thousand ways to turn solder paste into a solid connection and [Saar] might have found the cheapest way yet: a hair straightener with a street value of just £15.

We don’t expect the majority of the Hackaday demographic to know much about hair straighteners, but [Saar] has done all the work and came up with a list of what makes a good one. Floating plates are a must to keep the PCB in contact with the heating element at all times, and temperature control is essential. [Saar] ended up with a Remington S3500 Ceramic Straight 230 Hair Straightener, although a trip to any big box store should yield a straightener that would work just as well.

One modification [Saar] added was a strip of Kapton tape to one of the ceramic heating elements. It’s not a replacement for a toaster oven or real reflow oven, but for small boards it works just as well.

Video below.

Continue reading “Reflowing With A Hair Straightener”

Smart Reflow Oven Is Over-Engineered

reflow

[Linas] reverse engineered an AMOLED HTC 800×480 screen and interfaced it with an STM32 micro-controller, along with some other components, to make a gorgeously over engineered reflow oven.

Under the hood there is a PSoC5LP PID controller to control the 800W IR heating coil and two K-type thermocouples for sensing.

The real beauty is in the relatively small STM32 chip powering the HTC AMOLED screen. The AMOLED screen is high contrast and has a wide viewing angle, giving it a clear crisp view from all front facing viewpoints. Though pushing the limits of what the STM32F429i can do, [Linas] managed to make a very nice “home-grown” user interface, complete with user configurable settings and current temperature graphs.

The user interface looks very responsive and using some clever programming, [Linas] was able to make use of the potential of the screen to provide beautiful plots and interface widgets.

[Linas] goes into quite a bit of detail about the programming involved with rendering to the screen, so be sure to check out the video after the jump.

Continue reading “Smart Reflow Oven Is Over-Engineered”