The Cheapest And Easiest 3D Printer We’ve Seen So Far

3D printers are awesome, but boy are they frustrating. If you’ve built a RepRap Mendel, Prusa or Huxely, you know there’s nothing quite like trying to get a washer off of a threaded rod without disassembling the entire machine. This frustration in part sourcing, assembling and correctly aligning a printer is where printers like the Makerbot find their niche. There’s a new printer on the block that promises a 45 minute assembly time and less than 2 hours from starting the build to first print. It will do all this for under $500, electronics and motors included.

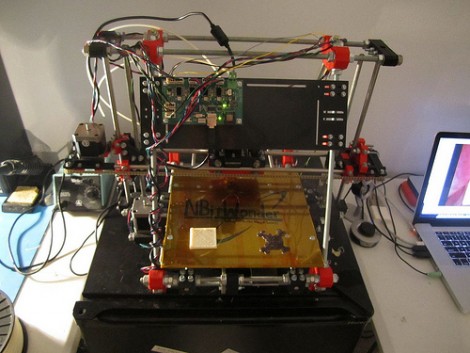
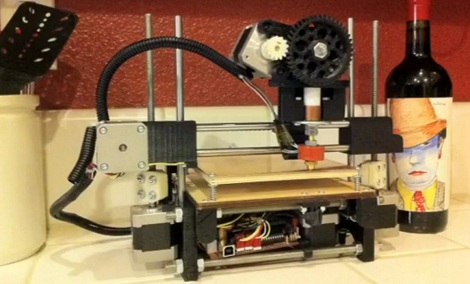
From the Flickr photoset, we can see that the Printrbot has 2 motors for the z-axis, uses sanguinololu electronics, and uses a derivative of Wade’s extruder – all proven design choices. Unlike the RepRaps, most of the frame is actually printed, and not built out of threaded rods. This drastically reduces the assembly and calibration time.

The inventor of the Printrbot, [Brook Drumm], has a Kickstarter up where he’s selling complete kits (electronics, motors and vitamins) for $499. This beats the very inexpensive SUMPOD in affordability. We haven’t been able to find the 3D design files for the Printrbot (although you can buy these printed parts for $75), and there’s no word on the build volume of the stock printer. That being said, the printrbot does have pretty good resolution. Check out the video of a Printrbot in action after the break.

Continue reading “The Cheapest And Easiest 3D Printer We’ve Seen So Far”

Pololu Compatible Relay Driver

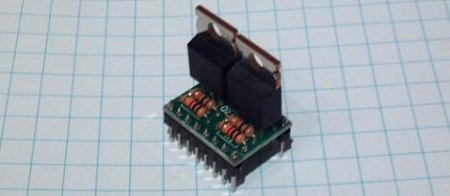
[Bart] built a couple dozen Pololu compatible relay drivers.

If you have a Reprap, you’re probably familiar with the Pololu stepper motor driver. These tiny pieces of kit provide stepper motor control for Gen 6, RAMPS, or Sanguinololu Reprap electronics. There’s a small problem with all these boards, though; there’s no way to control any high-power devices from these boards except for stepper motors. Controlling a spindle for a home-built CNC router would be great, but apart from attaching a Dremel to your x-axis, you’re just about out of luck.

[Bart]’s relay driver takes the step and direction inputs from the stock Pololu stepper driver and connects each of those to a MOSFET. From there, a relay can be hooked up to the driver to control the spindle for a router, or a whole bunch of fans for a homebrew laser cutter.

The schematic and Gerber files are up on [Bart]’s webzone. The part count is very low, and the entire board could easily be built on a piece of perfboard. Check out the demo on the other side of the jump.

Continue reading “Pololu Compatible Relay Driver”

3D Printed Electromechanical Computer

A few nights ago, [Chris Fenton] was hanging out at NYC Resistor putting in some time on his electromechanical computer project. You might remember [Chris] from his tiny Cray that he’s putting an OS on. It seems [Chris] is going back in time about 150 years and has set his sights on a 3D printed version of [Babbage]’s Analytical Engine.

The Analytical Engine was is a remarkable feat of engineering and machining. It was the first programmable computer. Shame, then, that it was never built in the 1800s. [Chris] isn’t building a glorified calculator like [Babbage]’s polynomial-computing Difference Engine – he’s going all out and building something with conditional looping.

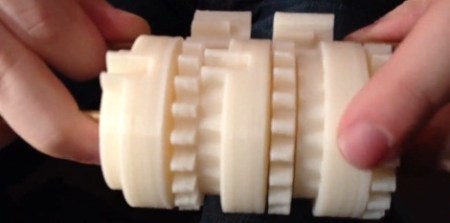
[Chris] calls his device an electromechanical computer, so we’re assuming it won’t be crank driven like the version in the British Science Museum. Right now, he’s constructed the decade-counting gears that are vitally important for the ALU of his design. All the parts were printed on a Thingomatic, so we’re betting [Chris] is going to be relying heavily on the MakerBot automated build platform for the thousands of parts he’ll have to fabricate.

Check out the video from NYC Resistor after the break.
Continue reading “3D Printed Electromechanical Computer”

14-part RepRap Saga Draws To A Close

Behold, another RepRap springs into existence! Well, springs might not be the best choice of words, it took a while and there were many bumps in the road. But [NBitWonder’s] self-built RepRap is now finished and you can read his 14-part build log to see all that went into the process.

We checked in on the project at one of the early stages. At that point he was just beginning to assemble the hardware and we mused that the calibration stage is where we thought things would get exciting. The project didn’t disappoint, as he had many follies getting the extruder heads to work. At first some issues popped up when figuring out what diameter filament would work for the print head he was using. Once that was worked out, a less-than-precise PID controller led to the clogging and eventual destruction of the extruder tip. He goes on to assemble and test a heated build platform only to discover that the resistors shipped with the hardware are shockingly underrated for the task. We could go on and on, but that would ruin the fun for you. Bookmark this one for the weekend and enjoy!

Using Polycarbonate Filament With A RepRap

[Rich] couldn’t find any instances where RepRap owners had used polycarbonate as a 3D printing source material. He’s filled that knowledge gap by running multiple polycarbonate printing tests. Polycarbonate is a plastic that is highly resistant to shattering yet it’s still rather soft. With enough effort it can be bent and stretched, but it’s fairly difficult to break the material.

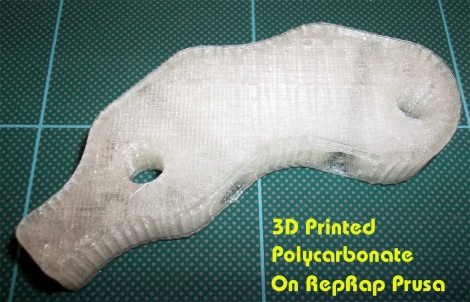
The test spool of polycarbonate was special ordered for this project. [Rich] sourced 1.6mm filament since 3mm material would have been difficult to spool. It melts at a temperature range of 280-300 degrees Celsius, which he reaches with a hot-end extruder design. The printed material comes out a bit cloudy, which may be due to the heating process itself, or due to extruder reversals (he’s not quite sure what’s causing it). But as you can see above and in the video after the break, it’s certainly a viable printing medium.

Continue reading “Using Polycarbonate Filament With A RepRap”

Solar-powered RepRap Prints Even When The Power Is Out

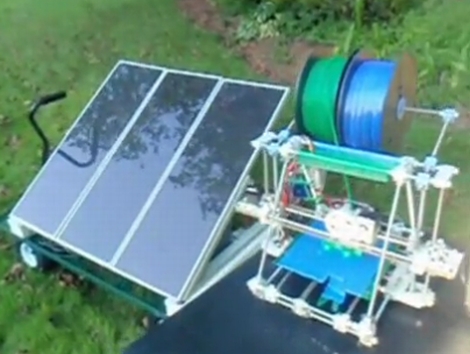
solar_powered_3d_printer_reprap

[Mark] wrote in to share a little creation that he is calling the first solar-powered 3D printer in existence. While we can’t say that we totally agree with him on that title, we will give him the benefit of the doubt that this is the first solar-powered RepRap we have seen thus far.

You might remember [Mark] from his previous exploits, but rest assured that there’s little possibility of anyone losing an eye with this one. He has taken his RepRap outdoors, and with the help of a solar panel plus a few batteries from Harbor Freight, he has the world’s first solar-powered RepRap*.

The trick behind keeping the RepRap running for such a long time with the sun as its only power source lies in the RAMPS board [Mark] uses. He has the 1.3 revision of the shield, which enables him to print objects loaded from an SD card rather than requiring a computer to be connected at all times.

So, if you happen to need the ability to print 3D objects where an extension cord cannot possibly reach, check out [Mark’s] setup and get to building!

* Maybe. Perhaps.

Continue reading “Solar-powered RepRap Prints Even When The Power Is Out”

Laser Etched PCB Production

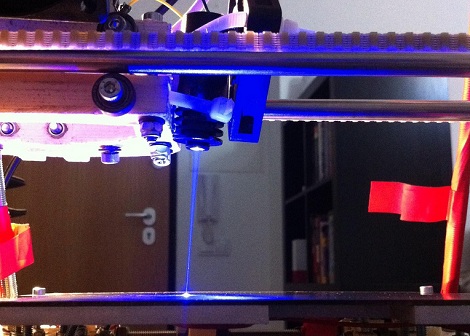
Like most of us, [reonarudo] isn’t satisfied with the current methods of homebrew PCBs, so he put a laser on a reprap and started burning some boards.

The basic procedure is to cover a copper clad board with matte black spray paint. A laser was installed on the X carriage of the reprap. [reonarudo] used cad.py to convert the board files into g-code and fired up his laser. The quality of the boards is highly dependent on the accuracy of the laser so after working through some mechanical problems [reonarudo] managed to make some passable boards.

We’ve seen just about every manufacturing method imaginable applied to PCB production. Etch resist and toner transfer do the job and a reprap milling machine is pretty neat, but lasers are so much cooler. While it may not be perfect (yet), printing PCBs with a laser shows a lot of potential. Check out a video of [reonarudo]’s bot burning some copper after the break.

Continue reading “Laser Etched PCB Production”