LED Retrofit For Vintage Edge-lit Numeric Display Modules

edge-lit-led-retrofit

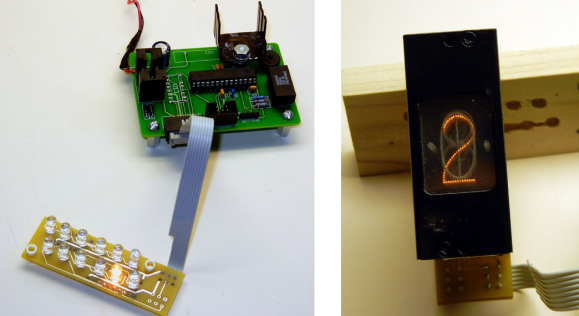
This single digit display is an old edge-lit module that [Ty_Eeberfest] has been working with. The modules were built for General Radio Company and have a really huge PCB to control just one digit. [Ty’s] modules didn’t come with that driver board, so he was left with the task of controlling an incandescent bulb for each digit. After a bit of thought he figured it would be much easier to just replace the edge-light bulbs with a set of LEDs.

We’ve seen these exact modules before, referenced in a project that created an edge-lit Nixie tube from scratch. Each digit in the display is made from a piece of acrylic with tiny drill holes which trace out the numerals. The acrylic is bent so that the edge exits out the back of the module where it picks up light from the bulb. [Ty] laid out his circuit board so that each LED was in the same position as the bulb it was replacing. As you can see, his retrofit works like a charm.

Continue reading “LED Retrofit For Vintage Edge-lit Numeric Display Modules”

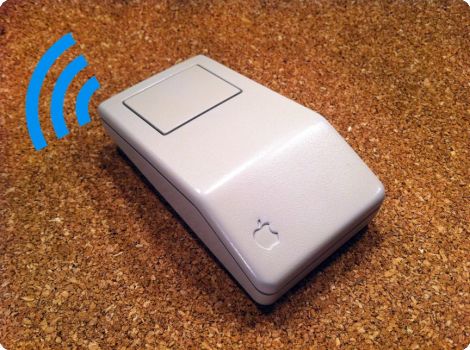
Making A Nostalgic Apple Mouse Wireless

If you’ve got an old mouse sitting around that has that perfect retro look why not start using it again? We’d bet there’s just enough room in there to turn the input device wireless.

The hack does away with everything but the case. The guts from a brand new wireless laser mouse are used as replacements. For the most part this is a simple process of making room for the new board and laying it in place. It involves cutting off a few plastic case nubs, enlarging the hole on the bottom so that the laser has a clear line of sight to the desktop, and hot gluing the thing in place. The button cover had a bit of plastic glued in place so that it lines up correctly with the replacement mouse’s switch.

The only thing that didn’t work out well is the battery situation. The AA cell that the mouse needs was too big for the retrofit so it was swapped with an AAA. These have a lower capacity which means more frequent replacement.

[via Make]

Vintage Camera Retrofit Perfect For Trolling Strangers

vintage_camera_retrofit

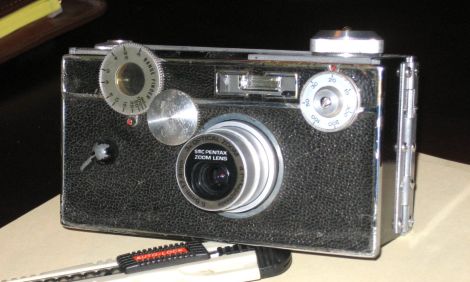
[John] likes making things out of unusual junk, and decided to build something for the sole purpose of trolling others. He thought it would be funny to stuff a new digital camera into the body of an old, obsolete camera, just to see how people would react to it.

He considered several different cameras, including a bulky old Polaroid, eventually settling on a far more manageable Argus C3. The camera wasn’t quite big enough to fit his new digicam inside, so he built a mock body using black micarta. He attached the Argus’ front and back to his plastic box, then spent some time fitting his digital camera inside. He transferred knobs from the original camera to his new false body, adding to the authenticity, before taking it out for some test shots.

You can see the final result above, and we think you would be hard pressed to notice that there’s something amiss with his camera unless you spent some time taking a closer look at it. He says that it works well for the most part, and it’s definitely a conversation starter. People are always puzzled by the fact that he is using such and old camera, and doubly so when he tells them it can take about 4,000 shots before he has to “develop” his pictures.

Retrofitting A 60-year Old Electric Heater

electric_heater_retrofit

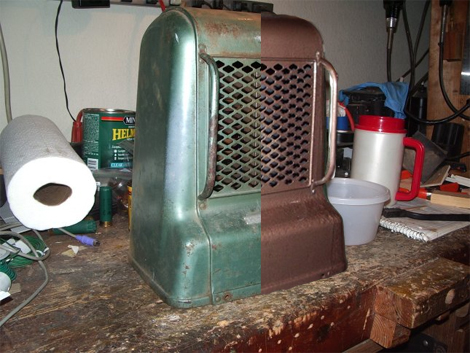
[John] found an old Kenmore electric heater at a junk store one day, and thought it would look great in his bathroom. The only problem with the unit is that it was built back in the 1940s/1950s, so it lacked any sort of modern safeguards that you would expect from an indoor heater. There was no on/off switch, no fuse, no thermostat, and no tip switch – though it did have a nice, flammable cloth-covered power cord.

Since [John] wasn’t too keen on burning his house down in the name of staying warm, he decided to retrofit the old unit’s shell with a new ceramic heater. He found a $20 unit that looked like it would fit, so he disassembled both heaters and got to work. The Kenmore’s innards were scrapped, then he gave the unit a nice fresh coat of high-temp paint. The new heater was cut to fit inside the old unit’s shell, controls and safety features intact.

He says that it works very well, and that it looks great in his bathroom. If you’re considering doing something similar, be sure to check out his writeup – it is very thorough and has plenty of details that will help you along the way.

Turning Spotlights Into Soft LED Nightlights

led_spotlight_retrofit

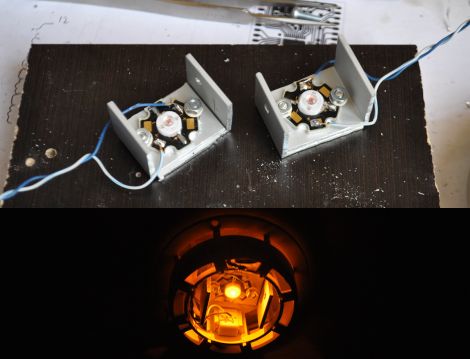
[Bob] had a couple of bright, 12V halogen spotlights in his hallway that didn’t get much use. Rather than toss them out or leave them sitting idle, he decided to replace the bright bulbs with dimmer LEDs that he could keep lit through the night.

He opened up the spotlights, removing the bulbs and the built in mirrors before fitting them with 350mA LED pucks. The pucks were mounted to a pair of L-shaped aluminum scraps, which serve as both a mounting plate and heatsink. When running, the underdriven LEDs barely heat the aluminum plates, so he is pretty confident that the lights are adequately cooled.

The orange LEDs provide a nice warm glow in his hallway, and he says they are perfect for late night trips to the fridge. They currently stay lit all the time, but [Bob] is considering adding a light sensor to turn them on them automatically, as well as a PIR sensor to increase the brightness as someone passes by.

Retrofitting LCD Projectors With High-powered LEDs

highpower_led

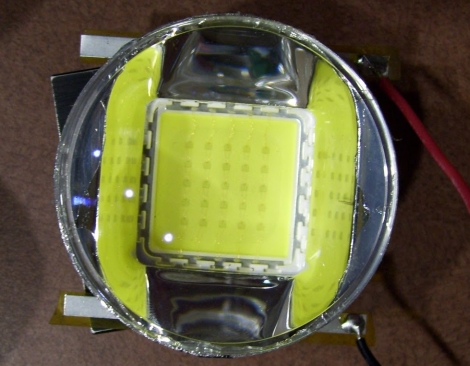
[Devon] recently repaired a handful of Phillips LCD projectors which he was quite excited to use. The only problem is that he didn’t want to mess with replacing the bulbs after every 2000 hours of use at $100 apiece. He was pretty confident that he could find a better way to drive the projectors, so he disassembled them once more and started looking around for bulb replacements.

He figured that a high-powered LED would do the trick, so he ordered a handful of parts and went about his first retrofit. Using his oscilloscope, he found that the control board pulses the high voltage board when the projector is powered on, and continues to pulse a signal until the machine is turned off. At this point, the HV board powers down the bulb.

He created a small circuit using a PIC that is used to interpret the initial pulse from the control board as well as watch for the steady “heartbeat” pulses that occur while the projector is powered on. This board is used to control the driver board for the high-powered LED he purchased.

His bulb replacement works well as far as color fidelity is concerned, but is not nearly as bright as he hoped for. He has plans to source some far brighter LEDs or automobile HID lighting in the very near future, and we look forward to seeing if he can match the brightness of the original bulbs.

Aftermarket Visor-mounted GPS Better Than OEM

mini_gps

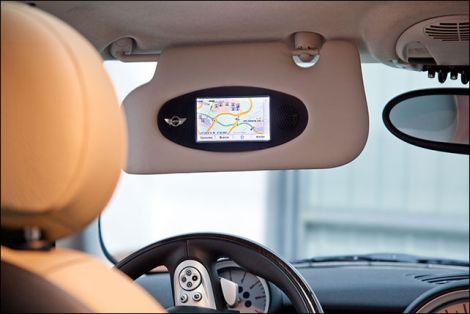
When [Roberto] bought his Mini Cooper, he opted to forgo the factory GPS system as it was over priced and didn’t have the best of reputations. He decided that he still needed GPS in his car, so he committed himself to install a TomTom unit in a way that would not detract from the car’s interior.

He dismantled the driver’s side sun visor, taking measurements of the original plastic housing that contained the mirror and lighting. He then drew up a 3D model of a replacement housing that would allow him to fit both the GPS unit and the speaker in the same amount of space formerly occupied by the mirror.

He gutted his TomTom unit, removing any extraneous parts he could find. A smaller speaker was sourced due to size constraints, then everything was mounted in his new housing once it arrived.

The end result is amazing. The GPS unit looks like it was installed at the factory – there is no sign that this was any sort of aftermarket modification. We are sure people will be quick to say that would be difficult to keep your eyes on the road while looking at the navigation screen, but as [Roberto] points out, you should be following the spoken directions once the car is in motion anyhow.