Taking A Moon Light From Grayscale To Full Color

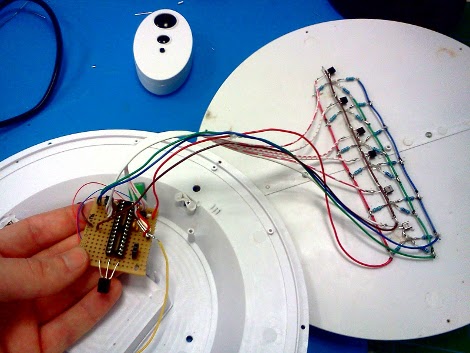
[Terry Miller] picked up a moon light on the cheap. All it does is light up some white LEDs to simulate moon phases after sensing nightfall via an LDR. He figured he could do better and set out to replace the electronics with a more colorful offering.

He chose to use an ATmega328 because he already had it on hand. The chip drives a series of RGB LEDs in a multiplex arrangement. To protect the I/O pins (and drive the LEDs at their target current) he is using a set of high and low side MOSFETs. Rather than rely on the light sensor to switch on the lamp he decided to add an IR receiver. In the video after the break you can see that this lets him cycle through colors and effects, in addition to switching the lamp on and off with a remote control.

With the enclosure put back together he is still able to reprogram the chip thanks to a serial header included in the design. The device is battery operated and the life estimates are included in his write-up.

Continue reading “Taking A Moon Light From Grayscale To Full Color”

Lightsaber Lets You Pick Just About Any ‘blade’ Color

If you’re staging some epic Star Wars battles you could go original with Red or Blue lightsabers. But what if you decide you’re more of a fan of Jedi and want to go green? Or perhaps the prequels have inspired you to take on purple? Why choose at build time when you can adjust the color to match your mood.

[Phik] built himself a color-selectable lightsaber using RGB LEDs. He sourced a 5M strip of them from eBay for around $20. The pixels are not individually addressable, but each color channel can be driven with a pulse-width modulation signal to mix and match the final color. Now he could have gone with a microcontroller solution, but [Phik] decided to give himself a bit more of a challenge. He built three PWM circuits based on a 555 timer which can be adjusted with a potentiometer. It’s not going to kill any insects, but the keep-it-simple-stupid aspect of the project makes it something we could actually build ourselves. The same cannot be said for most of the replica builds we see.

Bring Your LED Matrix Project Into The Living Room

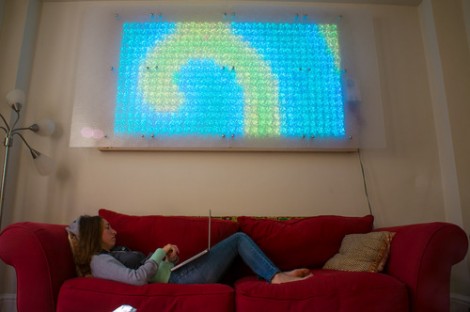
If you’re able to make a project look this good it shouldn’t be hard to convince that significant other to let you install it in a prominent place in the house. We think [Greg Friedland] pulled this off perfectly by building a 4’x8′ tablet controlled LED matrix.

First of all, everything looks better in a shiny case. It shouldn’t come as a surprise that this looks nice, thanks to the face plates which are mounted in a way that gives them a modern style (we’d expect to see this hanging in Ikea). They’re acrylic diffuser panels meant for used with lighting in a suspended ceiling. They do a nice job of scattering the light put off by the 544 LED modules that make up the display. The wiring was made easy by using LED strands where each pixel has its own control chip (WS2801). It sounds like the display will peak at around 160 Watts, which isn’t really that much considering the area. One nice touch that’s shown off in the video after the break is a full-feature iPad interface that even allows you to paint in light using your finger. But we’re also satisfied that [Greg] posted about the physical build too.

Continue reading “Bring Your LED Matrix Project Into The Living Room”

Color Multiplexing Through Fiber Optics

If you want to go high bandwidth, fiber optics is the way to go. From trans-oceanic cables to the yet-unseen ‘fiber to every home,’ fiber optics allows a lot more bandwidth than a copper cable. In low-bandwidth applications, fiber optic cable transmits data using one color of light. There’s a way to get more bandwidth out of a fiber optic cable, as [Shahriar] found out while experimenting with an RGB LED.

For his experiment, [Shahriar] used a BlinkM programmable RGB LED and a Sparkfun color sensor. In fiber optic lines with one light, it is possible to send many simultaneously using PWM, but noise becomes a problem at high data rates. Using an RGB LED, [Shahriar] sends three levels of Red, Green, and Blue to transmit 9 bits at a time – perfect for sending a byte with a parity check in one quick light burst.

[Shahriar]’s technique is exactly how the pros pump massive amounts of data through a single fiber optic cable. All the tools, code, and MATLAB functions are available on [Shahriar]’s site, ready to be used by anyone wanting to experiment for themselves.

In the video after the break, [Shahriar] breaks everything down, including the tools, theory, and actual circuits. It’s an amazing video demo, so thorough we’re wondering if [Shahriar] has any teaching ambitions.

Continue reading “Color Multiplexing Through Fiber Optics”

Triangle-grid LED Display

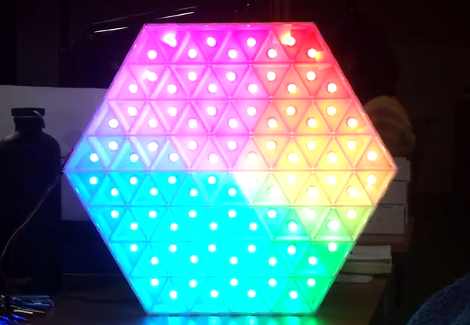
[Dearmash] put together this RGB LED display using triangles for each pixel. It’s an interesting deviation from the traditional grid layout. There are two video demos after the break. The first is a plasma-style pattern generated in Processing. The second is a spinning color wheel which would be perfect if synchronized with your Photoshop color spinner.

So the physical build is done, and now [Dearmash] is looking for a purpose for the device (isn’t that always the way it happens?). He mentions that the triangular layout looks cool, but makes text display almost impossible. Does anyone have any ideas on how to make this work? Right off the bat we could see side-scrolling a font similar to the Metallica logo’s M and A. Bu there must be some way to group these pixels together into readable characters. If you always use an upward and downward pointed triangle on the same row as a pixel it makes a parallelogram which would be used to display italicization characters.

Continue reading “Triangle-grid LED Display”

Hipster Chandelier

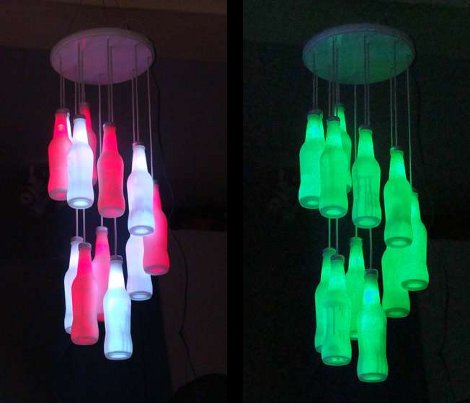
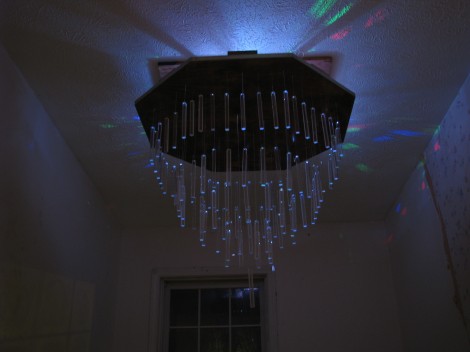
This chandelier is something we’d expect to see on sale in the local gallery store. [Starkec] made it a couple of years back and we just love the look. The materials are pretty common, and you can throw it together in an afternoon.

The diffuser are made from clear glass soda bottles. After removing the labels and giving them a good cleaning, they were each set upside down and sprayed with some glass frosting spray. A four-conductor telephone wire serves both as the support for the bottle and electrical path for the RGB LED inside of each. The original screw cap for the bottles makes it a twist to install them after the soldering is done. There are two common color buses so that alternating colors can be shown at the same time. After seeing the video we think you’ll agree that the wiring scheme makes for some great animated effects.

Continue reading “Hipster Chandelier”

Building A Color Sensor Using Luminosity

[Richard Osgood] is back again with an interesting project. This time he has constructed a color sensor. His initial design was to use three LEDs and a photoresistor. He would shine a red, then green, then blue LED on a surface and record the reflected light with the photoresistor allowing him to determine how much reflected light there was of each color. Unfortunately, he found it to be completely unreliable. An attempt at using a light frequency sensor didn’t work either. What did finally work, was a luminosity sensor shown above.

Finally, his prototype worked. Unfortunately only the red LED gives readings that he considers to be adequate with the blue and green being “not all quite right”.  With this type of circuit, he could build a clone of the magic chameleon lamp.