Move Aside Mercury: Measuring Temperature Accurately With An RTD

Temperature is one of the most frequently measured physical quantities, and features prominently in many of our projects, from weather stations to 3D printers. Most commonly we’ll see thermistors, thermocouples, infrared sensors, or a dedicated IC used to measure temperature. It’s even possible to use only an ordinary diode, leading to some interesting techniques.

Often we only need to know the temperature within a degree Celsius or two, and any of these tools are fine. Until fairly recently, when we needed to know the temperature precisely, reliably, and over a wide range we used mercury thermometers. The devices themselves were marvels of instrumentation, but mercury is a hazardous substance, and since 2011 NIST will no longer calibrate mercury thermometers.

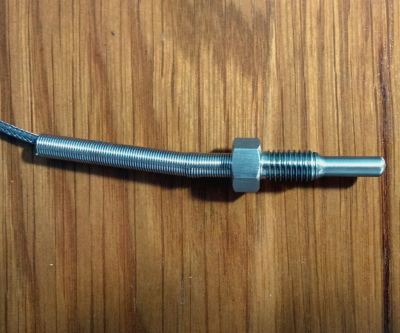
A typical Pt100 RTD probe

Luckily, resistance temperature detectors (RTDs) are an excellent alternative. These usually consist of very thin wires of pure platinum, and are identified by their resistance at 0 °C. For example, a Pt100 RTD has a resistance of 100 Ω at 0 °C.

An accuracy of +/- 0.15 °C at 0 °C is typical, but accuracies down to +/- 0.03 °C are available. The functional temperature range is typically quite high, with -70 °C to 200 °C being common, with some specialized probes working well over 900 °C.

It’s not uncommon for the lead wires on these probes to be a meter or more in length, and this can be a significant source of error. To account for this, you will see that RTD probes are sold in two, three, and four wire configurations. Two-wire configurations do not account for lead wire resistance, three-wire probes account for lead resistance but assume all lead wires have the same resistance, and four-wire configurations are most effective at eliminating this error.

In this article we’ll be using a 3-wire probe as it’s a good balance between cost, space, and accuracy. I found this detailed treatment of the differences between probe types useful in making this decision.

Continue reading “Move Aside Mercury: Measuring Temperature Accurately With An RTD”

Hackaday Prize Entry: Ebers – Diabetes Care, Step By Step

Diabetes is a disease that, among other things, has significant effects on the feet due to a combination of neuropathy, vascular issues, and other factors. You may have seen special diabetes socks with features like non-elasticated cuffs for better circulation and a lack of seams to prevent the formation of blisters. Taking care of  your feet is essential in diabetes to prevent injury and infection. Ebers is a project that seeks to help in just this area.

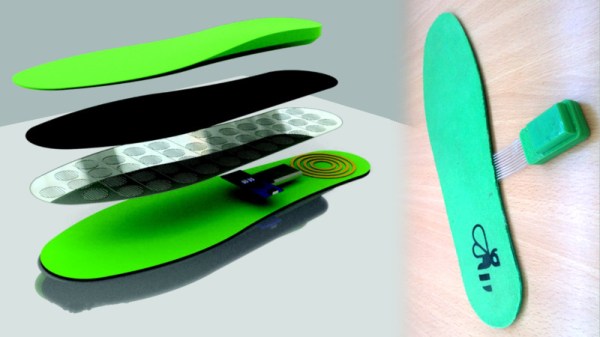
Ebers monitors plantar pressure, temperature, and humidity in the sole of the shoe. It then feeds this data back to a smartphone for analysis over Bluetooth. The brain of the project is an Arduino Pro Mini which is tasked with interfacing with the various sensors.

The project relies on 3D printed insoles which fit inside the shoe of the wearer. This is a particularly useful application of 3D printing, as it means the insole can be customised to fit the individual, rather than relying on a smaller selection of pre-sized forms. This has the additional benefit of allowing the insole to be designed to minimise pressure on the foot in the first place, further reducing the likelihood of injury and infection. The pressure sensing is actually built into the insole itself, and can measure pressure at several different areas of the foot.

Overall, it’s a project with huge potential health benefits for those with diabetes. We look forward to seeing where this project goes in future, and how it can bring improvements to the quality of life for people the world over.

Low-cost Drift Buoy Plies The Atlantic For Nearly A Year

Put a message in a bottle and toss it in the ocean, and if you’re very lucky, years later you might get a response. Drop a floating Arduino-fied buoy into the ocean and if you’ve engineered it well, it may send data back to you for even longer.

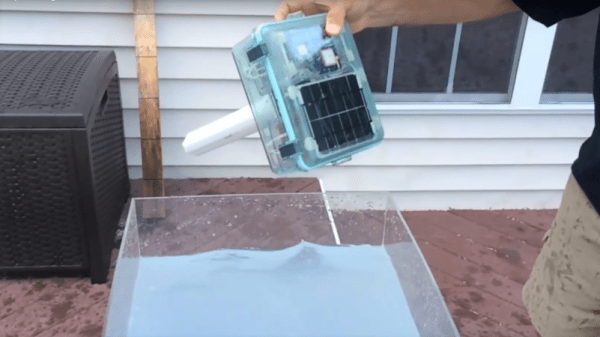
At least that’s what [Wayne] has learned since his MDBuoyProject went live with the launching of a DIY drift buoy last year. The BOM for the buoy reads like a page from the Adafruit website: Arduino Trinket, an RTC, GPS module, Iridium satellite modem, sensors, and a solar panel. Everything lives in a clear plastic dry box along with a can of desiccant and a LiPo battery.

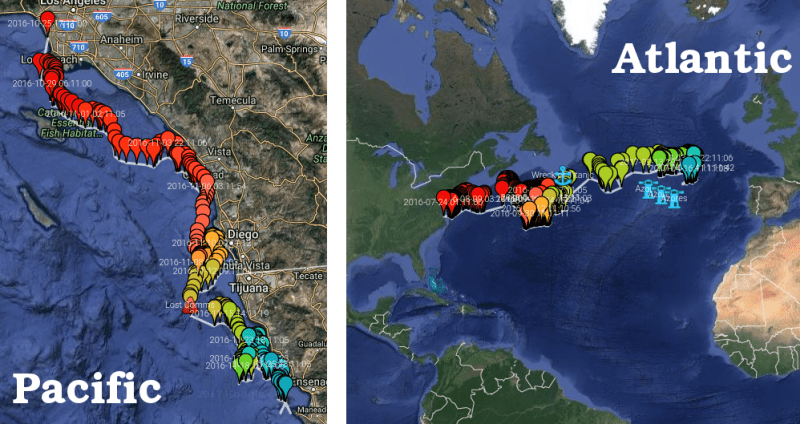
The solar panel has a view through the case lid, and the buoy is kept upright by a long PVC boom on the bottom of the case. Two versions have been built and launched so far; alas, the Pacific buoy was lost shortly after it was launched. But the Atlantic buoy picked up the Gulf Stream and has been drifting slowly toward Europe since last summer, sending back telemetry. A future version aims to incorporate an Automatic Identification System (AIS) receiver, presumably to report the signals of AIS transponders on nearby ships as they pass.

We like the attention to detail as well as the low cost of this build. It’s a project that’s well within reach of a STEM program, akin to the many high-altitude DIY balloon projects we’ve featured before.

Continue reading “Low-cost Drift Buoy Plies The Atlantic For Nearly A Year”

Hackaday Prize Entry: SunLeaf

If there’s one place where the Internet of Things makes sense, it’s agriculture. From vast fields of soybeans, corn, and a different variety of corn, to the backyard garden, knowing how much sun, and rain crops get can vastly increase yields. For their Hackaday Prize project, [Adam] and [Shane] are building  a board designed explicitly for plants. It’s called the SunLeaf, and it has all the sensors and radios a good remote sensing board needs.

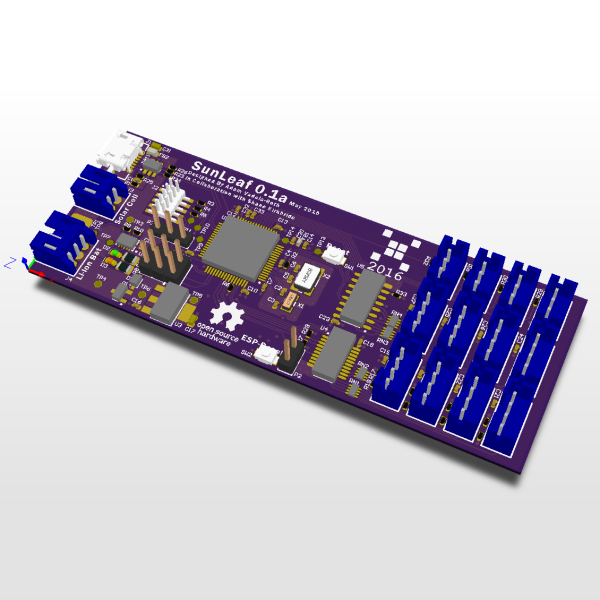
The SunLeaf is built around an ARM Cortex M4 microcontroller with an ESP8266 module for WiFi connectivity. Sensors are important for any remote sensing board, and for this the guys are going with SeeedStudio Grove connectors, providing four UARTs, four I2C, and four analog ports.For remote sensing applications, you generally can’t rely on mains power, so SunLeaf includes a port for a solar panel and a battery charger.

Although this project was originally a redesign of [Adam] and [Shane]’s Hackaday Prize entry from last year, what they’ve come up with is a great device for data logging, autonomous control, and environmental sensing for anything, from farms to weather stations.

The HackadayPrize2016 is Sponsored by:

Simple Robot Knows Its Bounds

table_top_bot

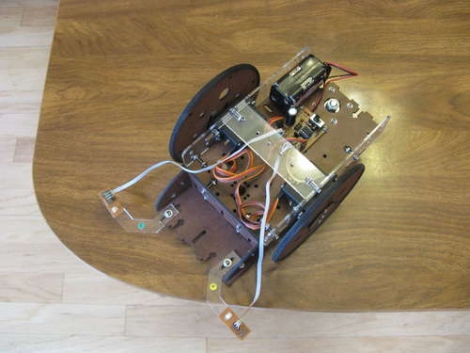
The [Dallas Personal Robotics Group] recently put together a set of tutorials for their members, including the build process of a table-top robot, they call the Tiny Wanderer. The bot can be constructed pretty easily, and is meant as an introduction to robot building.

The small servo-driven bot uses simple edge sensors to ensure that it doesn’t fall off a raised surface. The sensors were built using a small IR LED and photo transistor, which is partially isolated from the LED by a piece of shrink tubing. An ATiny micro-controller takes two measurements of the amount of IR light entering the photo transistor – one with the LED on, the other with the LED off. The difference of these measurements is compared to determine if the edge sensors are hanging off the side of the table. The logic used here is pretty simple – the difference will be high if the sensors are hovering over a surface, due to reflected light, and low if the sensors are hanging over open space.

The writeup contains templates for building the bot’s structure, as well as source code and schematics for all of the electronic bits.

Be sure to stick around to see a video of the robot in action.

Continue reading “Simple Robot Knows Its Bounds”