6809 Computing

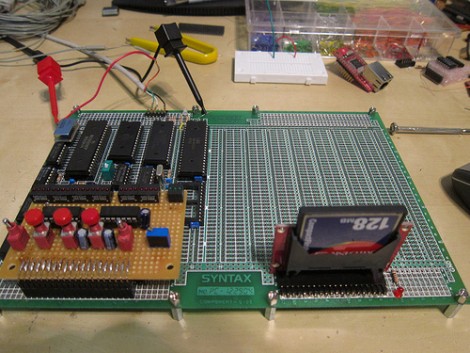
[Matthew Arnoff] built an 8-bit computer around the Motorola 6809 processor. He chose this processor because it seems there are a lot of Z80 builds out there and he wanted to try something different.

This actually packs quite a punch. He’s clocking the machine at 2 MHz with 512 KB of SRAM memory. Compact Flash that is FAT formatted provides mass storage. He’s using a serial connection for a user interface. After the break you can see his oscilloscope is used as the monitor. This was easy to accomplish by connecting the serial out to Terminalscope, one of his previous projects. Continue reading “6809 Computing”

Adding A Serial Port To A Dockstar

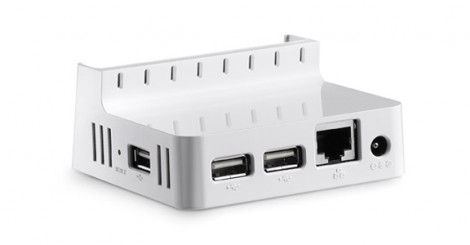
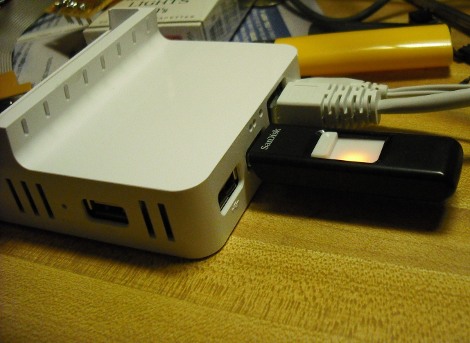
If you don’t look close you might think this Seagate Dockstar is in stock condition. But look at the three holes in the white case just above the thumb drive which act as a serial connection for the Dockstar. [Firestorm_v1] posted the instructions after see our post about installing OpenWRT on the device. He did a nice job of concealing the connection, heating up a pin header to melt the holes he needed. Now he has quick access without sacrificing features or aesthetics. A serial-to-USB cable is modified with a polarized pin header to ensure a quick and accurate connection. This is great for PC connectivity but you also never know when you want to add your own hardware bits to the network device.

OpenWRT On A Seagate FreeAgent Dockstar

The Seagate FreeAgent Dockstar aims to make all of your stuff available online. It serves that purpose but sometimes you just want more options for controlling your hardware and running some scripts. [Eric Cooper] put together a guide for installing OpenWRT on the Dockstar by building your own kernel and loading it onto the internal storage. Once you have a kernel that will play nicely with the hardware, you can install it by tunneling in through SSH; the same method you would use if you wanted to run Linux on this hardware. If you have problems along the way, [Eric’s] also included a guide for cracking the Dockstar open and connecting a serial cable.

Power Cycling A Problematic Modem

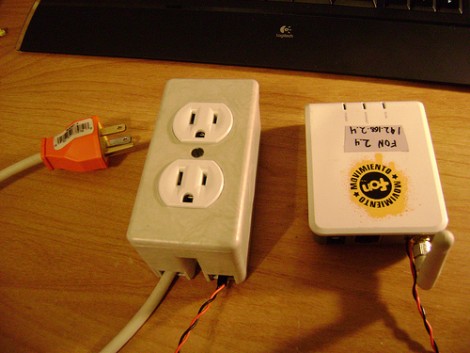
[Gigawatts] struggled against a shoddy Internet connection for quite some time. Changing modems, having the line serviced, and spending far too much time on the phone didn’t do any good. In fact, the only thing that fixed the problem was power cycling the modem once it stopped responding. His solution was to automate the power cycling process. He added a cron task to his router which is running DD-WRT, a favorite firmware alternative for hacked routers. The script monitored the WAN connection and when it went down it would toggle one of the serial port pins. He whipped up an outlet box with a relay in it and used that serial pin to cut the power going to the modem. A workaround yes, but it was the only thing that brought an end to his frustration.

JTAG Programming Over A Network

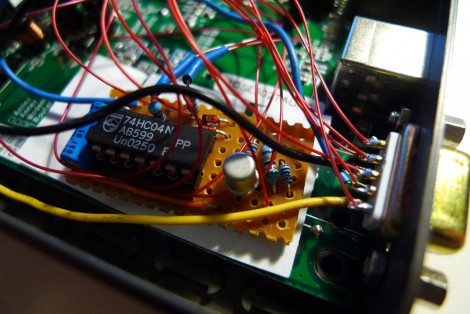
[Matt Evans] was running up against the common programming gotcha caused by disappearing parallel ports. For years he had used a JTAG parallel cable when working with FPGAs but recently realized he no longer owned any machines with that interface available. Instead of shelling out $50 for a USB programmer he a programming interface from an old router.What he’s doing is bit-banging using Linux. In this case it’s a router running a version of Linux which makes his setup Internet friendly but this could be done in the same basic manner on any Linux device with enough available I/O to connect to the device you are programming.

Reuse That PDA As A WRT Terminal

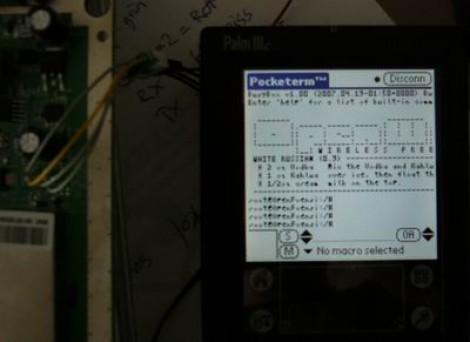
[Michu] used his old Palm IIIc to make a serial interface for his OpenWRT router. It’s a matter of cracking open both the router and the Palm device, then connecting the TTL lines from the router to the MAX 3386e level converter chip inside the Palm. From there, Pocketterm can connect to the router’s serial terminal.

A lot of us have old electronics lying around that work perfectly well. It’s nice to find hacks that make them useful again.

[Thanks Isama]

Hacking The MindFlex, More!

[vimeo http://vimeo.com/10184668%5D

Reader [Eric] sent us a powerfully informative, yet super simple hack for the MindFlex toy. Don’t worry, it’s not another worthless shock ‘game’, And it’s using an actual interface instead of the built-in LEDs.

With two wires for the serial protocol, and an Arduino, you’ll be able to view “signal strength, attention, meditation, delta, theta, low alpha, high alpha, low beta, high beta, low gamma, high gamma” brainwaves. While it’s not medical grade, it’s a lot more intuitive than previous interfaces.

The original intent was for a system called MentalBlock, but we’re wondering what would you do with brainwave data?