Hacking The MindFlex, More!

[vimeo http://vimeo.com/10184668%5D

Reader [Eric] sent us a powerfully informative, yet super simple hack for the MindFlex toy. Don’t worry, it’s not another worthless shock ‘game’, And it’s using an actual interface instead of the built-in LEDs.

With two wires for the serial protocol, and an Arduino, you’ll be able to view “signal strength, attention, meditation, delta, theta, low alpha, high alpha, low beta, high beta, low gamma, high gamma” brainwaves. While it’s not medical grade, it’s a lot more intuitive than previous interfaces.

The original intent was for a system called MentalBlock, but we’re wondering what would you do with brainwave data?

Flux Paste Applicator Gun

[Luciano] didn’t want to drop a lot of cash into a flux and solder paste applicator so he built his own for about $5. He re-purposed a hot glue gun which you can usually find at a dollar store. After removing the heating element he inserted the body of a syringe. The plunger has been modified to use a knitting needle inside of some plastic tubing. After taking the picture above he made an improvement by adding a milliliter scale to the plunger, allowing you to meter out the paste and also gauge how much remains.

PIC USB Host Shortcuts

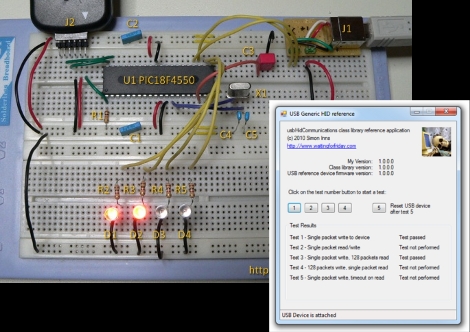
[Simon Inns] is still hard at work making USB connectivity for PIC microcontrollers easier for the hobbiest. He’s released a framework for PIC based USB devices under Windows. It includes the firmware needed for USB compatible 18F PIC chips as well as a C# class library and example programs for the Windows side of things. This goes quite a bit further than his PIC-USB tutorial but with little added effort on your end of things.

We do our USB prototyping on a breadboard just like [Simon] did in this example. He’s got a nice little USB-B connector breakout that is easy to plug into the breadboard. If you prefer to have a more stable development area, check out the one he designed. It’s a single-sided PCB made for through-hole components with just a handful of jumper wires.

LEGO Gearbox – Seven Speed Plus Reverse

We know LEGO is a very versatile medium to build with but this is beyond what we considered possible. Seven speeds and a reverse gear were built into the gearbox for this LEGO vehicle. It’s not completely an original design, but adds to the five-speed design found in a ten-year-old LEGO set. See it demonstrated in the video after the break. The design uses a sequential gearbox; shifting is accomplished by clicking the stick up or down depending on how you want to shift. If you’ve got enough parts on hand you can build this using the assembly photos that [Sheepo] posted.

Can’t get enough of the gears? Check out this model of a double clutch transmission.

Continue reading “LEGO Gearbox – Seven Speed Plus Reverse”

Arduino Implemented On An FPGA

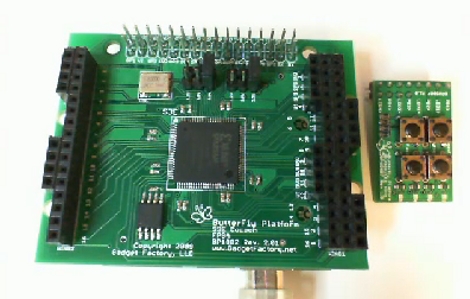
If you think that Arduinos are overkill in most projects we can do one better for you. [Jack Gassett] has a virtual Arduino running on a Field Programmable Gate Array. We checked in with [Jack] back in November to see his work with the AVR8 Soft Processor, an FPGA version of an AVR chip. Because the Arduino uses AVR it wasn’t too much of a leap to make this Arduino compatible. We’re lacking in imagination when hit comes to using this method productively, but we’re sure someone will find a way.

[Thanks Drone]

Intruder Alarm McDonald’s Toy Hacking

[malikaii] needed to set up some kind of tripwire style alarm system for his office. His bosses kept sneaking in to find him slacking. So, like any loyal hacker, instead of just working harder he built an alarm system. After a failed attempt to recreate an IR alarm circuit he found on the web and built from old appliance parts, he found the Hack a Day article about harvesting McDonald’s toys. The end result was a fully functional IR detecting alarm for the office doorway. This is pretty simple really, the best kind of hack.