Review: IFixit’s FixHub May Be The Last Soldering Iron You Ever Buy

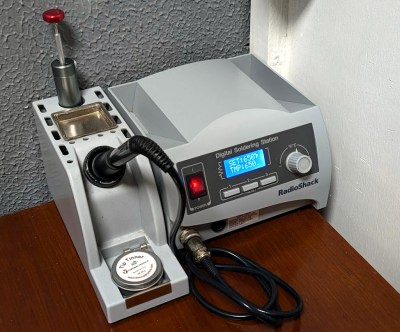
Like many people who solder regularly, I decided years ago to upgrade from a basic iron and invest in a soldering station. My RadioShack digital station has served me well for the better part of 20 years. It heats up fast, tips are readily available, and it’s a breeze to dial in whatever temperature I need. It’s older than both of my children, has moved with me to three different homes, and has outlived two cars and one marriage (so far, anyway).

When I got this, Hackaday still used B&W pictures.

As such, when the new breed of “smart” USB-C soldering irons started hitting the scene, I didn’t find them terribly compelling. Oh sure, I bought a Pinecil. But that’s because I’m an unrepentant open source zealot and love the idea that there’s a soldering iron running a community developed firmware. In practice though, I only used the thing a few times, and even then it was because I needed something portable. Using it at home on the workbench? It just never felt up to the task of daily use.

So when iFixit got in contact a couple weeks back and said they had a prototype USB-C soldering iron they wanted me to take a look at, I was skeptical to say the least. But then I started reading over the documentation they sent over, and couldn’t deny that they had some interesting ideas. For one, it was something of a hybrid iron. It was portable when you needed it to be, yet offered the flexibility and power of a station when you were at the bench.

Even better, they were planning on putting their money where their mouth is. The hardware was designed with repairability in mind at every step. Not only was it modular and easy to open up, but the company would be providing full schematics, teardown guides, and spare parts.

Alright, fine. Now you’ve got my attention.

Continue reading “Review: IFixit’s FixHub May Be The Last Soldering Iron You Ever Buy”

Neat Soldering Station Design Has Workshop & Portable Versions

The warm and rather stinky heart of any hacker’s lair is the soldering station, where the PCB meets the metal (solder). A good soldering station lets you get on with the business of building stuff without worrying about piffling details like temperature and remembering to turn the thing off. The AxxSolder is a neat design from [AxxAxx] that fulfills these criteria, as it includes full PID control of the iron and an auto sleep feature. It will run from any DC power source from 9 to 26 Volts, so you can run it off your bench power supply and have one less thing to plug in. There is even a portable version for those on-the-go hackathons.

Continue reading “Neat Soldering Station Design Has Workshop & Portable Versions”

Miniware TS1C: A Cordless Soldering Iron With A Station

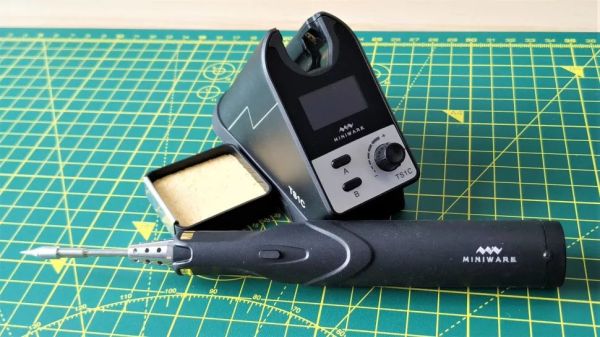
Most soldering irons in the market seem to fall into a few distinct categories. They either provide a full-blown station to which the soldering iron is wired, powered straight by mains, or an iron powered by DC power. The Miniware TS1C takes up an interesting position here in that it features both a station you put the iron into and adjust the temperature, as well as a fully cordless iron. Sounds too good to be true, perhaps, but a recent Tom’s Hardware review by [Les Pounder] seems to think it has real merit.

Behind the glossy exterior and marketing, we find a cordless soldering iron that uses a supercapacitor to power itself when it is not inserted into the station, with communication between the iron and station performed using Bluetooth. This way, you can keep an eye on both the tip temperature and the remaining charge left, which [Les] found to be sufficient for soldering about 80 smaller joints, with the marketing claiming it can solder 180 size 0805 SMD parts with one charge.

The advantage of having a station is that it is the part that is wired to a power bank or wall wart, with the temperature setting performed using a chunky dial. The station also provides a place for the iron in between soldering sessions, but in order to recharge the iron, the brass bands near the front have to be pushed into the holder for them to make contact. This also makes one-handed removal of the iron from the holder not as easy as you’d hope.

Continue reading “Miniware TS1C: A Cordless Soldering Iron With A Station”

Tiny PCB Banishes Soldering Fumes, Automatically

A fan to remove fumes is a handy thing to have when soldering, even better is a fan furnished with a filter. Better still is a fan that activates only when the iron is in use, turning off when the iron is in its stand. Now that’s handy!

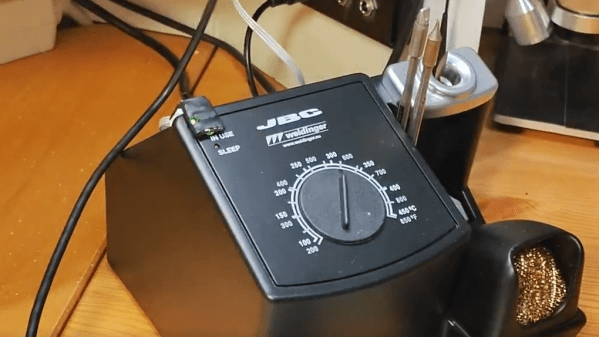
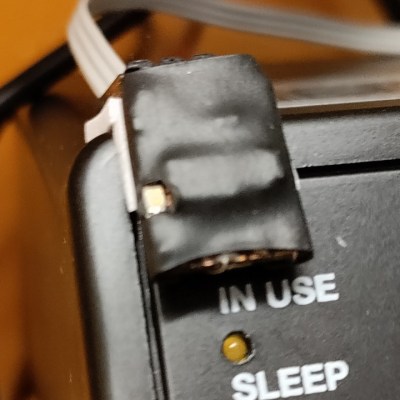
[Petteri Aimonen] made exactly such a device when he noticed his JBC BT-2BWA soldering station could detect when the iron is removed from its stand, and indicate its operating mode via status LEDs. Broadly speaking, when the iron is removed from its cradle the green “in use” LED is on. By turning the fan on whenever that LED is lit (and turning it off when it becomes unlit), fume extraction gets a little more elegant and efficient.

Instead of tapping directly into the soldering station’s hardware to detect the LED’s state, [Petteri] went for a completely noninvasive solution that made good use of a few spare parts and a small bit of copper-clad board. The PCB is nothing more than piece of copper-clad board with lands scratched out with a hobby knife.

This tiny board sits atop the soldering station, parking a photodiode directly above the “in use” LED. The circuit is a simple comparator whose output controls fan power via a MOSFET, and a top-facing LED provides as a duplicate “in use” indicator, since the original is hidden under the tiny board.

Even for one-off designs like this, creating a PCB layout in an EDA program like KiCad is still worth doing because one can use it to scratch out lands on a copper-clad board, a technique with similarities to Manhattan-style circuit construction.

Have JBC Soldering Handle, Will USB-C Power Deliver

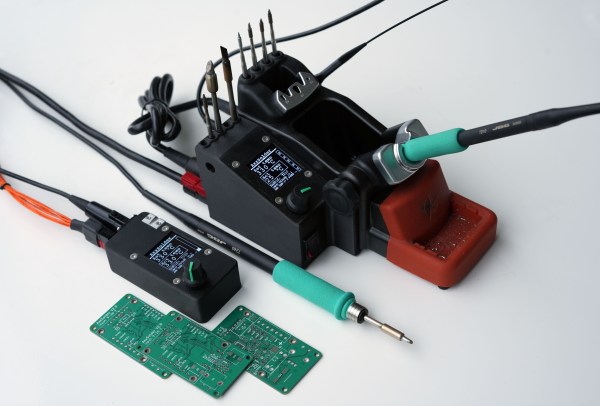
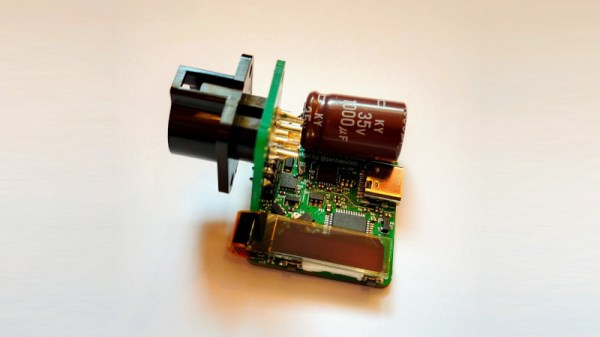
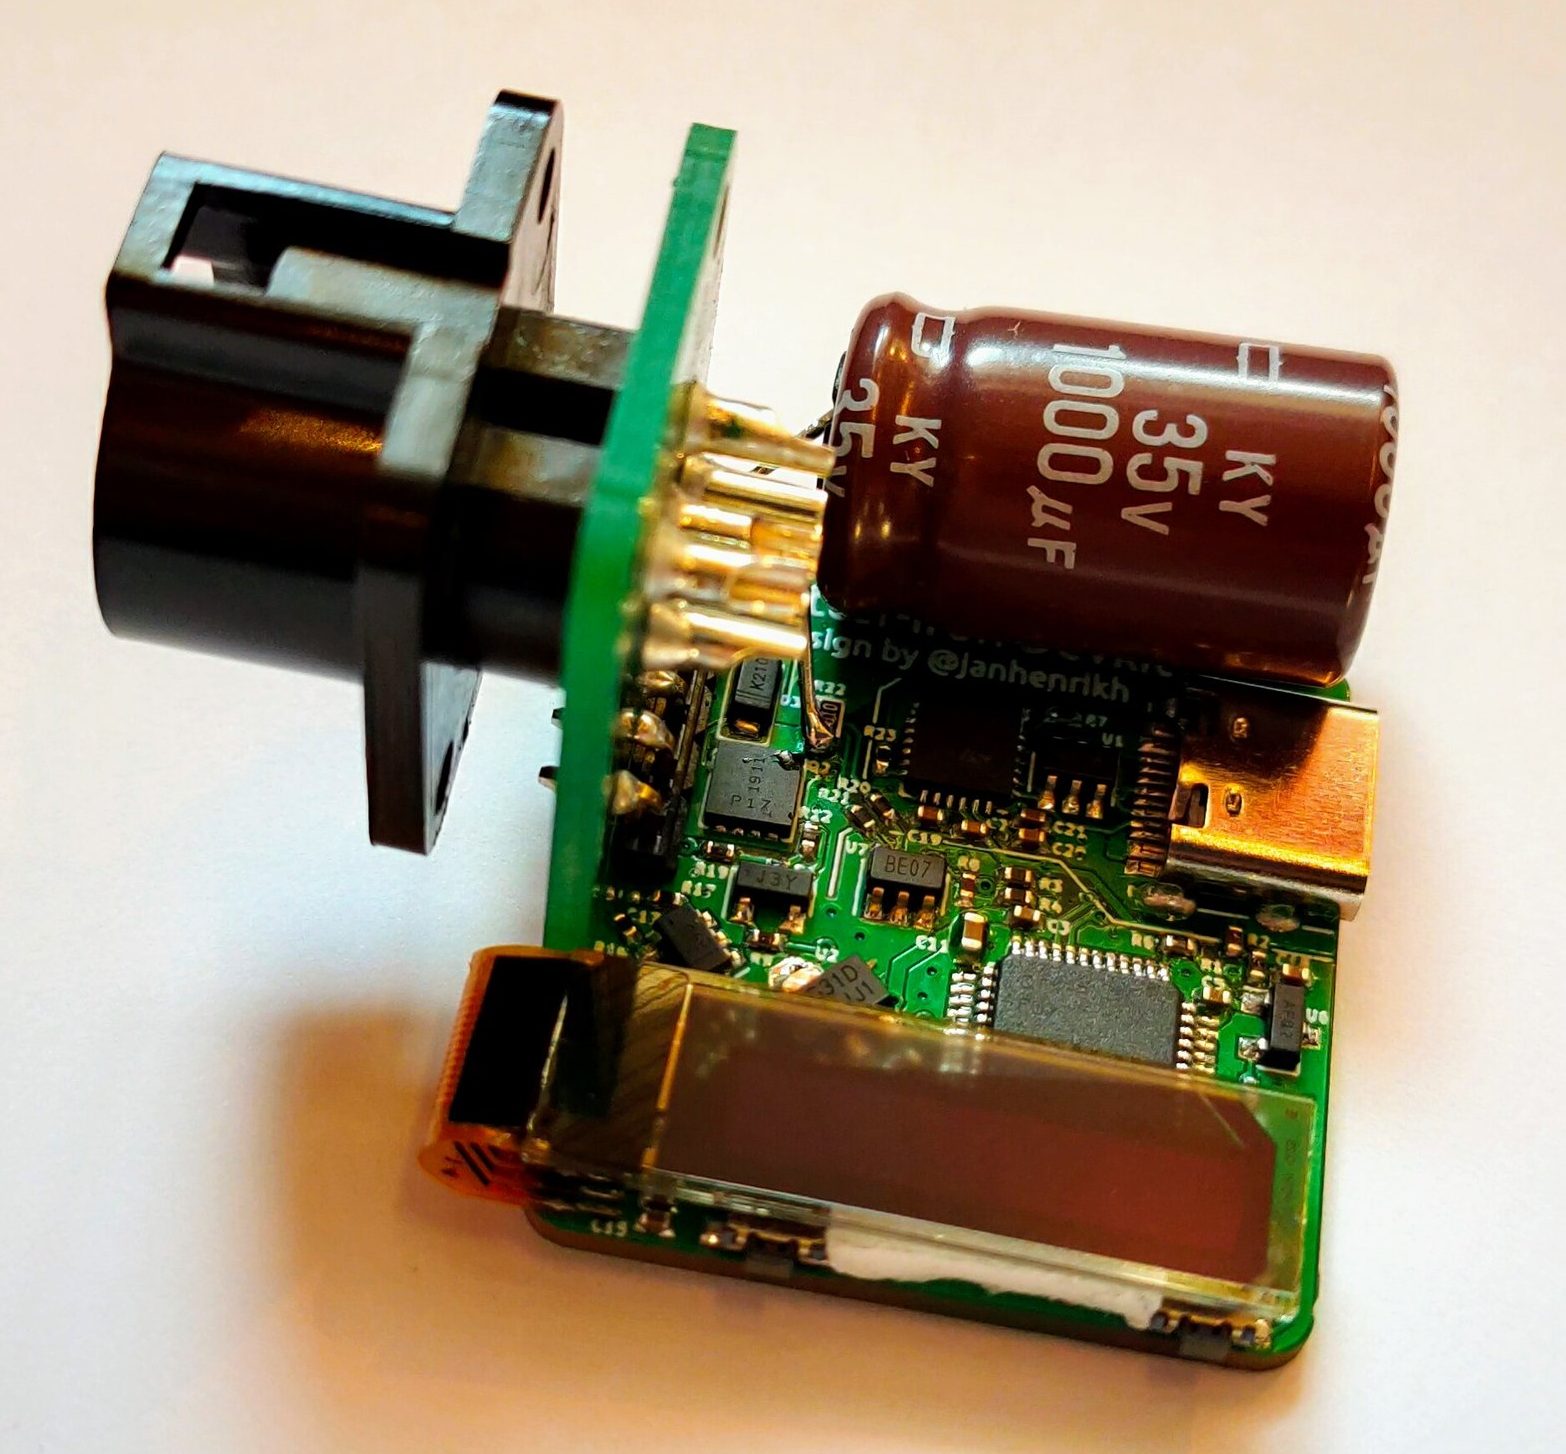
Frequent converter-of-tools-to-USB-C [Jana Marie Hemsing] is at it again, this time with a board to facilitate using USB Power Delivery to fuel JBC soldering iron handles. Last time we saw [Jana] work her USB-C magic was with the Otter-Iron, which brought Power Delivery to the trusty TS100 with a purpose built replacement PCBA. This time he’s taking a different approach by replacing the “station” of a conventional soldering station completely with one tiny board and one giant capacitor.

If you’ve been exposed to the “AC fire starter” grade of soldering iron the name JBC might be unfamiliar. They make tools most commonly found with Metcal’s and high end HAKKOs and Wellers on the benches of rework technicians and factory floors. Like any tool in this class each soldering station comes apart and each constituent piece (tips, handles, base stations, stands, etc) are available separately from the manufacturer and on the used market at often reasonable prices, which is where [Jana] comes in.

The Otter-Iron PRO is a diminutive PCBA which accepts a USB-C cable on one side and the connector from a standard JBC T245-A handle on the other. JBC uses a fairly typical thermistor embedded in the very end of the iron tip, which the Otter-Iron PRO senses to provide closed loop temperature control. [Jana] says it can reach its temperature setpoint from a cold start in 5 seconds, which roughly matches the performance of an original JBC base station! We’re especially excited because this doesn’t require any modification to the handle or station itself, making it a great option for JBC users with a need for mobility.

Want to make an Otter-Iron PRO of your own? Sources are at the link at the top. It sounds like v3 of the design is coming soon, which will include its own elegant PCB case. Check out the CAD render after the break. Still wondering how all this USB-PD stuff works? Check out [Jason Cerudolo’s] excellent walkthrough we wrote up last year.

Continue reading “Have JBC Soldering Handle, Will USB-C Power Deliver”

A Homebrew Weller RT Soldering Station

Like a number of hackers before him, [MarcelMG] was impressed with Weller’s RT soldering iron tips, but considerably less enthused about the high purchase price on the station they’re designed to go into. Inspired by similar projects, he decided to try his hand at building his own soldering station which reaps the benefits of these active tips without the sticker shock.

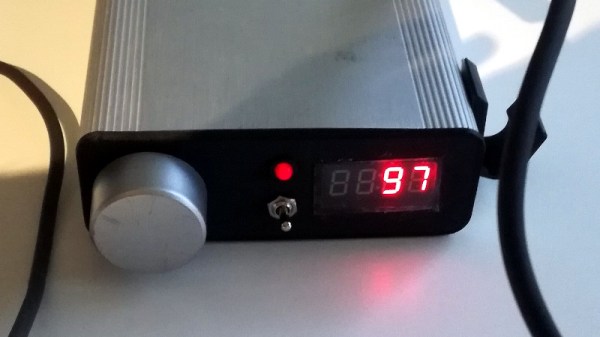
The station’s user interface was kept intentionally simple, with little more than a four digit LED display to show the temperature and a rotary encoder to set it. The display alternates between the current temperature and the set temperature every few seconds while the knob is being turned, and if you push it in, the set temperature will be saved as the default for next time.

[MarcelMG] also included a feature that drops the iron’s temperature when it’s sitting in the holder, reducing tip wear and energy consumption. He originally planned on using a Hall effect sensor to detect when the iron was holstered without needing to physically interface with it, but in the end he realized the easiest approach was to simply connect one of the input pins on the microcontroller to the metal holder. Since the tip is grounded, he could easily detect if it was in place with a couple lines of code.

Speaking of which, the station is powered by an ATtiny24A with firmware written in C using the Atmel Studio IDE. [MarcelMG] mentions that the limited storage on the 24A was a bit of a challenge to work around, and suggests that anyone looking to follow in his footsteps uses something with a bit more flash under the hood. The LED display is a very common TM1637 type, the rotary encoder was salvaged from a radio, and the power supply was from an old laptop. All told, this looks like a very economical build.

Depending on your needs, a DIY soldering station can either have features to rival the commercial models or be exceedingly simplistic. In either case, the advent of low-voltage irons and active tips have made self-built soldering stations much more approachable. Attempts without the use of these modern niceties tended to be somewhat less glamorous.

What Does An Electronics Tinkerer’s Workbench Need?

Ever been in a situation where you’re not sure where to begin building your own electronics workbench or improve your existing one? [Jeff Glass] writes in with a blog post as detailed as it is beautifully long, chronicling each and every part of his own home lab in order to give us some ideas on how to get one started.

Despite [Jeff] using his own workbench tools accrued over 10 years of working in the field as prime example, his guide takes into account that you don’t need the latest and most expensive in order to get working. Affordable examples of the tools presented are suggested, along with plenty of links to follow and what to look for in each one of them. He even goes on and aside to note the lack of affordable versions of bench-top multimeters, seeing how the portable counterparts are so cheap and plentiful in contrast.

However, contrary to [Jeff]’s claims, we would argue that there are things you could do without, such as the oscilloscope. And you could use a regular soldering iron instead of a soldering station if you are in a pinch. It just depends on the type of work you’re looking to do, and simpler tools can work just fine, that’s what they’re there for after all. That’s not to say his advice is all bad though, just that every job has different requirements, and he notes just that in the final notes as something to keep in mind when building your own lab.

Lastly, we appreciate having a section dedicated to shop safety and the inclusion of soldering fume extractors in the recommendations. We’ve talked about the importance of fire safety when working with these tools at home before, and how soldering is not the only thing that can produce toxic fumes in your shop. With no shortage of great tips on how to build your own fume extractors, we hope everybody’s out there hacking safely.