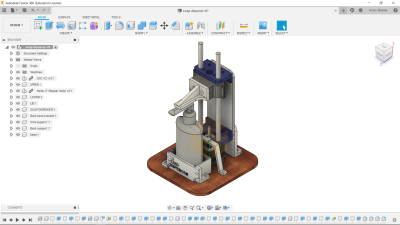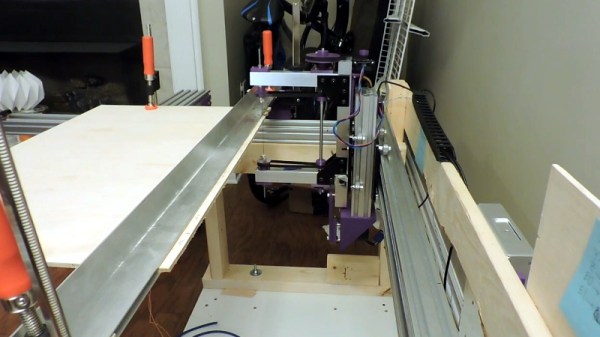
When [Andrew Consroe] tried to build a CNC scroll saw, he quickly learned how tricky of a design problem it is. With a blade that only cuts in one direction, you can’t simply move the tool in the X and Y dimensions like you can with a laser or router; either the work piece or the blade itself needs to continuously rotate towards the direction of the cut.
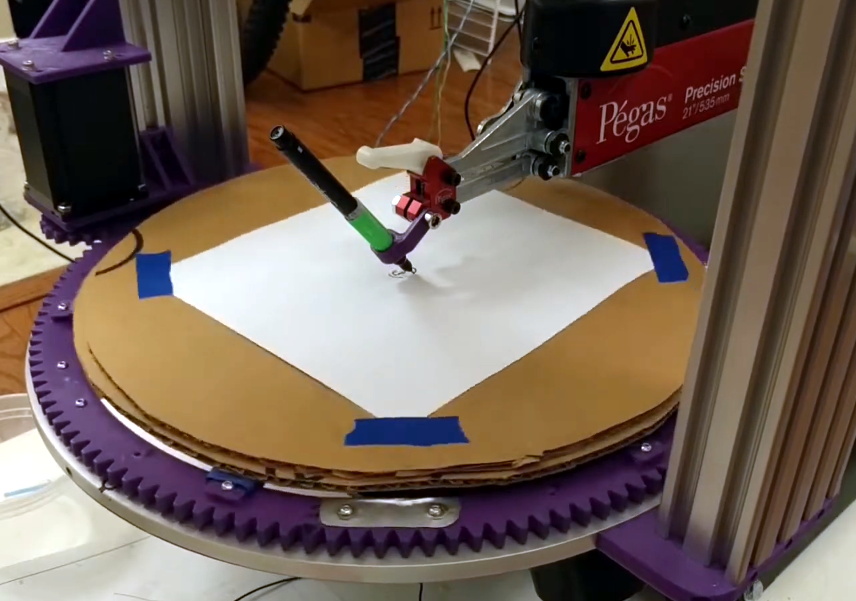
He’s recently shown off the third version of the machine, and while it’s still not exactly a practical tool, there’s no question it’s a brilliantly designed one, or that it works, slowly. Earlier attempts used a rotating table to spin the work piece, but [Andrew] found this to be an imperfect solution. Building a mechanism heavy duty enough to spin the material being cut while remaining accurate enough not to break the blade was a tall order, though he did get pretty close.
This time around he’s decided to simply rotate the blade itself. This can be accomplished with a single stepper motor and some suitably sized pulleys, while maintaining an exceptionally high degree of accuracy. The whole blade assembly moves up and down on an aluminum extrusion rail with a motor and crank arrangement. By synchronizing the rotation of the blade with the vertical movement of the saw, the software can be sure that everything is where it needs to be before the cutting stroke actually happens.
Judging by the video after the break, the system works quite well. The complex rounded shapes he cuts out of the piece of plywood look essentially perfect, and it sounds like this new version of the machine isn’t breaking blades due to positional errors like the previous one did. Unfortunately, it’s also very slow. There’s so many moving parts and careful positioning required that even when the video is sped up 10x, the saw still appears to only be creeping its way through the material.
On the back half of the video, [Andrew] details another approach to rotating the blade that would reduce the amount of moving mass in the saw. This would give the machine a considerable speed boost, and we’d love to see him implement it. By the way, before anyone says it: using a spiral blade is cheating.
Continue reading “The Redesigned CNC Scroll Saw Rides Again”