Bringing Guitar Synthesis To The Microcontroller

If you’re working with audio in an embedded environment, the best option for years now has been the Teensy 3 microcontroller board. This choice has mostly been due to its incredible power and audio libraries, but until now we really haven’t seen a stompbox-style interface that used the Teensy to its fullest extent. Now we have, in [Wolkstein]’s GitSynth, everything you could want in a synthesizer that processes the signals from an electric guitar.

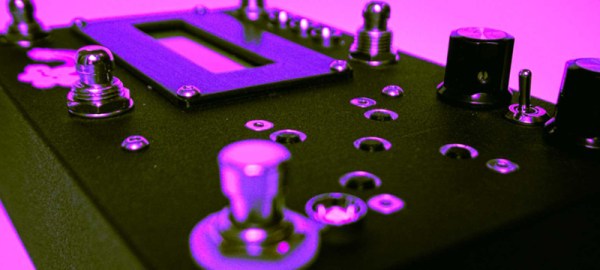
The core of this build is a Teensy 3, and all the audio goodies that come with that. Also included is a USB MIDI and audio interface, smartly both attached to a panel-mount USB-B connector on the back of the stompbox. Other controls include a single mono in jack for guitars and synths, two mono out jacks for stereo-ish output, a bunch of footswitches for bypass, tap tempo, preset selection, a jack for an expression pedal, and some buttons to move around the LCD user interface.

While putting a powerful microcontroller in a stomp box for is a project we’ve seen many times, this project really shines with the MIDI GUI that’s built for a device with a real display and a mouse. [Wolkstein] built a PyQt-based app for this synth, and it’s a plethora of buttons and sliders that looks similar enough to a real synthesizer. There’s enough configurability here for anyone.

You can check out the demo video (in German, but auto-translate subtitles exist) below.

Thanks [Mynaru] for the tip!

Continue reading “Bringing Guitar Synthesis To The Microcontroller”

Restoring A Piece Of Musical History

Every restoration project involves various levels of grit, determination, gumption and doggedness. But [Darren Glen]’s restoration of a Jupiter-8 is an absolute labor of love. The Jupiter-8,  launched by Roland in 1981, was their flagship “polyphonic analog subtractive” synthesizer and was used by many legendary acts of the ’80’s. The synthesizer was rugged — built to withstand the rigors of travelling everywhere that the bands took it. More importantly, it could produce a wide range of sounds that came from dedicated and independent controllers. These, plus a host of other desirable features, makes the synth highly coveted even today and the rare ones that surface for sale can be quite expensive.

The back story of how he came in possession of this coveted, albeit non-functioning, piece of history is a good read. But the part that makes us all interested is the meticulous restoration that he is carrying out. There is a lot of useful information that he shares which could be handy if you are planning any restoration project of your own.

When he first turned it on, all he got was an “8” on the display — which seemed like an error code. From then onward, he has been carefully stripping away each part and slowly bringing it back to life. All of the linear slide potentiometers and slide switches were de-soldered, dis-assembled, cleaned of rust and the carbon tracks and contacts cleaned with special spray — making them almost as good as new. The transformer and its mounting brackets received a similar treatment of rust cleaning and fresh paint. All of the other internal metal parts, such as the chassis, were restored in a similar fashion.

White plastic buttons and knobs which were faded, were brightened up by spraying them with a generous dose of hydrogen peroxide hair spray, putting them in Ziploc bags and letting them bake in sunlight for a day. [Darren] was satisfied enough with this process and gave the same treatment to all the other colored buttons too, with good results. The other set of plastic parts – the keyboard keys, were cleaned and polished with a scratch and blemish polish cream, and replacements were ordered out from a specialist supplier for the few that were damaged beyond repair.

But by far the greatest challenge for [Darren] has been resurrecting the top metal cover. It was badly rusted and had to be completely stripped of all paint. Repainting it the right shade was relatively easy, but applying the legend and decals took him to every screen printer in town, none of whom could manage the job. He lucked out by locating a screen printer who specialized in custom automotive work and managed to do a pretty good job with the decal work.

The Z80 microprocessor had lost all its magic smoke, so [Darren] has ordered an original Zilog replacement which will hopefully clear the error he noticed when it was first turned on. He’s slowly working his way through all the issues, and it is still work in progress, but we look forward to when it’s all done and dusted. A fully functional, restored Roland Jupiter-8 — one of the first 500 that were built back in 1981 — resurrected with a lot of TLC.

A big shout out to [Tim Trzepacz] for bringing this project to our notice.

Virtual Analog Synth Brings Tunes To The Masses

Part of the problem with getting involved in a new hobby is the cost. Whether you’re learning to surf, weld, garden, or program, often the entry cost is several hundred dollars. We’re huge fans of things with low barriers to entry, though, so we were happy to see the latest project from [pappas.chris] which promises to introduce newcomers to the musical hobby of synthesizers for just over $20.

The build revolves around an STM32F7 microcontroller and offers a 6-voice virtual analog synthesizer. The build is expandable, too, so if you want to build on the STM platform with any other add ons the process is relatively simple. This might not be necessary for a while, though; the current iteration offers many features that a typical synthesizer would have. Exhausting the possibilities with this tiny device will take some effort.

Since the synth is built on a common microcontroller platform, it’s easily programmable too, which isn’t often a feature of commercial synthesizers. You can listen to a sample audio file on the project page, and get started building your own as well. If you don’t have your own keyboard to use with it, there are other DIY synths that cover that area as well.

This Synth Is Okay

While this 3D printed synthesizer might just be okay, we’re going to say it’s better than that. Why? [oskitone] did something with a 555 timer.

The Okay synth from [oskitone] uses a completely 3D printed enclosure. Even the keys are printed. Underneath these keys is a small PCB loaded up with tact switches and small potentiometers. This board runs to another board loaded up with a 555 timer and a CD4040 frequency divider. This, in turn, goes into an LM386 amplifier. It’s more or less the simplest synth you can make.

If this synth looks familiar, you’re right. A few months ago, [oskitone] released the Hello F0 synth, a simple wooden box with 3D printed keys, a few switches, and a single 4046 PLL oscillator. It’s the simplest synth you can build, but it is something that can be extended into a real, proper synthesizer with different waveforms, LFOs, and envelope generators.

The sound of this chip is a very hard square wave with none of the subtleties of A,S,D, or R. Turn down the octave knob and it makes a great bass synth, or turn the octave knob to the middle for some great chiptune tones. All the 3D models for this synth are available on Thingiverse, so if you’d like to print your own, have at it.

You can check out the demo of the Okay synth below.

Continue reading “This Synth Is Okay”

The Sound Of (Synthesized) Music

What’s an ADSR envelope generator? If you are a big music hacker, you probably know. If you are like the rest of us, you might need to read [Mich’s] post to find out that it is an attack-decay-sustain-release (ADSR) envelope generator. Still confused? It is a circuit used in music synthesis. You can see a demo of the device in the video below.

Before the Altair–which was sort of the first hobbyist computer you could actually buy–electronics magazines were full of music synthesizer projects that had a lot in common with the analog computers of old. A lot of people took that very seriously and then computers took over the collective consciousness and we found musical hackers started working with (digital) computer-based synthesizers. But the old analog synth designs just won’t die. [Mich’s] ADSR is based on an ancient design, and the amount of information and additions he provides makes it worth a read, even if you don’t fancy building one.

Continue reading “The Sound Of (Synthesized) Music”

The Monolith Brings The Boom To Maker Faire

[Ross Fish], [Darcy Neal], [Ben Davis], and [Paul Stoffregen] created “the Monolith”, an interactive synth sculpture designed to showcase capabilities of the Teensy 3.6 microcontroller.

The Monolith consists of a clear acrylic box covered in LED-lit arcade buttons. The forty buttons in front serve as an 8-step sequencer with five different voices, while touch sensors on the left and right panels serve as a polyphonic arpeggiator and preset controller, respectively.

In order to control all of those buttons, the team designed breakout boards equipped with a port expander, 16-channel PWM driver chip, and N-channel MOSFETs allowing the entire synth to be controlled from a single Teensy 3.6.

In terms of software, [Paul] made improvements to the Teensy Audio Library to accommodate the hardware, improving the way signal-controlled PWM waveforms are handled and enhancing the way envelopes work. Ultimately they combined three Arduino sketches into one to get the finished code.

After showing off the project on Tested, the team set up the Monolith in the Kickstarter booth at Maker Faire Bay Area. The project was a hit at the Faire, earning a coveted red ribbon and inspiring countless adults and kids to check it out. We love a project that inspires so much interaction. Not only can three people play with the Monolith at once, but they can see through the clear case and get an idea of what’s going on.

If you want to learn more you can download project files from [Paul]’s GitHub. In the meantime, check out some other synth projects we’ve published on Hackaday: we’ve grooved on a synth-violin, a 3D-printed synth, and a single-PCB synth, among many others.

Continue reading “The Monolith Brings The Boom To Maker Faire”

Starship One: The Ultimate 90’s Synthesizer

We’ve seen some crazy music production stations over the years. But this synthesizer system may just take the cake. Starship One is the creation of [Marc Brasse]. At first glance, this music battle station looks like it belongs on the bridge of the Enterprise. The resemblance is not entirely unintentional. [Marc] himself says “Commander Data from Star Trek: The Next Generation might actually (have) like(d) it if he did not have such a conservative taste in music.”

At the core of Starship One are two underappreciated synths from the 90’s. The Technics WSA1, and a Gem S3 turbo. Both were keyboards ahead of their time. The WSA1 is a modeling synth, a sound generation trend in the ’90s which sounded great, but never quite caught on. The other strike against it was that it was built by Technics, who had a reputation for building HiFi equipment and home keyboards. Professionals just didn’t pick it up.

The Gem S3 had a similar story — built by a company called General Music, the keyboard was a great design with incredible piano action, but never quite made it. [Marc] wasn’t turned off by the lineage of these two synths. In fact, he embraced them. [Marc] explains more about his philosophy in creating the Starship One in this PDF document.

[Marc] combined these two instruments with Fatar MP1 bass pedals, a ribbon controller, and more additional components than we could ever hope to name here. The frame of the synth is built from a discarded retail CD sales rack. Extruded aluminum pieces came from a sun slat curtain. Just about every part was reused to build one beast of a workstation.

If you’re wondering what the strange keyboard layout is, it’s a Janko keyboard adapter [Marc] custom made. Instead of 88 notes, there are 264 keys, arranged so that every chord has the same fingering, regardless of the scale being played.

Want more modulation? Check out this ARM based FM synth, or this monster post of open source synths!