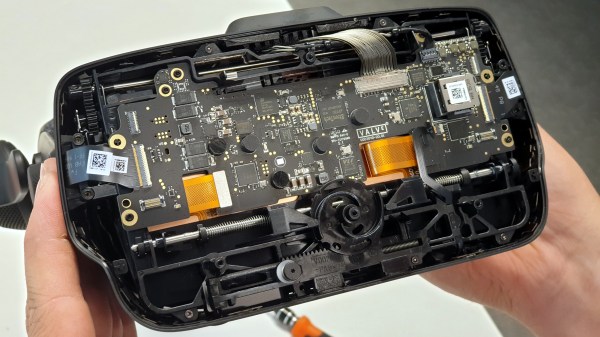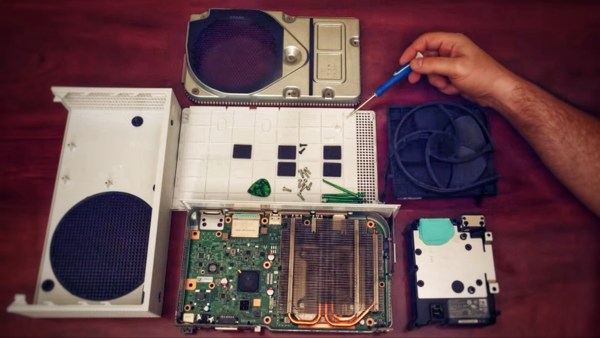
Console launch season is upon us. A time for billion dollar corporations ingratiate themselves with “Johnny Consumer” by promising the future of entertainment is finally available to one-and-all. The focus of this new generation of consoles has been the battle for 4K supremacy between Xbox Series X and PlayStation 5. Interestingly, Microsoft also created another iteration of their Xbox Series for those satisfied with games in 1080p, and thanks to [Dimitris] we have been able to see the internals of the Xbox Series S (XSS).
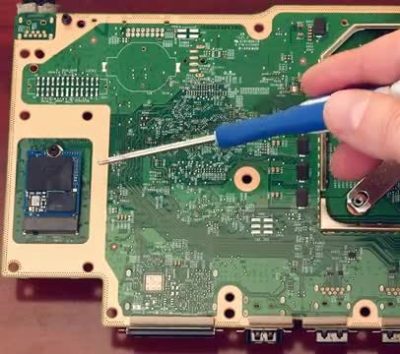
Microsoft’s choice to produce an all-digital console has greatly affected the internal design of the XSS. With the lack of a disc-drive there is only a single cable, the fan cable, tying the components together. The heat sink covering the 197mm² AMD APU takes up nearly 60% of the motherboard surface area. Though the XSS may be diminutive by modern console standards, its cooling fan is huge, somewhere in the 140 mm range. What little space is left by the heat sink and fan assembly is taken up by the internal power supply. As a fun nod, the PSU sports a Master Chief insignia to denote the location of the two-pronged connector beneath.
On the underside of the motherboard lies the biggest surprise of the “little brother” console. The system storage SSD is socketed rather than directly soldered to the board itself. The primary design goal of the XSS was to provide a cheaper alternative for players, but this standard m.2 slot reveals that Microsoft has plans for future expansion. This SSD, while not user-accessible in a traditional sense, will likely provide an alternative method to expanding storage outside of Microsoft’s proprietary external offerings. For a look at the teardown in process, [Dimitris’] video from his Modern Vintage Gamer YouTube channel is below.
Continue reading “Xbox Series S Teardown Shows A Glimpse At The Future”