Global CALCnet: Your TI-83 Just Acquired Internet

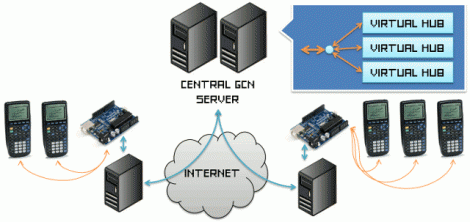
Global CALCnet lets you connect your TI graphic calculator to the Internet and use your favorite services like instant messaging and Internet relay chat. It also provides the option of worldwide multiplayer functionality for games ported to the device such as Scorched Earth and Tetris. We looked in on [Christopher Mitchell’s] CALCnet in December when it was being used to create local area networks with the adding machines. He’s taken that up a notch with a helping hand from Arduino. An Arduino board is used to connect the serial communications from the calculator to an Internet connected PC via the Arduino’s USB capabilities.

Think this will waste a lot of time in schools? Unlikely since an Internet connected computer is integral for this system to work. If you have a computer in front of you why waste time on the calculator network? Still, how hard would it be to build a WiFi module that can directly connect them to an access point? That may be a moot point as the Slashdot article that pointed us to global CALCnet also links to a calculator port of DOOM. It runs quite well, as you can see in the video after the break. This is a must-have for anyone owning a TI Nspire that can run it.

Continue reading “Global CALCnet: Your TI-83 Just Acquired Internet”

TI Evalbot Development Under Linux

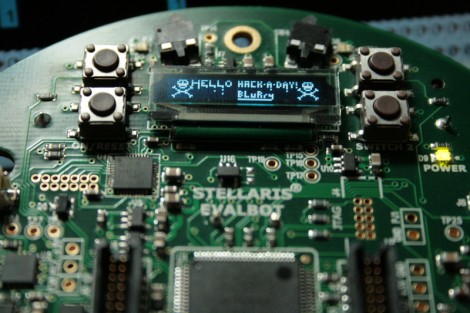
We have some beefs about how Texas Instruments does things, the biggest of which is their lack of support for development under Linux operating systems. But if they build it, someone will try to get Linux involved in one form or another. This time around, [BLuRry] put together a guide to developing for the Evalbot under Linux. He got a shove in the right direction from the code package that went along with that nunchuck-controlled Evalbot. Picking apart that example to the bare essentials he wrote up the process of setting up the cross-compiling toolchain in a virtual machine so as not to clutter your system. From there he details how to set up and use Eclipse when starting a new project. What what did he choose for a Hello World experience? Well a plain “Hello World” was first but right on its heels is the “Hello Hack-A-Day” seen above. So if you’ve got one of these on hand get out there and start coding for it.

What Development Board To Use?

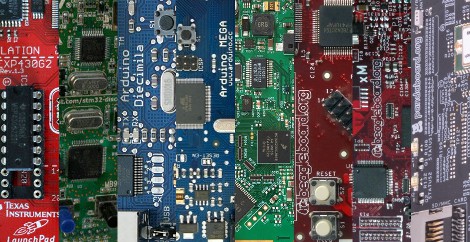
Here at Hackaday, we see microcontroller based projects in all states of completion. Sometimes it makes the most sense to design systems from the ground up, and other times when simplicity or a quick project completion is desired, pre-built system boards are a better choice. We have compiled a list of boards that we commonly see in your submitted projects, split up by price range and with a little detail for reference.

After reading our list, sound off in the comments or on this forum post, and we may include your board in a follow-up guide at a later date. We will also be giving away 10 Hackaday stickers to the most insightful, the most original, and most useful advice given on the forum, so if you haven’t registered yet, now would be a perfect time. Winners of the sticker giveaway will be selected from the forum thread, and the final decision for prizes will be judged by the wit and whim of the Hackaday writing team. More prize details to follow in the thread. Read on for our guide based on past project submissions.

Continue reading “What Development Board To Use?”

Evalbot Nunchuck Control

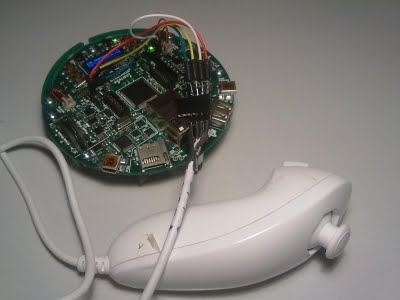
[Martin] got his evalbot recently and wanted to try controlling it with his Wii nunchuck. After some trial and error, he finally got it working. He’s shown that controlling the bot with the nunchuck was actually pretty simple, but there are some other tips that could be pretty helpful in the process. One was the fact that the point where he’s taking power for the nunchuck could easily be shorted on the motor. He wrapped his in tape, but we could see this little bug pestering us for a while before we figured out what it was.  You can download his code and see his build process on his site. Be sure to catch the video of it working in both accelerometer and joystick mode after the break.

Continue reading “Evalbot Nunchuck Control”

Hands-on With EZ430-F2013

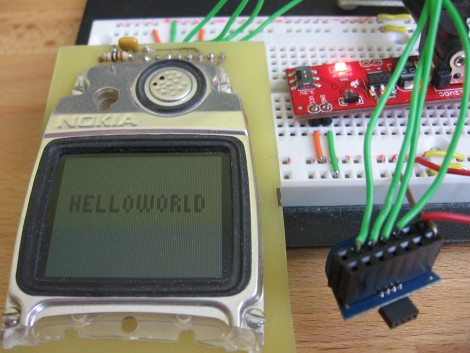
At the beginning of the Month we came across a coupon code for a free eZ430-F2013 development stick. TI has given these things now and again so we took the opportunity to acquire one. It arrived yesterday and we’ve spent just a bit of time looking it over. Above you can see the first project completed; Hello World on a salvaged Nokia cell phone screen. Join us after the break for our thoughts on the device, as well as more pictures and details.

Continue reading “Hands-on With EZ430-F2013”

Peer Network Using Graphing Calculators

These calculators are networked together, able to pass information and play games on a multi-screen playing field. All of this is thanks to [Christopher Mitchell’s] work on a package called CalcNet. This networking software takes advantage of [Christopher’s] shell and GUI for TI calculators called Doors CS. To demonstrate the high reliability and throughput of his network he wrote NetPong, a multi-calculator version of the popular game that you can watch in a clip after the break.

This is definitely an instance where asking ‘why?’ is the wrong question. We’re more interested in the how, a question you can answer for yourself by reading the whitepapers he provided in both of the links above. [Christopher] knows what he’s doing, he proved that with his face-recognizing augmented reality.

Continue reading “Peer Network Using Graphing Calculators”

Reading A Digital Caliper With A Microcontroller

[Maris] wanted a way to read measurements from a digital caliper electronically. He ended up using the TI Launchpad to accomplish this, but not all of the necessary hardware is seen above. The calipers cost him about $7 on eBay, and they have four interface pins which made this hack quite a bit easier. After a bit of probing he established their purpose; voltage, ground, clock and data. A bit of scoping proved that data was being sent in 24-bit burst in packets that are quite easy to decode.

From there it’s just a matter of interfacing with a microcontroller. The chip he’s using is an MSP430G2231 that runs at 3.3V, but the caliper’s logic high is only 1.5v. By constructing an adapter using a pair of transistors, the data and clock from the calipers are able to pull pins on the MSP430 low. This is collected and analyzed by [Maris’] firmware and can be read on a PC using a terminal program.

[Thanks Chris]