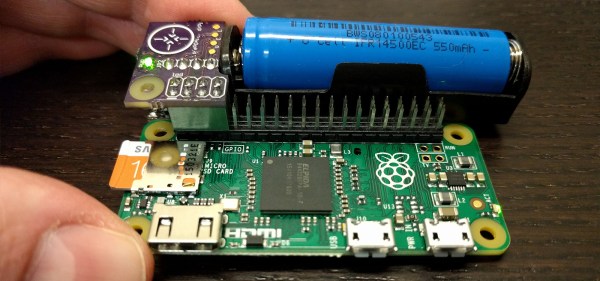
Knocking a microcontroller into sleep mode and waking it up on demand or in intervals is common practice in many low power applications, enabling devices to stay in operation for years on a single coin cell battery. Since there are tons of applications where you might want to do similar things with a Raspberry Pi, [Patrick Van Oosterwijck] created the LiFePO4wered/Pi. The module that snaps on to eight GPIO pins of a Pi, extending it by a long life LiFePO4 battery, a charging regulator, and a proper power management. Obviously, it also makes a great UPS.
 [Patrick] realized this project by expanding his already available and equally useful LiFePO4wered/USB charging regulator module by a low power MSP430G2131 microcontroller and a load switch. A daemon on the Raspberry Pi speaks to the module over I2C, allowing you to schedule a wake-up timer, let your Pi autoboot after a power outage or just read out the current battery voltage through a command line tool. Once the Pi is safely shut down, the microcontroller will also go to sleep, resulting in a standby current of 8 uA for the whole system. Together with the 500 mAh LiFePo4 cell, that’s theoretically low enough to send your Pi-ncess into a seven-year-long sleep.
LiFePO4wered/Pi is not only good for sleeping, though. [Patrick’s] runtime tests show, that the 500 mAh cell will power a Raspberry Pi Zero and a WiFi dongle for about two hours. Because the Raspberry Pi and many USB peripherals won’t complain when only 3.2 V are present on the VBUS, [Patrick] was able to squeeze out even more runtime by dismissing the boost converter from the design and driving the Pi directly from the battery voltage. If that worries you, you can either read a detailed explanation on why that works so well or just have a look at the more compliant 5 V version.
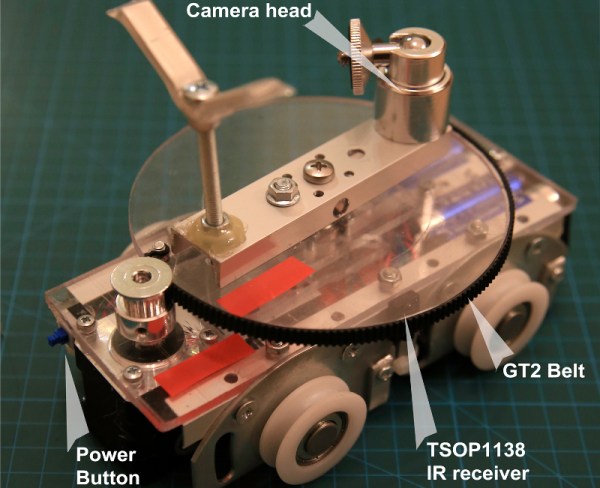
 Eventually, [Patrick] used his module to create a Raspberry Pi time-lapse camera. A little script lets the Pi take a picture on boot up, set a wake-up timer and go back to sleep again. Safely enclosed in a waterproof electric box and deployed into the wild, the camera took 120 pictures on a single charge.
We’re sure the module will find it’s way into many cool projects and we’re counting the hours until we can get one in [Patrick’s] tindie store. Until then, enjoy the time-lapse video:


 First person video – between Google Glass, GoPro, and other sports cameras, it seems like everyone has a camera on their head these days. If you’re a surfer or skydiver, that might make for some awesome footage. For the rest of us though, it means hours of boring video. The obvious way to fix this is time-lapse. Typically time-lapse throws frames away. Taking 1 of every 10 frames results in a 10x speed increase. Unfortunately, speeding up a head mounted camera often leads to a video so bouncy it can’t be watched without an air sickness bag handy. [Johannes Kopf], [Michael Cohen], and [Richard Szeliski] at Microsoft Research have come up with a novel solution to this problem with