Build Cheap Panning Camera Mounts For Time Lapse Photography

diy_ikea_panning_camera_mount

Panning time lapse photographs always look pretty cool, but there’s that whole “making a panning time lapse” rig that gets in the way of all the fun. [Getawaymoments] put together a tutorial quite a while ago showing how to use Ikea egg timers as cheap and dispensable panning units, and has updated his instructions with a pair of refreshed designs.

He stumbled upon two new egg timers at Ikea, the Stam and Ordning, which sell for $1.99 and $5.99 respectively. The Stam is a small plastic model that can be fitted with a set screw, to which most cameras can be mounted. A small bushing can also be installed in the timer’s plastic base, allowing it to be mounted on any standard tripod.

The Ordning is a beefier unit capable of withstanding more abuse than its plastic brethren, hence the larger price tag. A few minutes on the drill press makes room for a metal bushing, allowing the Ordning to be installed on any tripod as well.

The hack isn’t high tech, but we’re impressed with the results he was able to get with these simple kitchen timers. For the cost and time required to build them, they are sure to give most other panning rigs a run for the money.

Continue reading to see a short instructional video demonstrating how to build one of your own.

[via Make]

Continue reading “Build Cheap Panning Camera Mounts For Time Lapse Photography”

[Bunnie] Mods Chumby To Capture Epic Time-lapse Video

When [Bunny] moved into his apartment in Singapore he was surprised to find that a huge building project was just getting started on the other side of the block. Being the curious sort, he was always interested in what was going on, but just looking in on the project occasionally wasn’t enough. Instead, he set up a camera and made a time-lapse video.

This isn’t hard, you can find a slew of intervalometer projects which we’ve covered over the years. But being that [Bunnie] is one of the designers of the Chumby One, and frequently performs hacks on the hardware, it’s no surprise that he chose to use that hardware for the project.

Luckily, he’s sharing the steps he used to get Chumby capturing images. He mentions the hardest part is finding a compatible USB camera. If you have one that works with a 2008 Linux kernel you should be fine. The rest is done with shell scripts. Mplayer captures the images when the script is called from a cron job. Once all the frames are captured, he used mencoder to stitch the JPEGs into a movie. See the result after the break.

Continue reading “[Bunnie] Mods Chumby To Capture Epic Time-lapse Video”

Using An MSP430 For Time Lapse Photography

vistaquest_keychain_timelapse_msp430

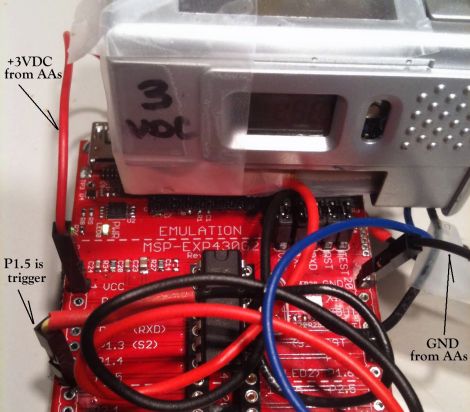
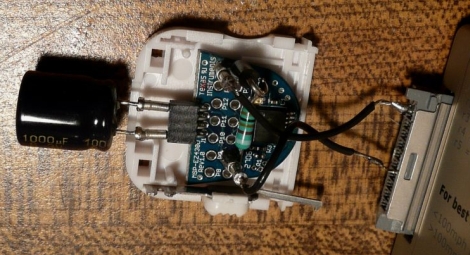
Hackaday reader [onefivefour] had an old VistaQuest VQ1005 keychain camera kicking around, and wanted to do something useful with it. A while back he hooked up a 555 timer and did a bit of time lapse photography, but he wanted more control over the process. Specifically, he desired the ability to tweak the delay between shots in a more granular fashion, as well as way to prevent the VistaQuest from going to sleep after sitting idle for 60 seconds.

His weapon of choice to get this task done was an MSP430, since the microcontroller can be found quite cheaply, and because it is relatively easy to use. He added a few header pins to the LaunchPad board wiring them up to the camera’s trigger as well as the on/off switch. When the wire connected to the trigger is pulled low, the camera snaps a picture. The wire connected to the on/off switch is always held low, ensuring that the camera is on and ready to go whenever it’s time to take a shot.

It’s a relatively simple project, but definitely useful. While there are many ways to build an intervalometer, the MSP430 is a great platform to use, especially for beginners.

Stick around to see a quick video [onefivefour] put together, showing off his time lapse rig’s capabilities.

Continue reading “Using An MSP430 For Time Lapse Photography”

Two-axis Panning Time Lapse Rig Built From Lego

2_axis_lego_timelapse_dolly

[Jochem] wrote in to share a neat time lapse camera dolly he constructed out of Lego bricks. He is a big fan of the two-axis panning time lapse effect where the camera moves while recording images. He figured it would be easy enough to construct one of his own, so he dug out his pail of Lego and got to work.

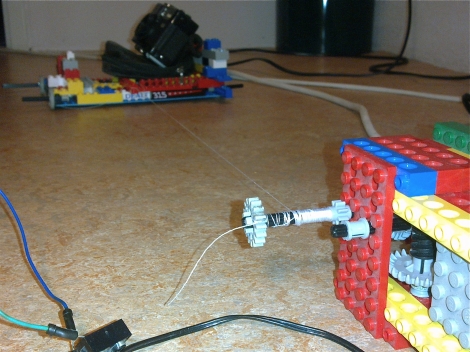
The rig consists of a stationary motor platform which pulls a movable sled using a simple gear and string. The motor platform is controlled by an Arduino, which pulls the movable sled along every so often, snapping pictures along the way. [Jochem’s] Nikon D80 supports shutter release via IR, so he programmed the Arduino to send a quick IR pulse each time it has finished moving the dolly.

The rig looks like it works pretty well as you can see by the video below, but [Jochem] says that it still needs a bit of work. We just can’t wait to see what other time lapse movies he puts together once he finds an “interesting” time lapse subject.

Continue reading “Two-axis Panning Time Lapse Rig Built From Lego”

If You’re Photographing And You Know It Clap Your Hands

If you’ve ever tried to take pictures of yourself you’ll know that it can be a pain. It’s especially hard to get that perfect shot of your godly features when you’re out of breath from sprinting across the room. OK, yes, they have remote controls for that. But what if you lost your remote or you just don’t want to have to carry it? [LucidScience] put together a sweet, um, “hands free” alternative.

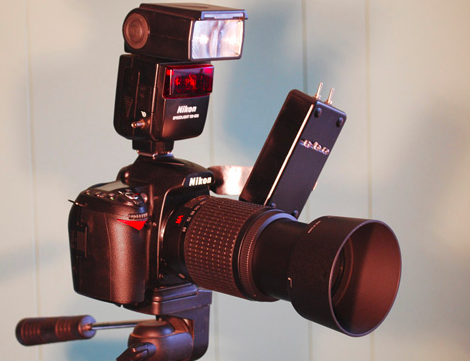
Essentially this hack emulates the IR signals sent by a Nikon remote, either to take a picture right away or to take time lapse photographs at regular intervals. We’ve seen a similar time lapse remote using an arduino before and a really thorough one using an AVR, but they don’t take the same approach as [LucidScience]’s design in terms of monitoring a microphone input for triggering. The project includes several status LEDs and adjustments for ambient noise and triggering, and it can be mounted to the camera body. We wonder how many of the Nikon’s features could be controlled using clap encoding, and how detailed your timing would need to be to have a kind of hand-made (get it?) pulsetrain syntax.  You’d probably need to have world record clap skills.

Check out the demo vid after the break.

Continue reading “If You’re Photographing And You Know It Clap Your Hands”

Time-lapse Camera Dolly

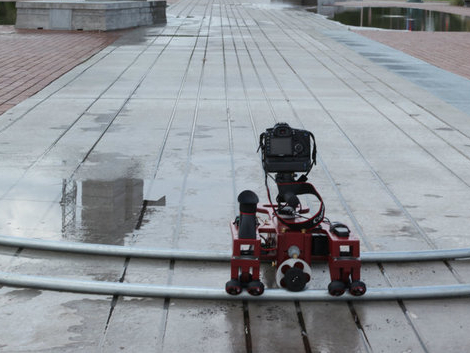
[Brian Grabski] was asked by a friend to design and build a dolly that would move a camera during a time-lapse sequence. Above you can see the product of his toils, and the videos after the break show off the parts that went into the design and showcase effectiveness of the build.

The dolly is designed to ride on a pair of tubular rails. These can be bent to match any desired path and the dolly will have no problem following it thanks to two features. First, the triad of skateboard wheels on each of the three corners are mounted on a swivel bearing that allows them to rotate without binding. The other piece of the puzzle is a set of drawer slides that let the third support move perpendicular to the other two sets of rollers. A motor drives a geared wheel to move the dolly along the track with speed adjustments courtesy of the motor controller. There’s also a failsafe that will shut the system down when it runs out of track, protecting that fancy piece of hardware taking the pictures.

We’ve seen timelapse equipment that moves the camera in the past, but those hacks usually involve rotating the camera along and axis. This track-based setup is a well executed tool useful at all levels of photography. We can’t wait to see the arch-based dolly that is teased at the end of the demo video.

Continue reading “Time-lapse Camera Dolly”

Full-featured AVR Time-lapse

This time-lapse photo trigger was built [Lukasz Goralczyk]. It is controlled by an ATmega168 and we were surprised to read that it uses about 12k of code. Curious about what takes up that much space, we were impressed to see all the features demonstrated in the video after the break. The small device, running on two AA batteries, has a well-designed user interface displayed on a 3V character LCD that is navigated with a clickable rotary encoder.

It isn’t the smallest intervalometer we’ve ever seen, but it deserves respect for the features packed into a diminutive form-factor.

Continue reading “Full-featured AVR Time-lapse”