Tiny Trackpad Fits On Ergonomic Keyboard

Cats are notorious for interrupting workflow. Whether it’s in the kitchen, the garden, or the computer, any feline companion around has a way of getting into mischief in an oftentimes disruptive way. [Robin] has two cats, and while they like to sit on his desk, they have a tendency to interrupt his mouse movements while he’s using his Apple trackpad. Rather than solve the impossible problem of preventing cats from accessing areas they shouldn’t, he set about building a customized tiny trackpad that integrates with his keyboard and minimizes the chance of cat interaction.

The keyboard [Robin] uses is a split ergonomic keyboard. While some keyboards like this might use a standard USB connection to join the two halves, the ZSA Voyager uses I2C instead and even breaks the I2C bus out with a pogo pin-compatible connector. [Robin] originally designed a 3D-printed integrated prototype based on a Cirque trackpad that would clip onto the right side of the keyboard and connect at this point using pogo pins, but after realizing that the pogo pin design would be too difficult for other DIYers to recreate eventually settled on tapping into the I2C bus on the keyboard’s connecting cable. This particular keyboard uses a TRRS connector to join the two halves, so getting access to I2C at this point was as simple as adding a splitter and plugging in the trackpad.

With this prototype finished, [Robin] has a small trackpad that seamlessly attaches to his ergonomic keyboard, communicates over a standard protocol, and avoids any unwanted cat-mouse action. There’s also a build guide if you have the same keyboard and want to try out this build. He does note that using a trackpad this small involves a bit of a learning curve and a larger-than-average amount of configuration, but after he got over those two speed bumps he hasn’t had any problems. If trackpads aren’t your style, though, with some effort you can put a TrackPoint style mouse in your custom mechanical keyboard instead.

Inputs Of Interest: Curves Are The Key To My Type

While I may have fallen in love aesthetically with the ErgoDox I built, beauty is only skin deep. And that’s funny, because you can see right through it. But the thing is, it’s just too big and knife-edged to be my daily driver. I keep missing the space bar and thumb-thumping the acrylic wasteland between the thumb cluster and the mainland.

The point was to make a nice portable keeb, even though all my trips for he foreseeable future are going to be limited to the bed or the couch. But it has to be comfortable, and the ErgoDox in its present state simply is not long-term comfortable. I’d take it over a rectangle any day, but it would probably end up being a half day.

Ergo isn’t so much a preference for me as it is a necessity at this point. I feel like I can honestly say that I might not be typing these words to you now if it weren’t for the Kinesis. I don’t want my fingers to do unnecessary legwork, or downgrade from the quality of typing life that concave keys have afforded me. So let me just say that using the ErgoDox made me want to build a dactyl even more than before.

Continue reading “Inputs Of Interest: Curves Are The Key To My Type”

Inputs Of Interest: ErgoDox Post-Mortem

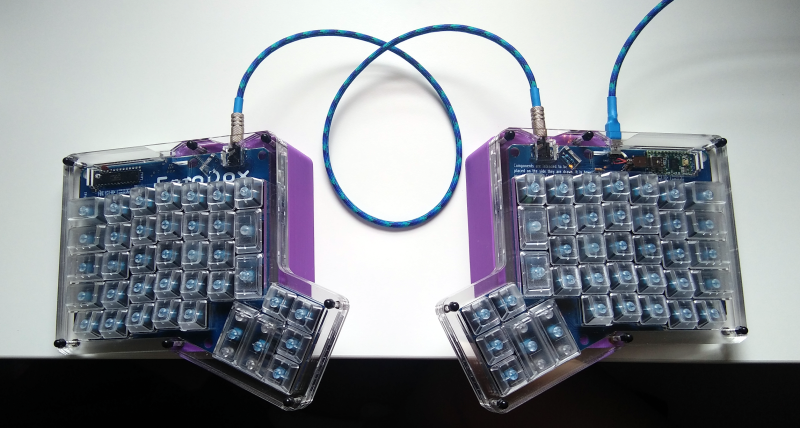
In the last installment, I told you I was building an open-source, split, ortholinear keyboard called the ErgoDox. I’m doing this because although I totally love my Kinesis Advantage, it has made me want to crack my knuckles and explore the world of split keyboards. Apparently there are several of you who want to do the same, as evidenced by your interest in the I’m Building an ErgoDox! project on IO. Thank you!

Well boys and girls, the dust has settled, the soldering iron has cooled, and the keycaps are in place. The ErgoDox is built and working. Now that it’s all said and done, let me tell you how it went. Spoiler alert: not great. But I got through it, and it keyboards just like it’s supposed to. I’m gonna lay this journey out as it happened, step by step, so you can live vicariously through my experience.

Continue reading “Inputs Of Interest: ErgoDox Post-Mortem”

Bluetooth Takes Keyboard From DIY To Super Fly

They say you should never cheap out on anything that comes between you and the ground, like tires, shoes, and mattresses. We would take that a little further into the 21st century and extend it to anything between you and work. In our case, ‘buy nice or buy twice’ includes keyboards and mice.

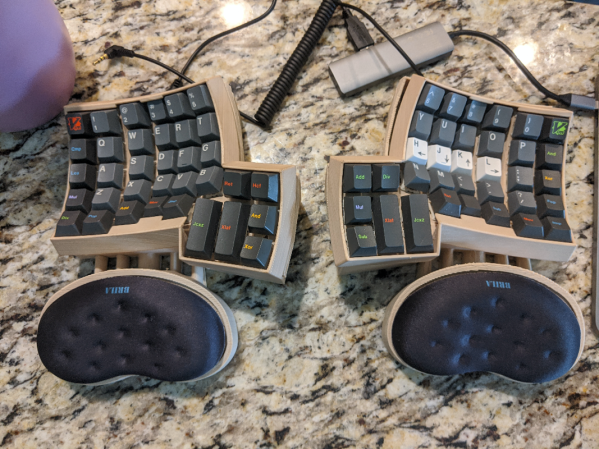
[Marcus Young] is a fan of ortholinear ergonomic comfort, but not of cables. He gave [adereth]’s dactyl keyboard some wings by using a Bluetooth micro, and the Pterodactyl was born. Of course, the two halves still use a TRRS cable to communicate, and wires are required to charge batteries, but it’s the principle of the thing.

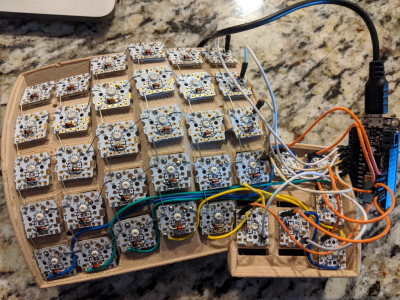
That’s not all [Marcus] did to make the dactyl his own — it also has a modified full-fat base that gives him all the room in the world to wire up the keyswitch matrix compared to the original streamlined design.

Instead of the usual Teensy, Pro Micro, or Proton-C, the pterodactyl has a Feather 32u4 in its belly. [Marcus] is clacking on Holy Panda switches which we’ve been meaning to try, and individual PCBs for each switch, which seems like it might negate gluing the switches in place so they survive through keycap changes. Check out [Marcus]’ write-up to see what he learned during this build.

This isn’t the first modified dactyl we’ve seen flying around here, and it won’t be the last. Here’s one with a dual personality — both halves can work together or alone.

Via r/mk

Patching Into Android Music Control

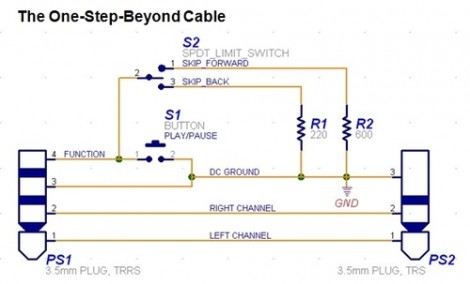
Here’s a look at the TRRS cable that Android phones use. [Rich Kappmeier] want to control the music player on his Nexus One while driving. It’s not necessarily a safe endeavor if you’re staring at the screen and poking away with one hand while trying to stay in your lane. A little bit of research helped him figure out how the hardware in a headphone controller worked and he decided to incorporate that into a connector cable for the car.

The control signals rely on a specific resistance between the TRRS function ring and ground. Once he worked out the chart above and targeted the correct resistance values he built a rocker switch for Fast Forward and Reverse, as well as a Play/Pause button into the connector cable. You should be able to use this for more than just music control. Take a look at our Android Development tutorial and see what else you can come up with.

[Thanks Alastair]