Digital White/Black Boards or “Smart Boards” are very useful in modern classrooms, but their high cost often makes it difficult to convince administrators from loosening their purse strings. Cooper Union’s 2nd annual HackCooper event in New York wanted students to design and build hardware and software projects that both solve real problems and spark the imagination. At the 24 hour hackathon, the team of [harrison], [david] and [caleb] decided to put together a low-cost and simple solution to digitizing classroom black board content.
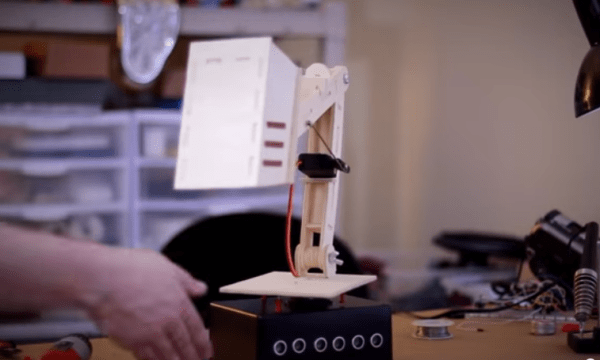
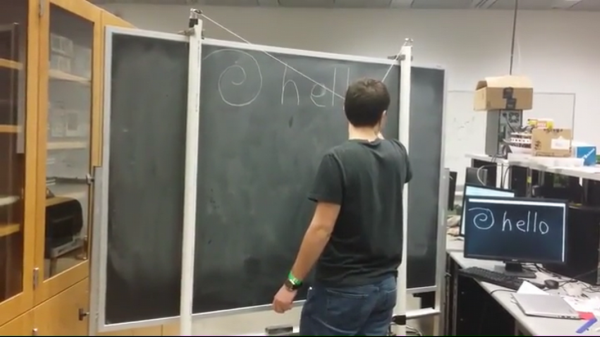
A chalk-holder is attached to two strings, each connected over a pulley to a weight. The weights slide inside PVC pipes at the two sides of the black board. Ultrasonic sensors at the bottom of each tube measure the distance to the weights. The weights sit in static equilibrium, so they serve the purpose of keeping the string taut without negatively interfering with the writer.
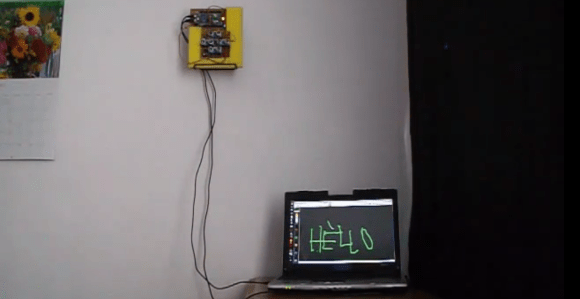
With a couple of calibration points to measure the extent of displacement of each weight, board width can be determined, making it easy to adapt to different sizes of boards. Once calibrated, the system can determine position of the chalk over the board based on some trigonometrical calculations. Since they had just 24 hours to hack the system together, they had to use a hand operated radio with a couple of buttons to provide user control. Pressing the “Write” button starts transmitting chalk movements to the digital screen. A second button on the radio remote serves to “Erase” the digital screen. After receiving the chalk position data, they had to do a fair amount of processing to eliminate noise and smooth out the writing on the digital screen.
A server allows the whole class to receive the chalk board data in real time. After each “Erase” command, the chalk board state is saved and logged on the server, thus allowing previous content to be viewed or downloaded. If only text is written, optical character recognition can be used to further digitize the content.
What makes the project really useful is the low cost. The sensors cost a dollar. The other parts – PVC pipe, weights/pulleys, Arduino and the Radio key fob – were all bought for under 40 dollars. For some additional cost (and maybe more time in their case) they could have automated the detection of when the chalk was actually doing the writing. The team have made their code available on Github. For a Chalk board at the other end of the cost spectrum, check this one out. Video below.