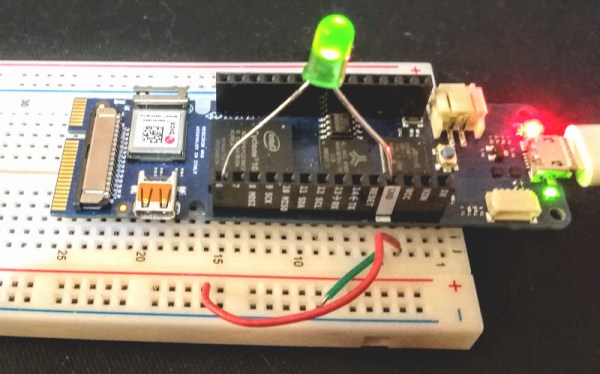
Hands On With The Arduino FPGA

All of the tools you need to work with the FPGA Arduino — the Vidor — are now in the wild!

We reported earlier that a series of French blog posts finally showed how all the pieces fit together to program the FPGA on the Arduino MKR4000 Vidor board. Of course, I wasn’t content to just read the Google translation, I had to break out the board and try myself.

I created a very simple starter template, a tool in C to do the bitstream conversion, required, and bundled it all together in one place. Here’s how you can use my starter kit to do your own FPGA designs using the Vidor. I’m going to assume you know about FPGA basics and Verilog. If you don’t, why not check out the FPGA boot camps first?

The first thing you’ll want to do is grab my GitHub repo. You’ll also need the Arduino IDE (a recent copy) and Intel’s Quartus software. Inside, you’ll find three directories, two of which contain slightly modified copies of original Arduino files. But before you start digging in, let’s get the high-level overview of the process.

Continue reading “Hands On With The Arduino FPGA”

Logic Analyzers For FPGAs: A Verilog Odyssey

Sometimes you start something simple and then it just leads to a chain reaction of things. I wanted to write a post about doing state machines in Verilog and target the Lattice iCEstick board that we often use for quick FPGA projects. That led to a small problem: how do you show what’s going on inside? In this series of posts, we’ll look at building a logic analyzer into an FPGA to help debug itself, instantiating memory, and — finally — state machines.

Logic analysis is a common tool in FPGA development. If you use Altera, they have Signal Tap available that lets you build a simple logic analyzer into the FPGA that talks back to your PC. Xilinx has ChipScope which is about the same. Sometimes those tools either cost money or are limited in some way in the free versions. I have my sights set on a tool that can be used with the Lattice architecture.

Sure, you can ship data out on I/O pins and then use a regular logic analyzer to pick up the data. But that isn’t very handy. So I thought about writing a generic logic analyzer component. But before I did I decided to check to see if someone else had already done it.

Spoiler alert: they did, but I wanted something a little different so I wound up extending the program significantly. What I wound up with is a reasonably portable Verilog logic analyzer that can produce traces like this one:

Keep in mind, this isn’t a simulation. This is real data pulled off the actual FPGA. Yes, that is gtkwave producing the plots, but the input data is a VCD file generated from samples taken inside the FPGA.

Continue reading “Logic Analyzers For FPGAs: A Verilog Odyssey”

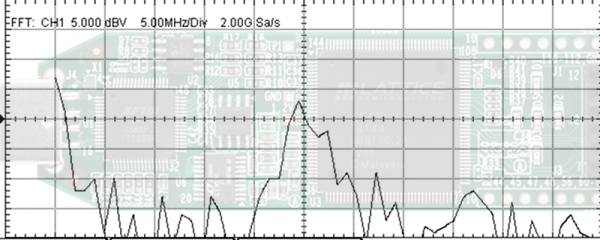
ICEstick Makes Terrible Radio Transmitter

We’ve done a lot of posts on how to use the Lattice iCEstick ranging from FPGA tutorials to how to use one as a logic analyzer. If you picked up one of these inexpensive boards here’s a fun little experiment. [T4D10N] saw a project [Hamster] put together to send SOS on the FM radio band using nothing but an FPGA. [Hamster used a Spartan], so he decided to do the same trick using an iCEstick with the open source IceStorm tools.

You might be surprised that the whole thing only takes 53 lines of Verilog — less if you cut out comments and whitespace. That’s because it uses the FPGA’s built-in PLL to generate a fast clock and then uses a phase accumulator divider to produce three frequencies on the FM radio band; one for a carrier and two for a tone, spaced 150 Hz apart. The result is really frequency shift keying but you can hear the results on an FM radio.

Continue reading “ICEstick Makes Terrible Radio Transmitter”

Learn Verilog In Your Browser

We are big fans of tools in the browser for education. You have a consistent environment maintained by someone else, you don’t have to install anything, and you can work from any computer you happen to find yourself. The HDLBits site has a great set of Verilog “exams” that would be a big help to anyone trying to learn or brush up on their Verilog skills.

The site offers a range of topics that go from the silly (output a constant 1 or 0) to full-blown state machines and testbenches. The site isn’t tutorial in nature, instead it offers a problem, an optional hint, and an editing window with some code already in place. You add your code and hit submit. Behind the scenes, the site runs Intel Quartus and Modelsim to test your work. It will either show you the results or tell you that you failed.

Continue reading “Learn Verilog In Your Browser”

How To Add UART To Your FPGA Projects

Being able to communicate between a host computer and a project is often a key requirement, and for FPGA projects that is easily done by adding a submodule like a UART. A Universal Asynchronous Receiver-Transmitter is the hardware that facilitates communications with a serial port, so you can send commands from a computer and get messages in return.

Last week I wrote about an example POV project that’s a good example for learn. It was both non-trivial and used the board’s features nicely. But it has the message hard coded into the Verilog which means you need to rebuild the FPGA every time you want to change it. Adding a UART will allow us to update that message.

The good news is the demo is open source, so I forked it on GitHub so you can follow along with my new demo. To illustrate how you can add a UART to this project I made this simple plan:

Continue reading “How To Add UART To Your FPGA Projects”

Visualizing Verilog Simulation

You don’t usually think of simulating Verilog code — usually for an FPGA — as a visual process. You write a test script colloquially known as a test bench and run your simulation. You might get some printed information or you might get a graphical result by dumping a waveform, but you don’t usually see the circuit. A new site combines Yosys and a Javascript-based logic simulator to let you visualize and simulate Verilog in your browser. It is a work in progress on GitHub, so you might find a few hiccups like we did, but it is still an impressive piece of work.

Continue reading “Visualizing Verilog Simulation”

Learn FPGA With This Persistence Of Vision Hack

Everybody wants to give FPGA development a try and here’s a great way to get into it. You can build your own Persistence of Vision display using a $30 dev board. It’s a fun project, and you’ll learn quite a bit about designing for an FPGA, as well as using the Quartus design software.

The inspiration for this article comes from [vpecanins] who did an example project where you wave the board back and forth and a message appears in mid air. This uses the MAX1000, a pretty powerful yet odd FPGA board for about $30. It contains an Intel MAX10 (when did Intel start making FPGAs? Remember, Intel bought Alterra back in 2015). I find the board odd because it also holds an accelerometer that you can talk to using SPI. That’s a little strange for a generic FPGA board, but paired with eight on-board LEDs it’s perfect for this demo.

Since I didn’t find any written documentation for this example, I thought we’d help out and take you on a step-by-step tour of the project. What’s more, in a future installment, I’ll show you how to make some significant changes to the tutorial that will make it even more practical as a base for other projects.

Continue reading “Learn FPGA With This Persistence Of Vision Hack”