Interactive Project Teaches Lessons About Electromagnets And Waves

Whether you’re a kid or a nerdy adult, you’ll probably agree that the interactive exhibitions at the museum are the best. If you happened to get down to the Oregon Science Festival in the last couple of years, you might have enjoyed “Catch The Wave!”—a public education project to teach people about electromagnets and waves. Even better, [Justin Miller] has written up how he built this exciting project.

Catch The Wave! consists of four small tabletop cabinets. Each has physical controls and a screen, and each plays its role in teaching a lesson about electromagnets and sound waves, with a context of audio recording and playback.

The first station allows the user to power up an electromagnet and interact with it using paper clips. They can also see the effect it has on a nearby compass. The second illustrates how reversing current through an electromagnet can reverse its polarity, and demonstrates this by using it to swing a pendulum. The third station then ties this to the action of a speaker, which is effectively a fancy electromagnet—and demonstrates how it creates sound waves in this way. Finally, the fourth station demonstrates the use of a microphone to record a voice, and throws in some wacky effects for good fun.

If you’ve ever tried to explain how sound is recorded and reproduced, you’d probably have loved to had tools like these to do so. We love a good educational project around these parts, too.

Mechanical Logic Gates With Amplification

One of the hardest things about studying electricity, and by extension electronics, is that you generally can’t touch or see anything directly, and if you can you’re generally having a pretty bad day. For teaching something that’s almost always invisible, educators have come up with a number of analogies for helping students understand the inner workings of this mysterious phenomenon like the water analogy or mechanical analogs to electronic circuits. One of [Thomas]’s problems with most of these devices, though, is that they don’t have any amplification or “fan-out” capability like a real electronic circuit would. He’s solved that with a unique mechanical amplifier.

Digital logic circuits generally have input power and ground connections in addition to their logic connection points, so [Thomas]’s main breakthrough here is that the mechanical equivalent should as well. His uses a motor driving a shaft with a set of pulleys, each of which has a fixed string wrapped around the pulley. That string is attached to a second string which is controlled by an input. When the input is moved the string on the pulley moves as well but the pulley adds a considerable amount of power to to the output which can eventually be used to drive a much larger number of inputs. In electronics, the ability to drive a certain number of inputs from a single output is called “fan-out” and this device has an equivalent fan-out of around 10, meaning each output can drive ten inputs.

[Thomas] calls his invention capstan lever logic, presumably named after a type of winch used on sailing vessels. In this case, the capstan is the driven pulley system. The linked video shows him creating a number of equivalent circuits starting with an inverter and working his way up to a half adder and an RS flip-flop. While the amplifier pulley does take a minute to wrap one’s mind around, it really helps make the equivalent electronic circuit more intuitive. We’ve seen similar builds before as well which use pulleys to demonstrate electronic circuits, but in a slightly different manner than this build does.

Continue reading “Mechanical Logic Gates With Amplification”

A Classroom-Ready Potentiometer From Pencil And 3D Prints

If you need a potentiometer for a project, chances are pretty good that you’re not going to pick up a pencil and draw one. Then again, if you’re teaching someone how a variable resistor works, that old #2 might be just the thing.

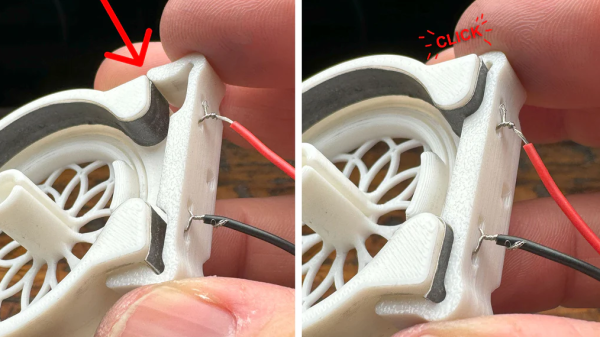
When [HackMakeMod] realized that the graphite in pencil lead is essentially the same thing as the carbon composition material inside most common pots, the idea for a DIY teaching potentiometer was born. The trick was to build something to securely hold the strip while making contact with the ends, as well as providing a way to wipe a third contact across its length. The magic of 3D printing provided the parts for the pot, with a body that holds a thin strip of pencil-smeared paper securely around its inner diameter. A shaft carries the wiper, which is just a small length of stripped hookup wire making contact with the paper strip. A clip holds everything firmly in place. The video below shows the build process and the results of testing, which were actually pretty good.

Of course, the construction used here isn’t meant for anything but demonstration purposes, but in that role, it performs really well. It’s good that [HackMakeMod] left the body open to inspection, so students can see how the position of the wiper correlates to resistance. It also makes it easy to slip new resistance materials in and out, perhaps using different lead grades to get different values.

Hats off to a clever build that should be sure to help STEM teachers engage their students. Next up on the lesson plan: a homebrew variable capacitor.

Continue reading “A Classroom-Ready Potentiometer From Pencil And 3D Prints”

Learning To Desolder Gracefully

When you’re just learning to sketch, you use graphite. Why? It’s cheap, great at training you to recognize different shades, and most of all, it’s erasable. When you’re learning, you’re going to make mistakes, and un-making them is an important part of the game. Same goes for electronics, of course, so when you’re teaching someone to solder, don’t neglect teaching them to desolder.

I want these!

We could argue all day about the best ways of pressing the molten-metal undo button, but the truth is that it’s horses for courses. I’ve had really good luck with solder braid and maybe a little heat gun to pull up reluctant SOIC surface-mount chips, but nothing beats a solder sucker for clearing out a few through-holes. (I haven’t tried the questionable, but time-tested practice of blasting the joint with compressed air.)

For bulk part removal, all you really have to do is heat the board up, and there’s plenty of ways to do that, ranging from fancy to foolish. Low-temperature alloys help out in really tough cases. And for removing rows of pinheaders, it can help to add more solder along the row until it’s one molten blob, and then tap the PCB and watch the part — and hot liquid metal! — just drop out.

But the bigger point is that an important step in learning a new technique is learning to undo your mistakes. It makes it all a lot less intimidating when you know that you can just pull out the solder braid and call “do-over”. And don’t forget the flux.

Are Hackers Being Let Down In Education?

In my work for Hackaday over the years I have been privileged to interact with some of the most creative people I have ever met, I have travelled far more than I ever did when I toiled unseen in an office in Oxford, and I have been lucky enough to hang out in our community’s spaces, camps, and dives across Europe.

Among the huge diversity of skills and ideas though, it’s striking how many of us share similar experiences and histories that have caused us to find our people in rooms full of tools and 3D printers. One of these things I found surprising because I thought I was the only one; I never fit in with the other kids at school, I found much of the teaching incomprehensible and had to figure things out for myself. As an exercise recently I did a straw poll among some of my friends, and found that a significant majority had a similar experience. Clearly something must have gone badly wrong in the way we were being taught that so many of us could have been let down by our schooling, and maybe to understand the needs of our community it’s time to understand why.

Continue reading “Are Hackers Being Let Down In Education?”

Greeking Out With Arduinos

Learning a new language is hard work, but they say that the best way to learn something is to teach it. [Angeliki Beyko] is learning Greek, and what better way to teach than to build a vocabulary flash-card game from Arduinos, color screens, 1602 text screens, and arcade buttons? After the break, we have a video from the creator talking about how to play, the hardware she chose, and what to expect in the next version.

Pegboard holds most of the hardware except the color screens, which are finicky when it comes to their power source. The project is like someone raided our collective junk drawers and picked out the coolest bits to make a game. Around the perimeter are over one hundred NeoPixels to display the game progress and draw people like a midway game. Once invested, you select a category on the four colored arcade buttons by looking at the adjacent LCD screens’ titles. An onboard MP3 shield reads a pseudo-random Greek word and displays it on the top-right 1602 screen in English phonetics. After that, it is multiple choice with your options displaying in full-color on four TFT monitors. A correct choice awards you a point and moves to the next word, but any excuse to mash on arcade buttons is good enough for us.

[Angeliki] does something we see more often than before, she’s covering what she learned, struggled with, would do differently, and how she wants to improve. We think this is a vital sign that the hacker community is showcasing what we already knew; hackers love to share their knowledge and improve themselves.

Typing Greek with a modern keyboard will have you reaching for an alt-code table unless you make a shortcut keyboard, and if you learn Greek, maybe you can figure out what armor they wore to battle.

Continue reading “Greeking Out With Arduinos”

Gear Up Your Gear Knowledge With Gears

Gears are fairly straightforward way to couple rotational motion, and the physics topics required to understand them are encountered in an entry level physics classroom, not a university degree. But to really dig down to the root of how gears transfer motion may be somewhat more complex than it seems. [Bartosz Ciechanowski] put together an astonishingly good interactive teaching tool on gears, covering the fundamentals of motion up through multi-stage gear trains.

Illustrating the distance traveled at different points on the disc

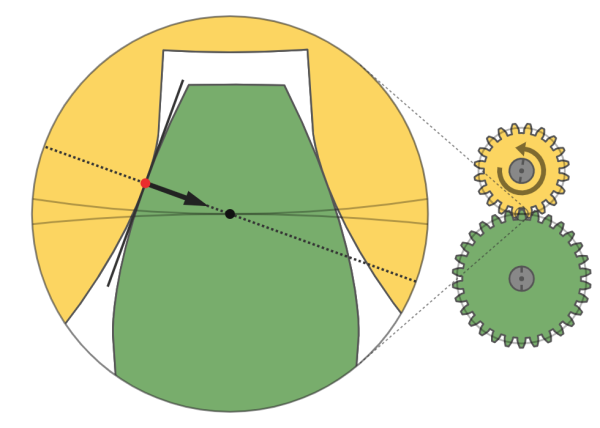
The post starts at the beginning – not “how to calculate a gear ratio” – but how does rotational motion work at all. The illustrations help give the reader an intuitive sense for how the rate of rotation is measured and what that measurement actually represents in the real world. From there [Bartosz] builds up to describing how two discs touching edge to edge transfer motion and the relationship of their size on that process. After explaining torque he has the fundamentals in place to describe why gears have teeth, and why they work at all.

Well written explanatory copy aside, the real joy in this post is the interactivity. Each concept is illustrated, and each illustration is interactive. Images are accompanied by a slider which lets you adjust what’s shown, either changing the speed of a rotating gear or advancing the motion of two teeth interlocking. We found that being able to move through time this way really helped form an intuitive understanding of the concepts being discussed. This feels like the dream of interactive multimedia textbooks come to life.