Throw FreeCAD Some Curves

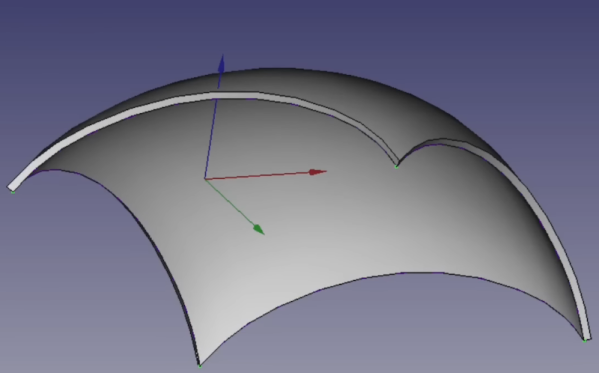
[Mango Jelly] got a question from someone trying to model a phone box with a complex curved roof. We have to admit that when we saw it, we knew it would be hard to model well. Naturally, there are several ways it could be one, but [Mango Jelly] used the curves workbench in FreeCAD to produce a wireframe of the shape, and you can see how that works in the video below.

The curve bench didn’t sound familiar to us, and that’s because it is an add-on workbench. He starts with a sketch of a curve, constrained to be symmetrical. Then the draft workbench allowed a rotation to convert the curve into a nice skeleton of the curved roof.

The curves workbench can create a Gordon surface over that skeleton. You can extrude that into a solid object. There are still some details to add, though, and you’ll see how each part of the roof takes shape.

Watching videos like this reminds us that we use a small fraction of what FreeCAD can do. You’ll probably pick up at least one tip from this video. If you need a quick basic tutorial, try the one from [NovaSpirit]. Or, try a longer one.

Continue reading “Throw FreeCAD Some Curves”

A Game Boy built out of copper wires

The Wonderfully Weird Wireframe Game Boy That Actually Works

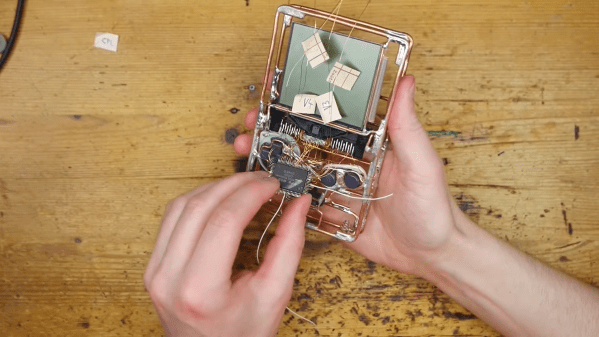
We see lots of great hardware projects here at Hackaday: some are extremely clever, some are beautifully made, and some show off their maker’s extraordinary skills. Others are just plain weird, but still manage to include some or even all of the above categories. Case in point: [kgsws]’s Wireframe Game Boy project. It’s probably the weirdest Game Boy mod we’ve seen so far, but also extremely impressive from a technical point of view.

The basic idea was to take a Game Boy Pocket and remove its outer shell, replacing it with a cage-like structure made from thick copper wire. That sounds kind of reasonable; think of those transparent Game Boys, only without the transparent plastic. [kgsws]’s video (embedded below) shows him bending a few pieces of copper wire to match the Game Boy’s overall shape, then adding mounts for the cartridge socket, the display, the D-pad and the four buttons. After that you’d simply slide in the PCB, insert some batteries and off you go, right?

Well, this wouldn’t do for [kgsws]. What he did instead, was use a hot air desoldering station to remove all chips from the motherboard and proceed to mount them directly inside the wireframe without a PCB. He then used dozens of thin copper wires to hook up the cartridge slot, the CPU, RAM, buttons, and everything else to reconstruct the motherboard’s functionality. We cringed a bit when we saw him brutally cut the display’s flat cable with scissors, and that too was connected to the rest of the system through flying wires, soldered directly onto the screen’s contacts.

Amazingly, the system managed to boot up and run its software after it got a pair of fresh batteries. Despite a slightly dodgy D-pad, the naked Game Boy actually turned out to be fully usable, although it probably requires somewhat more delicate handling than Nintendo’s famously bullet-proof hardware. We’ve seen Game Boys modded into all kinds of different shapes and sizes, but none quite as unusual as today’s. If it’s wireframe construction you like, check out this eerie sound generator or this beautiful circuit sculpture clock. Continue reading “The Wonderfully Weird Wireframe Game Boy That Actually Works”

LED Heart Beats With The Beholder

Many a maker likes to use their craft to create gifts for loved ones. [Jiří Praus] was celebrating having been married for 5 years, and crafted this beautiful LED heart sculpture to commemorate the occasion.

The outer shell was created by first starting with a 3D printed heart shape. This was used as a form upon which the brass wire could be soldered together to form an attractive heart-shaped cage. Inside, an Arduino Nano is hooked up to a series of WS2812b LEDs. The LEDs are flashed in time with the heartbeat of the person holding the heart, thanks to a MAX30102 heartbeat sensor. There’s also a TP4056 charge module and a small lithium battery to provide power for the device.

Adding the heartbeat sensor really makes this project shine, forming a connection between the holder and the device itself. The tasteful craftsmanship of the brass design makes this an excellent gift, one we’re sure anyone would like to receive. We’ve seen [Jiří Praus] make the most of this artform before too, with projects like this stunning tulip or dead-bug Arduino. Video after the break.  Continue reading “LED Heart Beats With The Beholder”

One More Weekend To Sculpt Your Circuits!

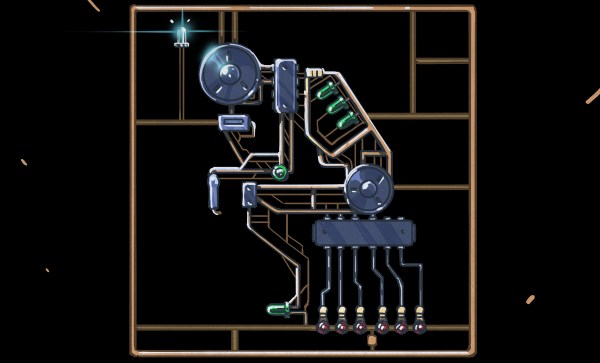
Drop what you’re doing and get thee to thy workshop. This is the last weekend of the Hackaday Circuit Sculpture Contest, the perfect chance for you to exercise the creative hacker within by building something artistic using stuff you already have on hand.

The concept is simple: build a sculpture where the electronic circuit is the sculpture. Wire the components up in a way that shows off that wiring, and uses it as the structure of the art piece. Seven top finishers will win prizes, but really we want to see everyone give this a try because the results are so cool! Need proof? Check out all the entries, then ooh and ah over a few we’ve picked out below. You have until this Tuesday at noon Pacific time to get in the game.

These are just three awesome examples of the different styles we’ve seen so far in the contest. Who needs a circuit board for a retro computer? Most people… but apparently not [Matseng] as this Z80 computer is freformed yet still interactive.

Really there can’t be many things more horrifying than the thought of spider robots, but somehow [Sunny] has taken away all of our fears. The 555 spider project takes “dead bug” to a whole new level. We love the angles in the legs, and the four SMD LEDs as spider eyes really finish the look of the tiny beast.

Finally, the 3D design of [Emily Valesco’s] RGB Atari Punk Console is spectacular. It’s a build that sounds great, and looks as though it will hold up to regular use. But visually, this earns a place on your desk long after the punky appeal wears off. We also like it that she added a color-coded photograph to match up the structure to the schematic, very cool!

What are you waiting for, whether it’s a mess of wires or a carefully structured electron ballet, we want to see your Circuit Sculpture!

RoMA: Robotic modeling assistant

3D Printing And Modelling With A Robot Assistant

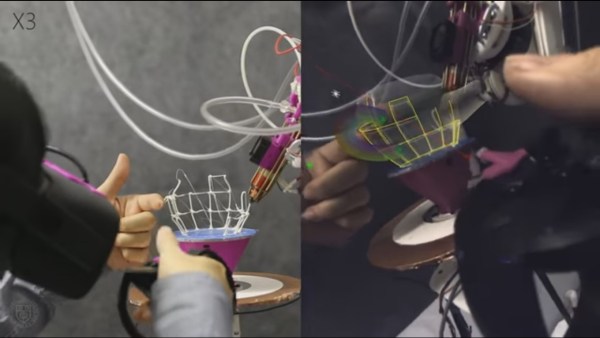
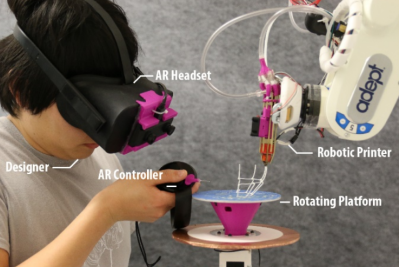
[Huaishu Peng] and a group of other researchers have come up with a system that allows them to use virtual reality (VR) to model an object in a space in front of them while a robot simultaneously 3D prints that object in that same space, a truly collaborative effort they call the RoMA: Robotic Modelling Assistant. This is a step toward fixing the problem of designing something and then having to wait for the prototype to be made before knowing how well it fits the design goals.

The parts: designer, AR headset, AR controller, rotating platform, robotic printer
The parts

How does the designer/robot collaboration work? The designer wears an Oculus Rift VR headset with a camera mounted to the front, turning it into an AR (Augmented Reality) headset. In front of the designer is a rotating platform on which the object will be 3D printed. And on the other side of the platform is the 3D printing robot. In the AR headset, the designer views the platform, the object, and the robot as seen by the camera but with the model he’s working on overlayed onto the object. An AR hand controller allows him to work on the model. Meanwhile, the robot 3D prints the model. See it in action in the video below.

Continue reading “3D Printing And Modelling With A Robot Assistant”

3D Printing And Modelling On The Fly

3D printing is supposed to be about rapid prototyping. Design, print, use, re-design, print, test — iterate until happy. But when you’re laying down filament at 60 mm/s, it can seem anything but rapid.

[Huaishu Peng], [Rundong Wu], and their supervisors at Cornell have come up with a 3D printer that can print almost as fast as you can model, and is able to add and subtract from the model on the fly. The goal is to get an initial model out so quickly that designing and printing can be truly interactive. They look to have succeeded — check out the video below.

3ders.org has a brilliant writeup of the machine that you should also go read once the video’s magic has worn off. There’s a lot going on to make this all work. The printer adds two extra degrees of freedom and a cutter head so that it can make additions and subtractions from the side, and is not constrained to layer-by-layer construction. To get the ABS to cool fast enough to make solid strands, water jets mist it down to temperature just after it’s printed.

Continue reading “3D Printing And Modelling On The Fly”

WirePrint

WirePrint Is A Physical ‘Print Preview’ For 3D Printers

3D printers may be old news to most of us, but that’s not stopping creative individuals from finding new ways to improve on the technology. Your average consumer budget 3D printer uses an extrusion technology, whereby plastic is melted and extruded onto a platform. The printer draws a single two-dimensional image of the print and then moves up layer by layer. It’s an effective and inexpensive method for turning a computer design into a physical object. Unfortunately, it’s also very slow.

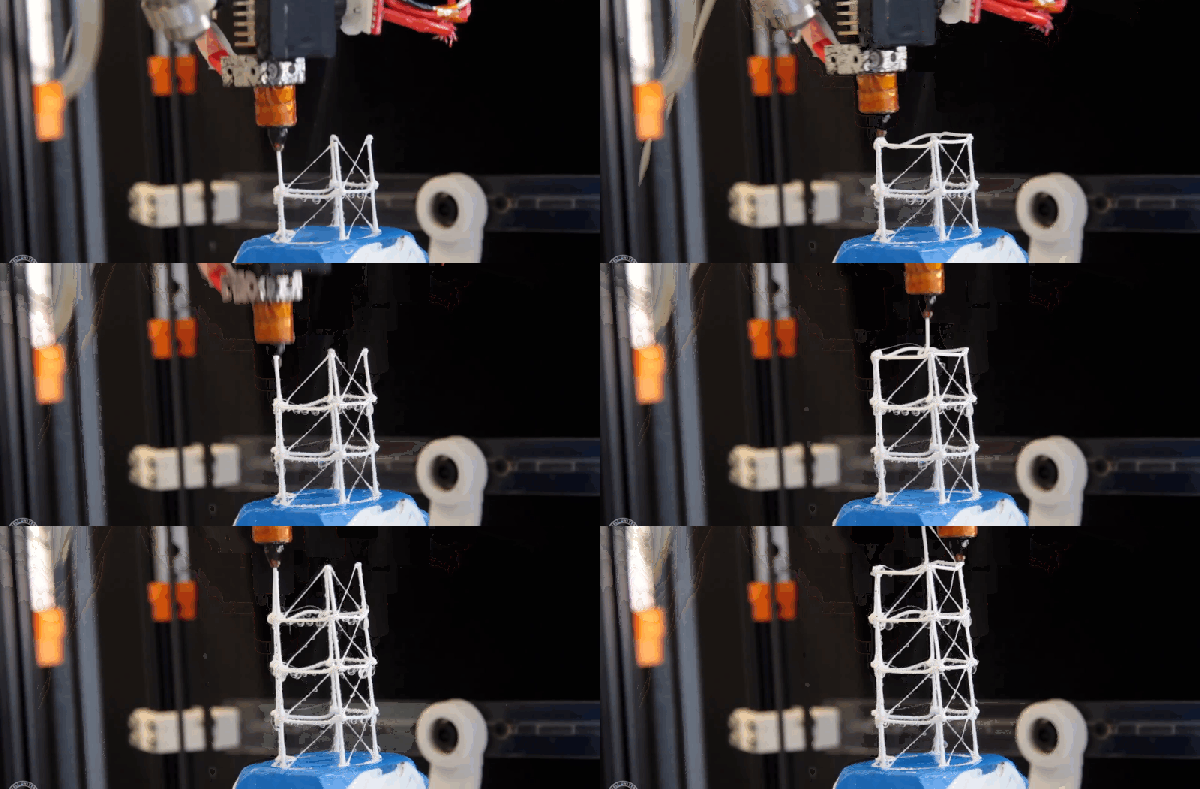
That’s why Hasso Plattner Institute and Cornell University teamed up to develop WirePrint. WirePrint can slice your three-dimensional model into a wire frame version that is capable of being printed on an extrusion printer. You won’t end up with a strong final product, but WirePrint will help you get a feel for the overall size and shape of your print. The best part is it will do it in a fraction of the time it would take to print the actual object.

This is a similar idea to reducing the amount of fill that your print has, only WirePrint takes it a step further. The software tells your printer to extrude plastic in vertical lines, then pauses for just enough time for it to cool and harden in that vertical position. The result is much cleaner than if this same wire frame model were printed layer by layer. It also requires less overall movement of the print head and is therefore faster.

The best part about this project is that it’s a software hack. This means that it can likely be used on any 3D printers that use extrusion technology. Check out a video of the process below to see how it works. Continue reading “WirePrint Is A Physical ‘Print Preview’ For 3D Printers”