Arduino Library Brings Rtl_433 To The ESP32

If you have an RTL-SDR compatible radio there’s an excellent chance you’ve heard of the rtl_433 project, which lets you receive and decode signals from an ever-expanding list of supported devices in the ISM radio bands. It’s an incredibly useful piece of software, but the fact that it requires an external software defined radio and a full-fledged computer to run dictated the sort of projects it could realistically be used for.

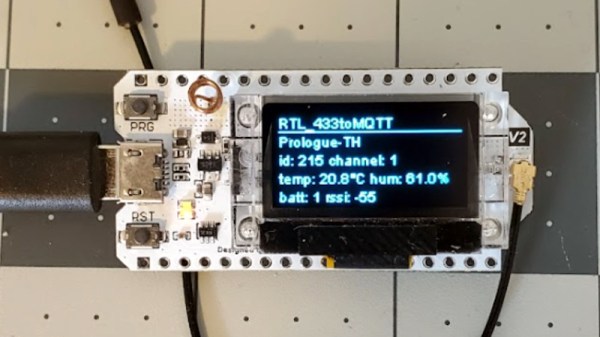
But thanks to the rtl_433_ESP Arduino library developed by [NorthernMan54], we’re now able to pack that functionality into a much smaller package. All you need is an ESP32 microcontroller and a CC1101 or SX127X transceiver module. If you’re looking for a turn-key hardware platform, the documentation notes the LILYGO LoRa32 V2 board includes the required hardware, plus adds a handy OLED display and microSD slot. It should be noted that the range of these radios don’t compare particularly well to a full-size RTL-SDR device, but that probably won’t come as much of a surprise. Continue reading “Arduino Library Brings Rtl_433 To The ESP32”

A Merciless Environmental Monitoring System

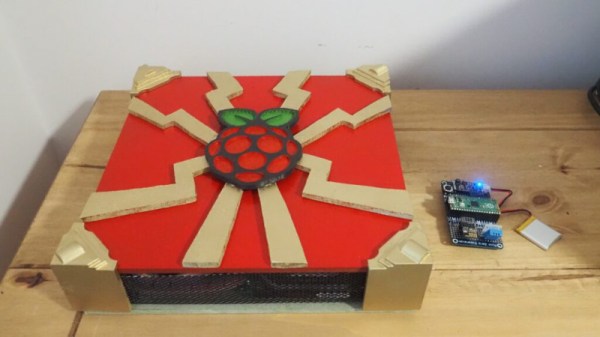
We’ve seen plenty of environmental monitoring setups here on Hackaday — wireless sensors dotted around the house, all uploading their temperature and humidity data to a central server hidden away in some closet. The system put together by [Andy] from Workshopshed is much the same, except this time the server has been designed to be as bright and bold as possible.

The use of Mosquitto, InfluxDB, Node Red, and Grafana (M.I.N.G) made [Andy] think of Ming the Merciless from Flash Gordon, which in turn inspired the enclosure that holds the Raspberry Pi, hard drive, and power supply. Some 3D printed details help sell the look, and painted metal mesh panels make sure there’s plenty of airflow.

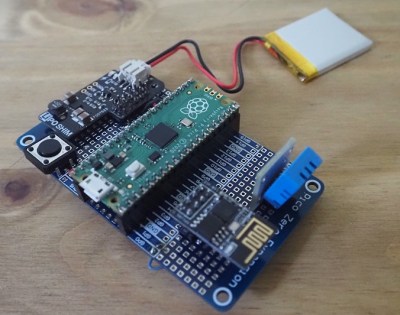
While the server is certainly eye-catching, the sensors themselves are also worth a close look. You might expect the sensors to be based on some member of the ESP family, but in this case, [Andy] has opted to go with the Raspberry Pi Pico. As this project pre-dates the release of the wireless variant of the board, he had to add on an ESP-01 for communications as well as the DTH11 temperature and humidity sensor.

For power each sensor includes a 1200 mAh pouch cell and a Pimoroni LiPo SHIM, though he does note working with the Pico’s energy saving modes posed something of a challenge. A perfboard holds all the components together, and the whole thing fits into an understated 3D printed enclosure.

Should you go the ESP8266/ESP32 route for your wireless sensors, we’ve seen some pretty tidy packages that are worth checking out. Or if you’d rather use something off-the-shelf, we’re big fans of the custom firmware developed for Xiaomi Bluetooth thermometers.

Continue reading “A Merciless Environmental Monitoring System”

Minimalist Low Power Supercapacitor Sensor Node

One of the biggest challenges for wireless sensor networks is that of power. Solar panels usually produce less power than you hoped, especially small ones, and designing super low power circuits is tricky. [Strange.rand] has dropped into the low-power rabbit hole, and is designing a low-cost wireless sensor node that runs on solar power and a supercapacitor.

The main components of the sensor node is an ATMega 328P microcontroller running at 4Mhz, RFM69 radio transceiver, I2C temperature/humidity sensor, 1F supercapacitor, and a small solar panel. The radio, MCU, and sensor all run on 1.5-3.6V, but the supercap and solar panel combination can go up to 5.5V. To regulate the power to lower voltage components a low-drop voltage regulator might seem like the simplest solution, but [strange.rand] found that the 3.3V regulator was consuming an additional 20uA or more when the voltage dropped below 3.3V. Instead, he opted to eliminate the LDO, and limit the charging voltage of the capacitor to 3.6V with a comparator-based overvoltage protection circuit. Using this configuration, the circuit was able to run for 42 hours on a single charge, transmitting data once per minute while above 2.7V, and once every three minutes below that.

Another challenge was undervoltage protection. [strange.rand] discovered that the ATmega consumes an undocumented 3-5 mA when it goes into brown-out below 1.8V. The small solar panel only produces 1 mA, so the MCU would prevent the supercapacitor from charging again. He solved this with another comparator circuit to cut power to the other components.

We see challenges like these a lot with environmental sensors and weather stations with smaller solar panels. For communication, low power consumption of a sub-Ghz radio is probably your best bet, but if you want to use WiFi, you can get the power usage down with a few tricks.

The IoT (Internet Of Teeth)

Get ready for another step towards our dystopian future as scientists have invented a way to track and monitor what we eat. This 2mm x 2mm wireless sensor can be mounted on to teeth and can track everything that goes into your mouth. Currently it can monitor salt, glucose, and alcohol intake. The sensor then communicates wirelessly to a mobile device that tracks the data. Future revisions are predicted to monitor a wide range of nutrients and chemicals that can get ingested.

It uses an interesting method to both sense the target chemicals and communicate its data. It consists of a sandwich of three layers with the central layer being a biosensor that reacts to certain chemicals. The complete sandwich forms a tiny RFID antenna and when RF signals are transmitted to the device, some of the signal gets absorbed by the antenna and the rest reflected back.

The mechanism is similar to how chromatography works for chemical analysis where certain chemicals absorb light wavelengths of specific frequencies. Passing a calibrated light source through a gas column and observing the parts of the spectrum that get absorbed allows researchers to identify certain chemicals inside the column.

This technology is based on previous research with”tooth tatoos” that could be used by dentists to monitor your oral health. Now this tiny wireless sensor has evolved to monitoring the dietary intake of people for health purposes but we’re pretty sure Facebook is eyeing it for more nefarious purposes too.

Hackaday Links: April 6, 2014

hackaday-links-chain

Back in September we saw this awesomesauce wristwatch. Well, [Zak] is now kitting it up. Learn more about the current version, or order one. [Thanks Petr]

Home automation is from the future, right? Well at [boltzmann138’s] house it’s actually from The Next Generation. His home automation dashboard is based on the LCARS interface; he hit the mark perfectly! Anyone thinking what we’re thinking? This should be entered in the Hackaday Sci-Fi Contest, right? [via Adafruit]

PCB fab can vary greatly depending on board size, number of layers, number of copies, and turn time. PCBShopper will perform a meta-search and let you know what all of your options are. We ran a couple of tests and like what we saw. But we haven’t verified the information is all good so do leave a note about your own experience with the site in the comments below. [via Galactic Studios]

We recently mentioned our own woes about acquiring BeagleBone Black boards. It looks like an authorized clone board is poised to enter the market.

Speaking of the BBB, check out this wireless remote wireless sensor hack which [Chirag Nagpal] is interfacing with the BBB.

We haven’t tried to set up any long-range microwave communications systems. Neither has [Kenneth Finnegan] but that didn’t stop him from giving it a whirl. He’s using Nanobridge M5 hardware to help set up a system for a triathlon happening near him.

Wireless Sensors Without A Microcontroller

While cruising the Internet one day, [Raj] found a really cool pair of RF transmitters and receivers manufactured by Dorji Applied Technology. These modules – the DRF5150S and DRF4432S – work just like any other ISM band transmitter receiver pair with the addition of inputs for analog and digital input pins. [Raj] put together a tutorial for using these radio modules, perfect if you need a very simple wireless connection for your next project.

[Raj]’s tutorial for using the Dorji sensor modules shows the transmitter has two operating modes. The first mode is a simple data transmitter, connected to a microcontroller through a UART connection. The ‘sensor’ mode doesn’t require a separate chip; the on-board STM8L151 microcontroller reads analog values on two pins and sends them over the air to the DRF4432S receiver module.

After programming the transmitter to function as a wireless sensor with an app released by Dorji, [Raj] plugged the transmitter into a breadboard with a battery and digital thermometer. The receiver module is plugged into a USB -> UART module, and data is pulled down from the sensor in a terminal.

[Raj] wrote a small app in Processing to display the data coming from the sensor. He has a wonderful animated thermometer showing the temperature reading of the sensor, the battery voltage and the strength of the wireless signal. Pretty easy, and a very helpful tutorial if you need an easy way to build a wireless sensor.