Slim RGB Matrix Puts LEDs Inside The PCB

Sometimes all that’s required to build something interesting is to put the same old pieces together differently. [Sayantan Pal] did this for the humble RGB LED matrix, creating an extra-thin version by recessing WS2812b NeoPixel LEDs inside a PCB.

The popular WS2812B is 1.6 mm in height, which happens to be the most commonly used PCB thickness. Using EasyEDA, [Sayantan] designed a 8×8 matrix with modified WS2812B footprints. A slightly undersized cutout was added to create a friction-fit for the LEDs, and the pads were moved to the back side of the panel just outside the cutout, and their assignment were flipped. The PCB is assembled face down, and all the pads are soldered by hand. Unfortunately this creates rather large solder bridges which slightly increases the overall thickness of the panel, and is probably also unsuitable for production with conventional pick-and-place assembly.

We’ve seen some similar methods with PCB assemblies that use layered PCBs. Manufacturers are starting to even embed components inside multilayer PCBs.

RGB Party Bike Flashes With The Beat

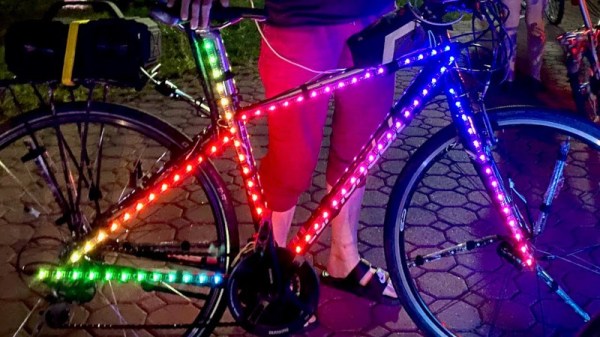
One of the biggest dangers to a cyclist is not being seen at night. To counteract this, all manner of lighting and reflective gear is available to help ensure bicycles are seen on the streets. Of course, you don’t have to stop at the purely practical. [TechnoChic] decided to have some fun with her ride, festooning her party bike with many, many LEDs.

As you’d expect, the RGB illuminations are thanks to WS2812B LED strips. Running the show is  a trio of Arduino Nano 33 IoTs – one for the LEDs on the bike’s frame, the other two mounted on the front and back wheels respectively. This allowed for the easy control of LEDs on the spokes without having to pass data and power lines to the rotating wheels. The LEDs on the frame are even music-reactive, with the Arduino sampling music input via one of its analog-to-digital converters.

Paired with a boombox on the bike, the build makes for a great way to hype up group rides through the city at night. We can imagine such a bike being an absolute hit at Critical Mass, though you’ve probably gotta add a laser or glitter cannon if you’re going to draw attention at Burning Man. If you’re tired of pedaling, you might consider an electric conversion, too. Video after the break.

Continue reading “RGB Party Bike Flashes With The Beat”

Colorful Quinary Clock Makes The Most Out Of Five Neopixels

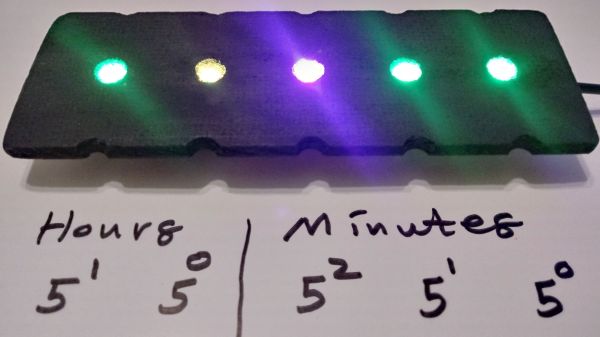
If binary digits are bits, are quinary digits “quits”? Perhaps, but whatever you call them, you’re going to have to wrap your head around some new concepts in order to make sense of this quinary display clock.

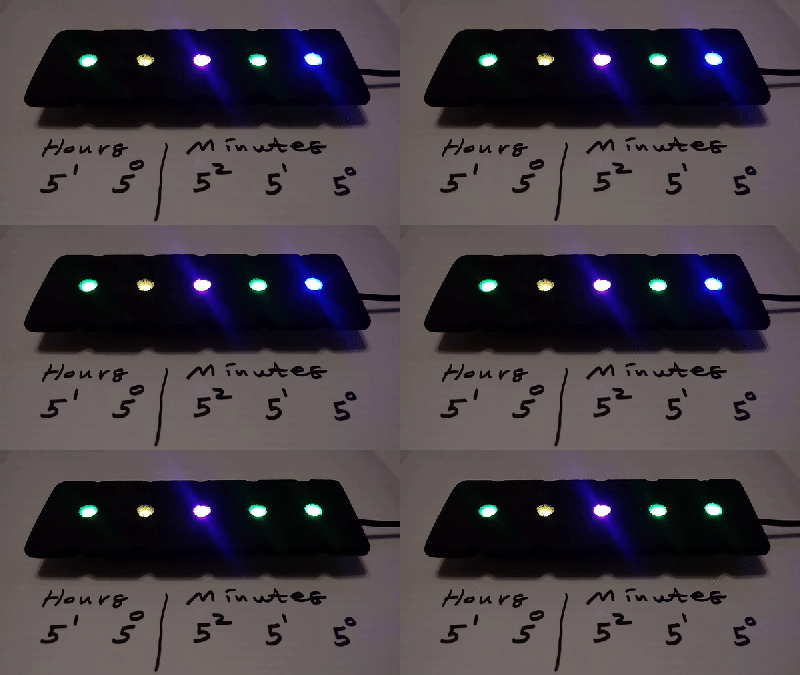
The transition between 15:42 and 15:43.

Why quinary? [Spike Snell] wanted to minimize the number of LEDs, and 52 is enough to cover all 24 hours. Binary clocks may have geek chic, but there are only so many ways to display ones and zeros.

[Spike]’s clock is unique because it shows each quit using a single WS2812 Neopixel. The values zero through four are each represented by a different color, meaning the user needs to memorize which color goes with which value, which we suspect is the hardest part of learning this clock. The clock’s software is fairly simple and runs on an ESP8266, and uses NTP to keep on track. The clock self-adjusts for Daylight Savings time, and it has a nice feature that dims the display in the evening to make living with it easier.

Even for those not up on their base-five arithmetic,  [Spike]’s clock is still a nice, slowly evolving abstract art piece. And for those who grok the quinary clock, perhaps a career awaits you in an alternate future where bi-quinary relay computers caught on.

Running Way More LED Strips On A Raspberry Pi With DMA

The Raspberry Pi is a powerful computer in a compact form factor, making it highly useful for all manner of projects. However, it lacks some of the IO capabilities you might find on a common microcontroller. This is most apparent when it comes to running addressable LED strings. Normally, this is done using the Pi’s PWM or audio output, and is limited to just a couple of short strings. However, [Jeremy P Bentham] has found a way to leverage the Pi’s hardware to overcome these limitations.

The trick is using the Raspberry Pi’s little-documented Secondary Memory Interface. The SMI hardware allows the Pi to shift out data to 8 or 16 I/O pins in parallel using direct memory access (DMA), with fast and accurate timing. This makes it perfect for generating signals such as those used by WS2812B LEDs, also known as NeoPixels.

With [Jeremy]’s code and the right supporting hardware, it’s possible to run up to 16 LED strips of arbitrary length from the Raspberry Pi. [Jeremy] does a great job outlining how it all works, covering everything from the data format used by WS2812B LEDs to the way cache needs to be handled to avoid garbled data. The hack works on all Pis, from the humble Pi Zero to the powerful Pi 4. Thanks to using DMA, the technique doesn’t overload the CPU, so performance should be good across the board.

Of course, there are other ways to drive a ton of LEDs; we’ve seen 20,000 running on an ESP32, for example.

[Thanks to Petiepooo for the tip!]

Surfboard LED Strips Light Up The Waves

Surfing is an activity predominantly enjoyed during the day, primarily for reasons of warmth and water safety. Of course, if you prefer to carve the waves at night, you might enjoy the latest project from [Moritz Sivers] – a surfboard kitted out with motion-reactive LEDs.

The build consists of a regular surfboard, with a channel cut around the perimeter into which WS2812B LED strips are glued. Powered by a lithium rechargable battery, commands are given by an Arduino Nano hooked up to a MPU6050 3-axis gyroscope. This allows the Arduino to change the light patterns based on the movement of the board. Left and right turns, pumping the board, and surfing down a wave all come with their own animations.

It’s a fun twist on night surfing, and makes it easier to spot a downed surfer, too. It’s a build we expect to see recreated in a high-end 4K surf film before the year is out. Of course, if you just need to know if the conditions are right before you head out, this surf weather station might be just the build for you. Video after the break. Continue reading “Surfboard LED Strips Light Up The Waves”

Get Creative With This ESP8266 Photography Light

In today’s fast-paced world of social media, if you want your photos to grab attention, you’ve got to have an edge. Whether it’s a deft touch in Photoshop or an amazing lens, it’s important to stand apart. Another great way is to experiment with lighting and color. To do just that, [Andrei] built a pocket RGB photo light for the home studio.

[Andrei]’s cat models for the camera.
This is a project that any experienced maker should be able to whip up in a weekend. Not that there’s anything wrong with that, of course. The basic enclosure is 3D printed and readily reproducible on any FDM printer. Lighting is provided via the venerable WS2812B LED, 68 of them, to be exact. Finally there’s an ESP8266 running WLED, a webserver for the platform that’s dedicated to controlling LED strips. This makes it easy to tweak the LEDs with your smartphone.

Thanks to the WS2812Bs LEDs, a full range of RGB colors are available for [Andrei] to experiment with. He’s done a great job showing off the light with a few choice cat pics that serve to show its capabilities. While we wouldn’t expect to use such a device for clean white lighting in a serious photographic sense, it’s a perfect tool for art photography.

We’ve covered other studio light builds before, too. Video after the break.

Continue reading “Get Creative With This ESP8266 Photography Light”

Abused Hard Drive Becomes POV Clock

We all know that there’s not much to do with an old hard drive. Once you render the platters unreadable and perhaps harvest those powerful magnets, there’s not much left of interest. Unless, of course, you turn the whole thing into a persistence-of-vision clock.

At least that’s what [Leo] did when he created “PendoLux”. The clock itself is pretty simple; like any POV project, it just requires a way to move an array of flashing LEDs back and forth rapidly enough that they can trick the eye into seeing a solid image. [Leo] put the read head mechanism of an old HDD into use for that, after stripping the platters and motor out of it first.

The voice coil and magnet of the head arm are left intact, while a 3D-printed arm carrying seven RGB LEDs replaces the old heads. [Leo] added a small spring to return the arm to a neutral position, and used an Arduino to drive the coil and flash the LEDs. Getting the timing just right was a matter of trial and error; he also needed to eschew the standard LED libraries because of his heavy use of interrupts and used direct addressing instead.

POV clocks may have dropped out of style lately — this hard drive POV clock and a CD-ROM version were posted years ago. But [Leo]’s clock is pretty good looking even for a work in progress, so maybe the style will be making a comeback.

Continue reading “Abused Hard Drive Becomes POV Clock”