A Mouse Becomes A Camera

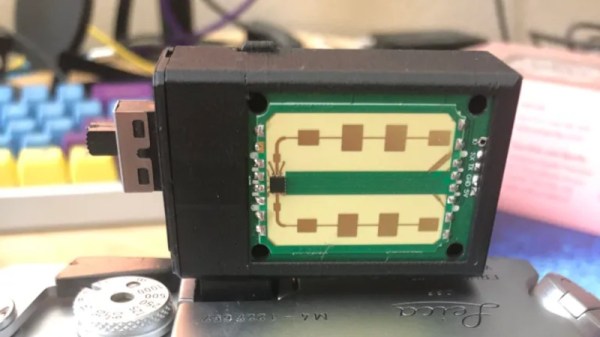
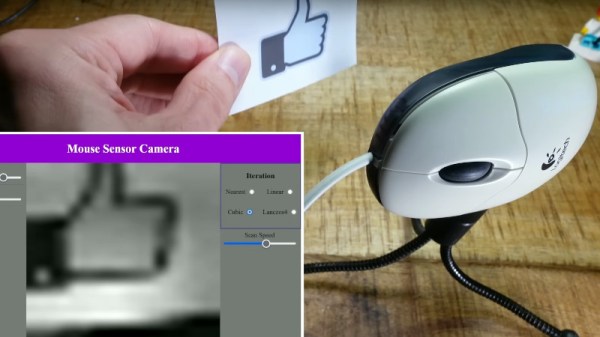
If your pointing device is a mouse, turn it over. The chances are you’ll see a red LED light if you’re not seriously old-school and your mouse has a ball, this light serves as the illumination for a very simple camera sensor. The mouse electronics do their thing by looking for movement in the resulting image, but it should be possible to pull out the data and repurpose the sensor as a digital camera. [Doctor Volt] has a new video showing just that with the innards of a Logitech peripheral.

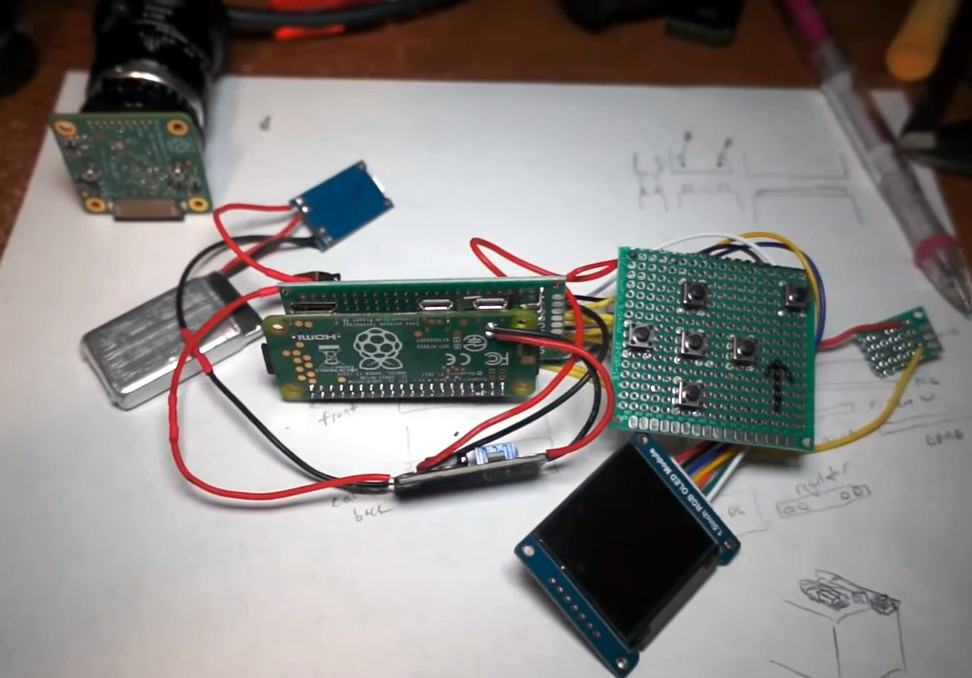
The mouse contains a microcontroller and the camera part, which fortunately has an SPI interface. The correct register to query the sensor information was deduced, and as if my magic, an image appeared. An M12 lens provided focus with a handy 3D printed mount, and the board went back into the mouse case as a housing. The pictures have something of the Game Boy camera about them, being low-res and monochrome, but it’s still a neat hack.

If you’d like to give it a go you can find the code in a GitHub repository. You might find it worth finding a gaming mouse though, for the much higher resolution sensor.

Continue reading “A Mouse Becomes A Camera”

Street Photography, With RADAR!

As the art of film photography has gained once more in popularity, some of the accessories from a previous age have been reinvented, as is the case with [tdsepsilon]’s radar rangefinder. Photographers who specialized in up-close-and-personal street photography in the mid-20th century faced the problem of how to focus their cameras. The first single-lens reflex cameras (SLRs) were rare and expensive beasts, so for most this meant a mechanical rangefinder either clipped to the accessory shoe, or if you were lucky, built into the camera.

The modern equivalent uses an inexpensive 24 GHz radar module coupled to an ESP32 board with an OLED display, and fits in a rather neat 3D printed enclosure that sits again in the accessory shoe. It has a 3 meter range perfect for the street photographer, and the distance can easily be read out  and dialed in on the lens barrel.

Whenever the revival of film photography is discussed, it’s inevitable that someone will ask why, and point to the futility of using silver halides in a digital age. It’s projects like this one which answer that question, with second-hand SLRs being cheap and plentiful you might ask why use a manual rangefinder over one of them, but the answer lies in the fun of using one to get the perfect shot. Try it, you’ll enjoy it!

Some of us have been known to dabble in film photography, too.

Thanks [Joyce] for the tip.

The Simple Tech Behind Hidden Camera Detectors

If you’ve ever been concerned about privacy in a rental space or hotel room, you might have considered trying one of the many “spy camera detectors” sold online. In the video after break [Big Clive], tears one down and gives us  an in-depth look at how these gadgets actually work, and their limitations.

Most detector follow the same basic design: a ring of LEDs through which the user inspects a room, looking for reflections indicating a potential hidden camera. Although this device can help spot a camera, it’s not entirely foolproof. The work best when you’re close to the center of a camera’s field of view, and some other objects, like large LEDs can produce similar reflections

The model examined in this video takes things one step further by adding a disc of dichroic glass. Coated with a metallization layer close to the wavelength of the LEDs, it effectively acts a bandpass filter, reducing reflections from other light sources. [Big Clive] also does his customary reverse-engineering of the circuit, which is just a simple flasher powered by USB-C.

[Big Clive]’s teardowns are always an educational experience, like we’ve seen in his videos on LED bulb circuits and a fake CO2 sensor.

Continue reading “The Simple Tech Behind Hidden Camera Detectors”

Open Source Scanner Scans The Slides

What do you get when you join a slide projector and a digital camera? Filmolimo, an open source slide scanner. The scanner uses an M5Stack Fire, an ESP32 development board. Thanks to the ESP32, you can control the device via WiFi.

All the project files, including KiCAD design files, are on GitHub. Of course, you will probably have to adapt things to your specific camera and slide projector. The PCB is double-sided and looks easy to put together. The board is mostly opto-isolation and interface between the controller and the equipment. The software allows you to change things like the time between slides, for example.

This is one of those projects you probably only need for a bit. Unless, of course, you regularly scan slides. You can farm it out to a service provider, but what fun is that? If you have a few hundred thousand slides, you might need to go for speed. If you just have a few, you can get by with a simple adapter.

Raspberry Pi Zero Powers Custom Camera Platform

These days, most of us are carrying a fairly impressive digital camera with us at all times. But as capable as the hardware and software of a modern smartphone may be, there’s still plenty of reasons you may want a “real” camera to go along with it. The larger sensor, advanced controls, and selection of lenses that you’ll get with even a relatively cheap camera opens up a world of artistic possibilities.

If you’re really into chasing that perfect shot, you can even build your own digital camera these days. This design from [Jacob Cunningham] may not be able to go shot-for-shot against a Canon or Nikon in its current state, but we think you’ll agree there’s a lot of potential here — especially for something pieced together with modular components and perfboard.

Inside the 3D printed enclosure is a Raspberry Pi Zero, a Pi HQ Camera module, an 1.5″ OLED display, a lithium-ion battery pouch cell, and the charging and voltage regulation boards necessary to keep everything powered up. There’s also a handful of tactile buttons to work through the settings and menus, and a 10-axis IMU to help you keep your horizon level.

[Jacob] figures the whole thing comes in at around at $185.00, though naturally that number could go up or down considerably depending on what you’ve already got in the parts bin and what kind of lenses you add to the mix.

The hardware side of things looks more or less complete, at least for a first version, and [Jacob] has provided everything you’ll need to build one of your own. But the software is still a work in progress, with the latest push to the Python code in the project’s GitHub repository just eight hours old at the time of this writing. If you’ve been looking for a DIY camera project to really sink your teeth into, this could provide a great starting point.

If you’re more interested in moving pictures, we recently covered the CinePi project, which aims to develop an open source cinema-quality camera that you won’t need studio backing to afford.

Continue reading “Raspberry Pi Zero Powers Custom Camera Platform”

Stereoscopic Macro Lens Shows Two Is Better Than One

You’d be forgiven if you thought [Nicholas Sherlock’s] new lens design was a macro lens that was 3D printed. In fact, it is, but it is also a macro lens that takes 3D images using two different cameras. If you have a pair of Sony E/FEs, you can 3D print your own copy today. If you don’t, you might have to adjust the design or wait for future releases. In any event, you are sure to enjoy the example photos, and there’s a video review of the device you can watch below.

The design merges two 4x microscope lenses to provide a 2X stereo image with a 5mm baseline. As you might expect, the secret is a prism in the assembly that allows one camera to shoot directly at the subject and the other to shoot with a 5mm offset. This is trickier than you might think because the cameras shift the image some, also.

Continue reading “Stereoscopic Macro Lens Shows Two Is Better Than One”

Falsified Photos: Fooling Adobe’s Cryptographically-Signed Metadata

Last week, we wrote about the Leica M11-P, the world’s first camera with Adobe’s Content Authenticity Initiative (CAI) credentials baked into every shot. Essentially, each file is signed with Leica’s encryption key such that any changes to the image, whether edits to the photo itself or the metadata, are tracked. The goal is to not only prove ownership, but that photos are real — not tampered with or AI-generated. At least, that’s the main selling point.

Although the CAI has been around since 2019, it’s adoption is far from widespread. Only a handful of programs support it, although this list includes Photoshop, and its unlikely anybody outside the professional photography space was aware of it until recently. This isn’t too surprising, as it really isn’t relevant to the casual shooter — when I take a shot to upload to Instagram, I’m rarely thinking about whether or not I’ll need cryptographic proof that the photo wasn’t edited — usually adding #nofilter to the description is enough. Where the CAI is supposed to shine, however, is in the world of photojournalism. The idea is that a photographer can capture an image that is signed at the time of creation and maintains a tamper-proof log of any edits made. When the final image is sold to a news publisher or viewed by a reader online, they are able to view that data.

At this point, there are two thoughts you might have (or, at least, there are two thoughts I had upon learning about the CAI)

  1. Do I care that a photo is cryptographically signed?
  2. This sounds easy to break.

Well, after some messing around with the CAI tools, I have some answers for you.

  1. No, you don’t.
  2. Yes, it is.

Continue reading “Falsified Photos: Fooling Adobe’s Cryptographically-Signed Metadata”