CinePi Project Promises Open Source Movie Making

Today, there’s open source options for pretty much anything mainstream, but that doesn’t mean there aren’t still some niches out there that could benefit from the libre treatment. The CinePi project is a perfect example — before today we didn’t even know that an open hardware and software cinema-quality camera was out there. But now that we do, we can’t wait to see what the community does with it.

Inside the 3D printed enclosure of the CinePi, there’s a Raspberry Pi 4 with HQ camera module, a four-inch touch screen, a Zero2Go power supply with four 18650 cells, and a Notcua fan to keep it all cool. The design intentionally favors modules that are easy to source from the usual online sources. You’ll need to be handy with a soldering iron to follow along with the beautifully photographed assembly guide, but there’s nothing that needs to be custom fabricated to complete the build.

The software was clearly developed with the user experience in mind, and in the video below, you can see how its touch interface makes it easy to change settings on the fly. While an amateur auteur might need to enlist the assistance of their geeky friend to build the CinePi, it doesn’t look like they’ll need them around to help operate it.

Of course, the big question with a project like this: what does the video actually look like? Well the technical answer is that, in terms of raw performance, the CinePi is able to capture 3840 x 2160 CinemaDNG video to an external device such as a NVME SSD or a CFExpress Card at 25 frames per second. But what that actually looks like is going to depend on what kind of post-processing you do to it. For the more practical answer, check out the short film TIMEKEEPER which was shot partially on a CinePi.

If this all looks a bit high-tech for your liking, don’t worry. You could always 3D print yourself a 35 mm movie camera instead.

Continue reading “CinePi Project Promises Open Source Movie Making”

A Camera That Signs Off Your Pictures

We’ll admit we’ve kicked around the idea of a camera that digitally signs a picture so you could prove it hasn’t been altered and things like the time and place the photo was taken for years. Apparently, products are starting to hit the market, and Spectrum reports on a Leica that, though it will set you back nearly $10,000, can produce pictures with cryptographic signatures.

This isn’t something Leica made up. In 2019, a consortium known as the Content Authenticity Initiative set out to establish a standard for this sort of thing. The founders are no surprise: The New York Times, Adobe, and Twitter. There are 200 companies involved now, although Twitter — now X — has left.

The problem, the post notes, is that software support is limited. There are only a few programs that recognize and process digital signatures. That’ll change, of course, and — we imagine — if you needed to prove the provenance of a photo in court, you’d just buy the right software you needed.

We haven’t dug into the technology, but presumably keeping the private key secure will be very important. The consortium is clear that the technology is not about managing rights, and it is possible to label a picture anonymously. The signature can identify if an image was taken with a camera or generated by AI and details about how it was taken. It also can detect any attempt to tamper with the image. Compliant programs can make modifications, but they will be traceable through the cryptographic record.

Will it work? Probably. Can it be broken? We don’t know, but we wouldn’t bet that it couldn’t without a lot more reading. PDF signatures can be hacked. Our experience is that not much is truly unhackable.

Probably The Largest Selfie Camera In The World

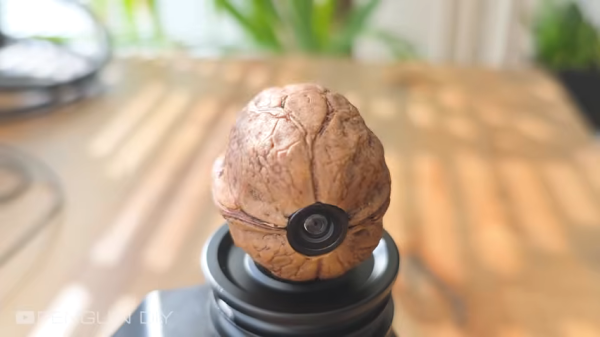
Most readers will have some idea of how a camera works, with a lens placed in front of a piece of film or an electronic sensor, and the distance between the two adjusted until the images is in focus. The word “camera” is a shortening of “camera obscura”, the Latin for “dark room”, as some early such devices were darkened rooms in which the image was projected onto a rear wall. [David White], a lecturer at Falmouth University in the UK has created a modern-day portable camera obscura using a garden gazebo frame, and uniquely for a camera obscura, it can be used to take selfies.

As might be expected the gazebo frame covered with a dark fabric forms the “room”, and the surface on which the image is formed comes from a projection screen. The lens is a custom-made 790 mm f/5.4, not exactly the type of lens found off-the-shelf. The selfie part comes from a Canon digital camera inside the gazebo focused on the frame, using its Wi-Fi control app a subject can sit at the appropriate point in front of the lens and take the selfie as they see fit.

The resulting images have a pleasing ethereal feel to them, and while it’s definitely not the most practical taker of snaps it’s still very much a camera to be impressed by. We’d be curious to see how it would perform as a pinhole camera, and even though it’s nowhere near the 2006 record pinhole image taken using an abandoned US Marine Corps aircraft hangar we think it would still deliver when given enough light. Meanwhile this isn’t the first time we’ve shown you a camera obscura, here’s one using the back of a U-Haul truck.

OpenMV Promises “Flyby” Imaging Of Components For Pick And Place Project

[iforce2d] has an interesting video exploring whether the OpenMV H7 board is viable as a flyby camera for pick and place, able to quickly snap a shot of a moving part instead of requiring the part to be held still in front of the camera. The answer seems to be yes!

The OpenMV camera module does capture, blob detection, LCD output, and more.

The H7 is OpenMV‘s most recent device, and it supports a variety of useful add-ons such as a global shutter camera sensor, which [iforce2d] is using here. OpenMV has some absolutely fantastic hardware, and is able to snap the image, do blob detection (and other image processing), display on a small LCD, and send all the relevant data over the UART as well as accept commands on what to look for, all in one neat package.

It used to be that global shutter cameras were pretty specialized pieces of equipment, but they’re much more common now. There’s even a Raspberry Pi global shutter camera module, and it’s just so much nicer for machine vision applications.

Watch the test setup as [iforce2d] demonstrates and explains an early proof of concept. The metal fixture on the motor swings over the camera’s lens with a ring light for even illumination, and despite the moving object, the H7 gets an awfully nice image. Check it out in the video, embedded below.

Continue reading “OpenMV Promises “Flyby” Imaging Of Components For Pick And Place Project”

Digital Photography Comes To The Apple II

Back in the very early days of consumer digital photography, one of the first stars of the new medium came from Apple. The QuickTake 100 used a novel flat form factor and at its highest resolution could only shoot 640×480 images, but at the time it was a genuine object of desire. It came in Windows and Apple versions, and to use the Apple variant required a Mac of the day with appropriate software.

The interface was an Apple serial connector though, so it was quite reasonable for [Colin Leroy-Mira] to wonder whether it could work with Apple’s 8-bit machines. The result is QuickTake for the Apple IIc, the product that perhaps Apple should have brought us in an alternative 1994.

Fortunately the protocol has already been reverse engineered and forms part of the dcraw package, however the process of extracting the code wasn’t easy. The full resolution and colour of the original pictures has to be sacrificed, and of course once the custom serial cable has been made it’s a painfully slow process transferring the pictures. But to get anything running in this way on such elderly hardware which was never intended to  perform this task is an extremely impressive feat. We would have given anything for this, back in the 8-bit days.

If you have a QuickTake and want to use a more modern machine, we’ve got you covered there, too.

Using LEDs To Determine A Video Camera’s True Framerate

Interpolation and digital cropping are two techniques which are commonly used by marketing folk to embellish the true specifications of a device. Using digital cropping a fictitious zoom level can be listed among the bullet points, and with frame interpolation the number of frames per second (FPS) recorded by the sensor is artificially padded. This latter point is something which [Yuri D’Elia] came across with a recently purchased smartphone that lists a 960 FPS recording rate at 720p. A closer look reveals that this is not quite the case.

The smartphone in question is the Motorola Edge 30 Fusion, which is claimed to support 240 and 960 FPS framerates at 720p, yet the 50 MP OmniVision OV50A sensor in the rear camera is reported as only supporting up to 480 FPS at 720p. To conclusively prove that the Motorola phone wasn’t somehow unlocking an unreported feature in this sensor, [Yuri] set up an experiment using three LEDs, each of which was configured to blink at either 120, 240 or 480 Hz in a side-by-side configuration.

As [Yuri] explains in the blog post, each of these blinking frequencies would result in a specific pattern in the captured video, allowing one to determine whether the actual captured framerate was equal to, less than or higher than the LED’s frequency. Perhaps most disappointingly about the results is that this smartphone didn’t even manage to hit the 480 FPS supported by the OV50A sensor, and instead pegged out at a pedestrian 240 FPS. Chalk another one up for the marketing department.

Solar Camera Built From Raspberry Pi

Ever since an impromptu build completed during a two-week COVID-19 quarantine back in 2020, [Will Whang] has been steadily improving his Raspberry Pi solar photography setup. It integrates a lot of cool stuff: multiple sensors, high bandwidth storage, and some serious hardware. This is no junk drawer build either, the current version uses a $2000 USD solar telescope (an LS60M with 200mm lens) and a commercial AZ-GTi mount.

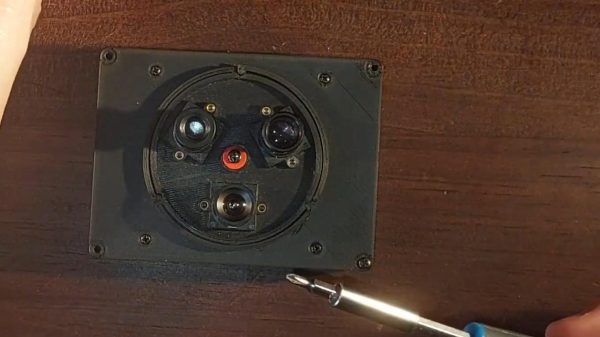
He also moved up somewhat with the imaging devices from the Raspberry Pi camera module he started with to two imaging sensors of his own: the OneInchEye and the StarlightEye, both fully open source. These two sensors feed data into the Raspberry Pi 4 Compute Module, which dumps the raw images into storage.

Because solar imaging is all about capturing a larger number of images, and then processing and picking the sharpest ones, you need speed. Far more than writing to an SD Card. So, the solution [Will] came up with was to build a rather complex system that uses a CF Express to NVME adapter that can keep up, but can be quickly swapped out.

Unfortunately, all of this hard work proved to be in vain when the eclipse came, and it was cloudy in [Wills] area. But there is always another interesting solar event around the corner, and it isn’t going anywhere for a few million years. [Will] is already looking at how to upgrade the system again with the new possibilities the Raspberry Pi 5 offers.

Continue reading “Solar Camera Built From Raspberry Pi”