Laser Scanning Microscope Built With Blu-ray Parts

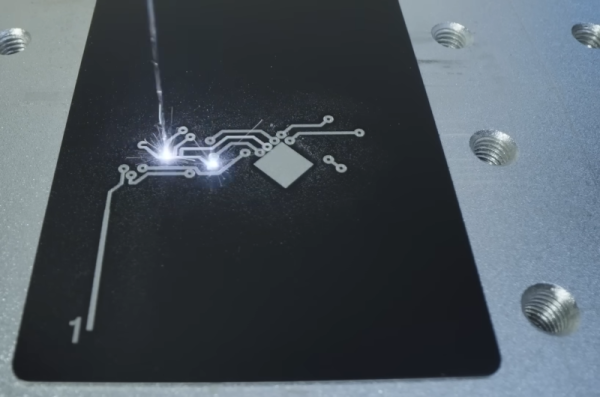
Laser scanning microscopes are useful for all kinds of tiny investigations. As it turns out, you can build one using parts salvaged from a Blu-ray player, as demonstrated by [Doctor Volt].

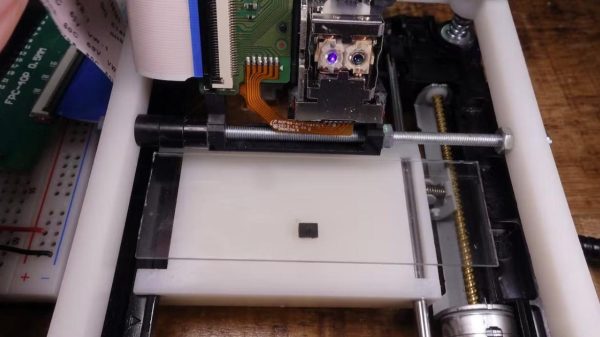
The trick is repurposing the optical pickup unit that is typically used to read optical discs. In particular, the build relies on the photodiodes that are usually used to compute focus error when tracking a disc. To turn this into a laser scanning microscope, the optical pickup is fitted to a 3D printed assembly that can slew it linearly for imaging purposes.

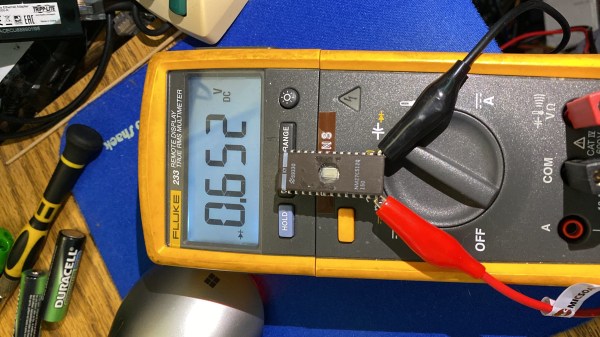
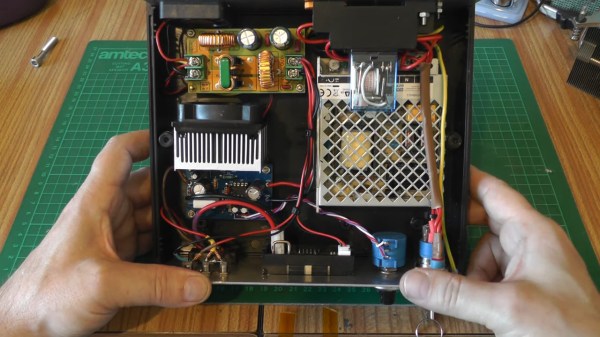
Meanwhile, the Blu-ray player’s hardware is repurposed to create a sample tray that slews on the orthogonal axis for full X-Y control. An ESP32 is then charged with running motion control and the laser. It also captures signals from the photodiodes and sends them to a computer for collation and display.

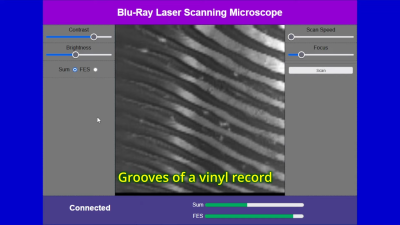
[Doctor Volt] demonstrates the microscope by imaging a small fabric fragment. The scanned area covers less than 1 mm x 1 mm, with a resolution of 127 x 127, though this could be improved with finer pitch on the slew mechanisms.

While it’s hardly what we’d call a beginner’s project, this technique still looks a lot more approachable than building your own scanning electron microscope.

Continue reading “Laser Scanning Microscope Built With Blu-ray Parts”

Laser Engraving, Up Close

You know you aren’t supposed to watch your laser while it is cutting or engraving. But [Alex] hosted Wired in his studio and showed them how lasers engrave metal with a fiber laser. You can see the video below.

If you haven’t used a fiber laser, you might be surprised that while a 60 W model can burn metal, it does absolutely nothing to [Alex’s] hand. We wouldn’t try that, by the way, with the common diode lasers you see in most hacker’s labs these days. The video isn’t terribly technical, but it is interesting to see different metals succumb to the powerful laser. There are a few tips about marking different metals in different ways and how to deal with thermal expansion and other effects.

Fiber lasers aren’t as common as diode engravers in private shops, but we assume it is just a matter of time before they get cheaper. Not to mention their widespread use commercially means surplus units might become available, too.

If you are interested in lasers, [Alex’s] YouTube channel has quite a few interesting videos to check out. If you need more power, how’s 200 kW? Then again, even 20 W will get you something useful.

Continue reading “Laser Engraving, Up Close”

Glass 3D Printing Via Laser

If you haven’t noticed, diode laser engraver/cutters have been getting more powerful lately. [Cranktown City] was playing with an Atomstack 20 watt laser and wondered if it would sinter sand into glass. His early experiments were not too promising, but with some work, he was able to make a crude form of glass with the laser as the source of power. However, using glass beads was more effective, so he decided to build his own glass 3D printer using the laser.

This isn’t for the faint of heart. Surfaces need to be flat and there’s aluminum casting and plasma cutting involved, although some of it may not have been necessary for the final construction. The idea was to make a system that would leave a layer of sand and then put down a new layer on command. This turned out to be surprisingly difficult.

Continue reading “Glass 3D Printing Via Laser”

Cutting The Grass With Frickin’ Lasers

We techie types are quite often much more comfortable in front of a keyboard knocking out code, than out in the yard splitting logs for winter, and even the little jobs like cutting the grass are sometimes just too much like hard manual labour for our liking. The obvious solution is a robot mower, but they’re kinda boring, with their low-tech spinning metal blades. What we need is a big frickin’ laser. YouTuber [rctestflight] has been experimenting with using a 40W blue diode laser module to cut the weeds, (Video, embedded below) and it sort of works, albeit in a rather dangerous fashion.

A nice flat ‘cut’

The first test used a fixed assembly, mounting the laser to a camera lens, upon a rotating gear driven by a small stepper motor. An Arduino controls the beam scanning, very slowly, burning the grass in its sights. But with a range limited to around eight feet best case, sitting in one spot just isn’t going to cut it. (sorry) The obvious next step was to mount one of the tested laser modules onto a moveable platform. After tweaking one of his earlier projects — a tracked rover — with a new gearbox design, it could now drive slow enough to be useful for this slow task. The laser was mounted to a simple linear rail slider, with an attempt at a vacuum pickup system to suck up the clippings, removing them from the beam path, and stopping them impeding the cutting efficiency of the laser.

Obviously this vacuum idea didn’t work, and since the contraption takes the best part of a week to cut just one small area, we reckon it would likely be growing faster than that! Still, it must have been fun to build it anyway. It just goes to show that despite the march of technological progress, maybe the boring old spinning blades of old are still the best way to get the job done.

Lawnmowing is clearly one of those jobs we love to hate, and do so with hacks. Here’s a way to prevent your mower sucking up foreign bodies and hurling them at you at ballistic speeds, and for those who really want to be hands off, add RTK-GPS to a robot mower, and just leave it to do the dirty work.

Continue reading “Cutting The Grass With Frickin’ Lasers”

A multimeter connected to the EEPROM chip with crocodile clips, showing that there's a 0.652V diode drop between GND and one of the IO pins

Dead EPROM Dumped With Help Of Body Diodes

[Jason P], evidently an enjoyer of old reliable laser printing tech, spilled a drink (nitter) onto his Panasonic KX-P5400 SideWriter. After cleanup, everything worked fine — except that the PSU’s 5 V became 6.5 V during the accident, and the EPROM with LocalTalk interface firmware died, connection between VCC and GND seemingly interrupted inside the chip. Understandably, [Jason] went on Twitter, admitted the error of his ways, and sheepishly asked around for EPROM dumps.

Instead, [Manawyrm] wondered — would the chip have anti-ESD body diodes from GND to IO pins, by any chance? A diode mode multimeter check confirmed, yes! It was time for an outlandish attempt to recover the firmware. [Manawyrm] proposed that [Jason] connect all output pins but one to 5 V, powering the EPROM through the internal VCC-connected body diodes – reading the contents one bit at a time and then, combining eight dumps into a single image.

After preparing a TL866 setup, one hour of work and some PHP scripting later, the operation was a success. Apparently, in certain kinds of cases, dead ROM chips might still tell their tales! It’s not quite clear what happened here. The bond wires looked fine, so who knows where the connection got interrupted – but we can’t deny the success of the recovery operation! Need a primer on dumping EPROMs that are not dead? Here you go.

Continue reading “Dead EPROM Dumped With Help Of Body Diodes”

Owen with his laser cutter

A Home Made Laser Cutter For $700

While some decent lasers are out there for under $400 USD, they tend to be a little small. What if you wanted something a little nicer but didn’t want to jump to the $2,000 category? The answer for [Owen Schafer] was to build it with parts he had lying around and a few strategic purchases.

While he was initially planning on using a diode laser, doing anything more than engraving is tricky. He purchased a cheap 40 W CO2 laser tube, but it meant that he needed water cooling, mirrors, and more complex stuff that a diode doesn’t need. The frame is aluminum extrusion held together with 3D printed plates. Given there was a powerful laser bouncing around with mirrors, a plywood box formed the enclosure.

The stepper controller is an Arduino Mega running the Marlaser firmware, though [Owen] admits perhaps a laser cutter-specific driver board would have been better as he spent many hours trying to get the Arduino to do what he wanted. Air ventilation is a tube with a fan that vents out a nearby window. Water cooling is just a bucket of water with a pump in it. A simple nylon hose connected to a compressor with a maximum airflow valve provides an air assist while cutting. Finally, we’re happy to report that [Owen] bought safety glasses specific to his laser to protect his eyes and researched how to ground the high voltages generated.

We particularly loved seeing all of [Owen’s] test cuts. He proudly displayed his boxes, sharks, and lamp shades like anyone with their new laser cutter is wont to do. If you’re looking to upgrade your laser, there’s an add-on for detecting materials optically or a relatively cheap laser bed you can throw in your laser.

Continue reading “A Home Made Laser Cutter For $700”

The laser driver's internals, showing the custom PCB, the PSU, connectors and the interlocks.

Laser Driver Design Keeps Safety First

[Les] from [Les’ Lab] has designed a driver for laser diodes up to 10 watts, and decided to show us how it operates, tells us what we should keep in mind when designing such a driver, and talks about laser safety in general. This design is an adjustable current regulator based on the LM350A, able to provide up to 10 watts of power at about 2 volts – which is what his diode needs. Such obscure requirements aren’t easily fulfilled by commonly available PSUs, which is why a custom design was called for.

He tells us how he approached improving stability of the current regulation circuit, the PCB design requirements, and planning user interface for such a driver. However, that’s just part of the battle – regulating the current properly is important, but reducing the potential for accidental injuries even more so. Thus, he talks extensively about designing the driver circuit with safety in mind – using various kinds of interlocks, like a latching relay circuit to prevent it from powering up as soon as power is applied.

Continue reading “Laser Driver Design Keeps Safety First”