Down The Fabrication Rabbit Hole To Build A Recumbent Bike

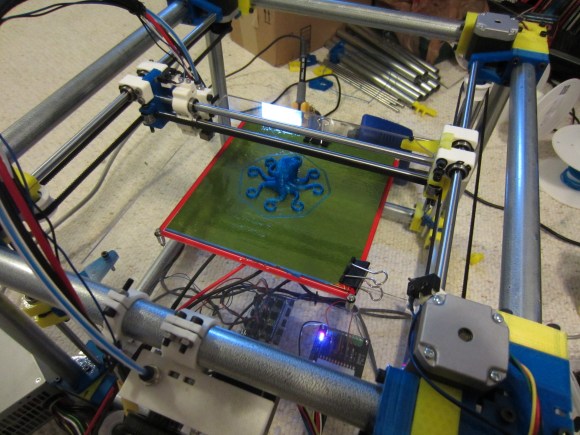
‘Tis the time of the year to find as many reasons as possible to shut off the smartphone and get yourself outside. [Rich Olson’s] newest excuse is a recumbent bicycle he built from at least three donor bikes. Of course we’ve seen any number of bike mods over the years (the tall bikes that integrate a ladder to climb up to the saddle have always held a special place in our hearts), but [Rich] left us a nice trail of bread crumbs on how to get into this yourself without breaking the bank.

He worked from a set of open source plans, with additional instructions laid out by [Brian in Ohio] in a bicycle hacking series on the Hacker Public Radio podcast. We learn in the first installment that you can get your hands on a torch that uses oxygen and MAP gas to braze the pipe joints — a quick Duck Duck Go search turns up kits that have the torch and both gases for about eighty bucks. Ask around your neighbourhood and you’re likely to find some bike frames from the disused and broken cycles lurking in dark garage corners. That first podcast page even has images that show you how to lay out fishmouth cuts where the tubes will meet.

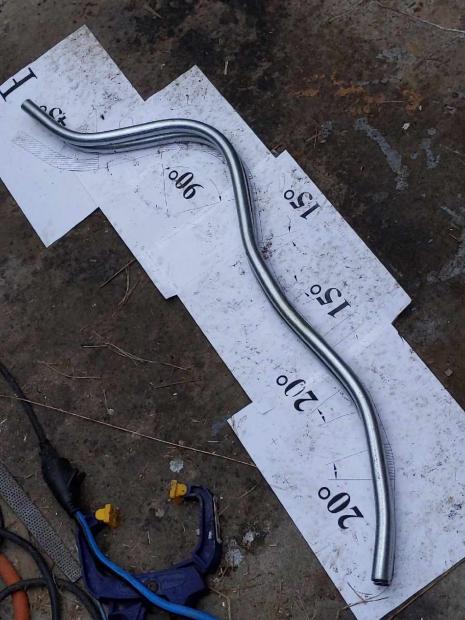
But what really grabbed our attention is the tube bending for the recumbent seat. This is a speciality part that you’re not going to be able to salvage from traditional bikes. [Rich’s] project shows off this image of a bend template and the two main rails he used from the seat; but how did he make those bends? The third episode of [Brian in Ohio’s] series covers the one simple trick that electricians don’t want you to know. Those rails are made out of electrical conduit and you can easily buy/rent/borrow a commonplace conduit bending tool which has the handy advantage of including angle guides.

You’ll find [Rich’s] video after the break which begins with a slideshow and ends with a demo ride. That lets us see the lacing on the back side of the seat fabric that keeps it taught, yet comfy in a way a standard bike saddle just can’t be.

If this still hasn’t convinced you to pick up a torch, you can also build a recumbent with a wooden frame.

Continue reading “Down The Fabrication Rabbit Hole To Build A Recumbent Bike”

Little Laser Light Show Is Cleverly Packaged, Cheap To Build

We’re suckers for any project that’s nicely packaged, but an added bonus is when most of the components can be sourced cheaply and locally. Such is the case for this little laser light show, housed in electrical boxes from the local home center and built with stuff you probably have in your junk bin.

When we first came across [replayreb]’s write-up and saw that he used hard drives in its construction, we assumed he used head galvanometers to drive the mirrors. As it turns out, he used that approach in an earlier project, but this time around, the hard drive only donated its platters for use as low mass, first surface mirrors. And rather than driving the mirrors with galvos, he chose plain old brushed DC motors. These have the significant advantage of being cheap and a perfect fit for 3/4″ EMT set-screw connectors, designed to connect thin-wall conduit, also known as electromechanical tubing, to electrical boxes and panels. The motors are mounted to the back and side of the box so their axes are 90° from each other, and the mirrors are constrained by small cable ties and set at 45°. The motors are driven directly by the left and right channels of a small audio amp, wiggling enough to create a decent light show from the laser module.

We especially like the fact that these boxes are cheap enough that you can build three with different color lasers. In that case, an obvious next step would be bandpass filters to split the signal into bass, midrange, and treble for that retro-modern light organ effect. Or maybe figuring out what audio signals you’d need to make this box into a laser sky display would be a good idea too.

Continue reading “Little Laser Light Show Is Cleverly Packaged, Cheap To Build”

Using Electrical Conduit For A 3D Printer Frame

electrical-conduit-for-cnc-frame

We’re always on the lookout for parts that can be source locally and that don’t cost a bundle. This hack fits both of those criteria. [Lee Miller] came up with a way to use steel electrical conduit as a 3D printer frame. He recently finished building the device seen above, and has been showing it off at Solid State Depot, a Hackerspace in Boulder, Colorado where he is a member.

Look closely at the corners of the frame in this image and you’ll see the 3D printed parts that make up the clamping mechanism. Each has three components that screw together. The two gaps in between each have a rubber ‘O’ ring. When the plastic clamps are screwed together they squeeze the rings which hold the electrical conduit firmly. This also has the side benefit of dampening vibrations.

It’s certainly easy to find this type of conduit which is sold at every home store (and most hardware stores). Just make sure that you check that a piece is straight when you pick it out. The SCAD files for the parts are available from his Github repo.

Continue reading “Using Electrical Conduit For A 3D Printer Frame”

Building A Yagi-Uda Antenna

[Tommy Gober] built this Yagi-Uda antenna that has some handy design features. The boom is a piece of conduit with holes drilled in the appropriate places. The elements are aluminum arrow shafts; a good choice because they’re straight, relatively inexpensive, and they have #8-32 screw threads in one end. He used some threaded rod to connect both sides of the reflector and director elements. The driven elements are mounted offset so that a different machine screw for each can be connected to the appropriate conductor of the coaxial cable. The standing wave ratio comes in right where it should meaning he’ll have no trouble picking up those passing satellites as well as the International Space Station.