Get A Better Look At E3D’s Tool-changing 3D Printer Kit

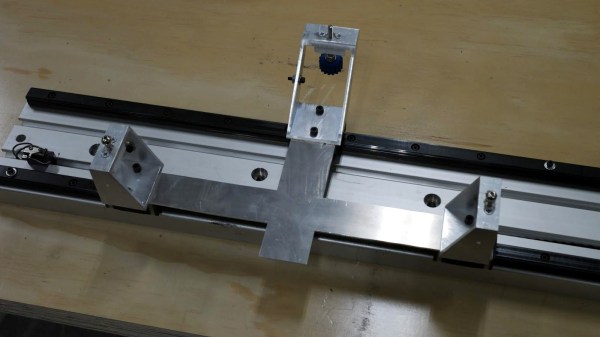
Want a closer, in-depth look at E3D’s motion system and tool-changing platform? [Kubi Sertoglu] shared his impressions after building and testing the system, which comes in the form of a parts bundle direct from E3D costing just under $3000 USD. The project took [Kubi] about 15 hours and is essentially built from the ground up. The system is definitely aimed at engineers and advanced prosumers, but [Kubi] found it to be of remarkable quality, and is highly pleased with the end results.

E3D Motion system and toolchanger, with four extruders

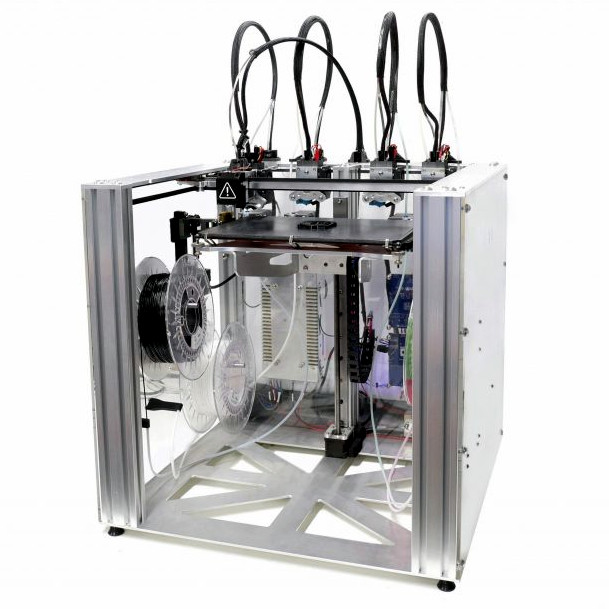
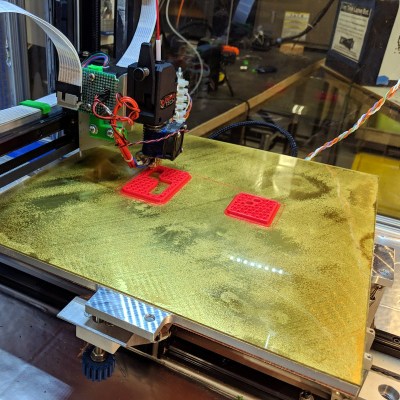
We first saw E3D’s design announced back in 2018, when they showed their working ideas for a system that combined motion control and a toolchanger design. The system [Kubi] built uses four 3D printing extruders for multi-material prints, but in theory the toolheads could just as easily be things like grippers, lasers, or engravers instead of 3D printing extruders.

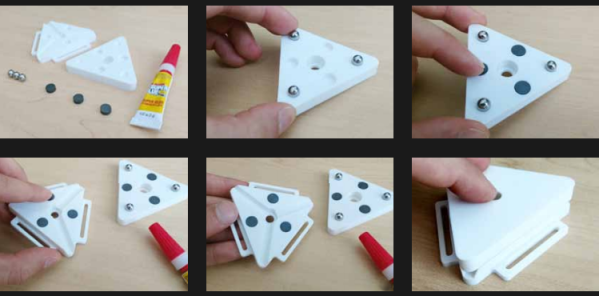
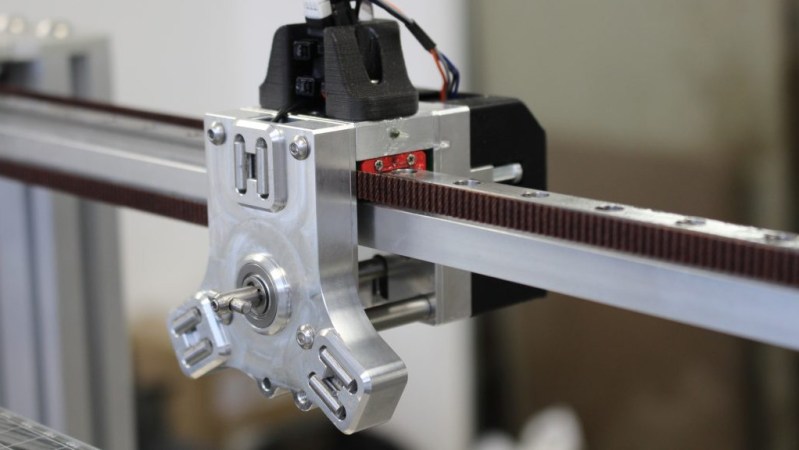
One challenge with tool changing is ensuring tools mount and locate back into the same place, time after time. After all, a few fractions of a millimeter difference in the position of a print head would spell disaster for the quality of most prints. Kinematic couplings are the answer to being sure something goes back where it should, but knowing the solution is only half the battle. Implementation still requires plenty of clever design and hard engineering work, which is what E3D has delivered.

Want a closer look at the nitty-gritty? Check out E3D’s GitHub repository for all the details on their toolchanger and motion system.

3D Printable Kinematic Couplings, Ready To Use

Time may bring change, but kinematic couplings don’t. This handy kinematic couplings resource by [nickw] was for a design contest a few years ago, but what’s great is that it includes ready-to-use models intended for 3D printing, complete with a bill of materials (and McMaster-Carr part numbers) for hardware. The short document is well written and illustrated with assembly diagrams and concise, practical theory. The accompanying 3D models are ready to be copied and pasted anywhere one might find them useful.

What are kinematic couplings? They are a way to ensure that two parts physically connect, detach, and re-connect in a precise and repeatable way. The download has ready-to-use designs for both a Kelvin and Maxwell system kinematic coupling, and a more advanced design for an optomechanical mount like one would find in a laser system.

The download from Pinshape requires a free account, but the models and document are licensed under CC – Attribution and ready to use in designs (so long as the attribution part of the license is satisfied, of course.) Embedded below is a short video demonstrating the coupling using the Maxwell system. The Kelvin system is similar.

Continue reading “3D Printable Kinematic Couplings, Ready To Use”

Robot Arms Nudge The Hands Of Time In The Strangest Clock

We see a lot of clocks here at Hackaday. Digital clocks, retro clocks, lots of Nixie clocks, binary clocks, and clocks that appear to be designed specifically to be unreadable. But this dual-servo kinematic clock is something we haven’t seen yet, and it’s certainly worth a mention.

[mircemk]’s idea is simple and hearkens back to grammar school days when [Teacher] put a large cardboard clock dial on the blackboard and went through the “big hand, little hand” drill. In this case, the static cardboard clock has been replaced by a 3D-printed dial and hands, while a pair of servos linked together by two arms takes the place of the teacher. The video below shows it in action; the joint in the linkage between the two servos has a screw sticking out that can be maneuvered across the clock face to reposition the hands. It’s a little jittery, though; [mircemk] might want to tune the servo loops up a bit or tighten the linkage joints to make things a little smoother.

Even with the shakes, we find it wonderfully weird and hard to stop watching. It reminds us a bit of this luminous plotting clock from a while back – same linkage, different display.

Continue reading “Robot Arms Nudge The Hands Of Time In The Strangest Clock”

Kinematic Mount For 3D Printer Bed Shows Practical Design

Aluminum bed with new kinematic mount and base on printer Son of Megamax, at the Milwaukee Makerspace

[Mark Rehorst] has been busy designing and building 3D printers, and Son of Megamax — one of his earlier builds — needed a bed heater replacement. He took the opportunity to add a Kelvin-type kinematic mount as well. The kinematic mount and base efficiently constrain the bed in a controlled way while allowing for thermal expansion, providing a stable platform that also allows for removal and repeatable re-positioning.

After a short discussion regarding the heater replacement, [Mark] explains the design and manufacture of his kinematic mount. Of particular note are the practical considerations of the design; [Mark] aimed to use square aluminum tubing as much as possible, with machining requirements that were easily done with the equipment he had available. Time is a resource after all, and design decisions that help one get something working quickly have a value all their own.

If you’re still a bit foggy on kinematic mounts and how they work, you’re not alone. Check out our coverage of this 3D-printed kinematic camera mount which should make the concept a bit clearer.

Internet Controlled Robotic Arm

The guys over at Rusty Nail Workshop have put up an Internet controlled robotic arm for your amusement. While you’re waiting for the turkey to be done (or, you know, working), try your hand at moving some LEGO pieces around with a remote-controlled robotic arm.

The build log goes through the parts needed for the build. The arm itself is a Lynxmotion AL-5D, a heavy-duty device that’s far more capable and looks a lot better than our old Armatron.

The arm is controlled by an Arduino Uno. The Arduino is connected to the arm’s servo controller. Movement commands are received by an Ethernet shield and translated into servo commands. The entire build runs independently of a computer just like this project’s inspiration, the Orbduino.

Of course you can imagine the mayhem that would ensue if multiple people tried to take control of the robot simultaneously. A bit of code on the project’s website makes sure only one person has control of the robot at any given time. Check out what somebody else is building out of LEGO blocks with a Waldo. If you’re lucky, you’ll be able to knock that work down.