Casting Car Emblems Via 3D Printing

Casting is a process that can be quite demanding for the first timer, but highly rewarding once the basic techniques are mastered. It then becomes possible to quickly and reliably produce metal parts en masse, and with impressive tolerances if the right method is chosen. [VegOilGuy] has been experimenting with lost PLA casting, and decided to see if it could be applied to car emblems. 

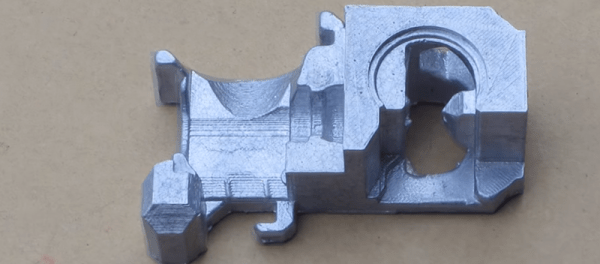
The process begins with 3D models of various car emblems, primarily sourced from Thingiverse. These are printed in PLA, with sprues added to assist with the casting process. The parts are sanded to avoid unsightly print lines on the finished product, and any voids filled with wax. The various emblems are then assembled onto a casting tree, with extra sprues added to improve metal flow with wax and further PLA parts.

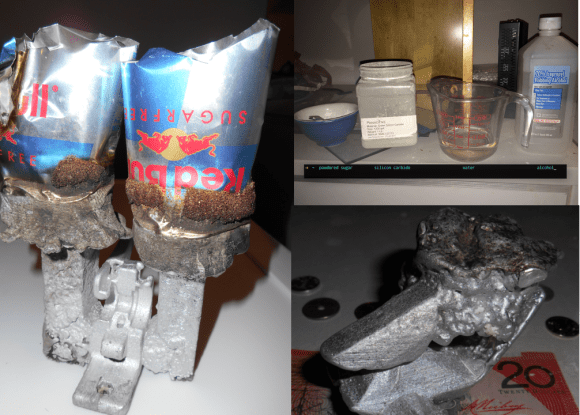
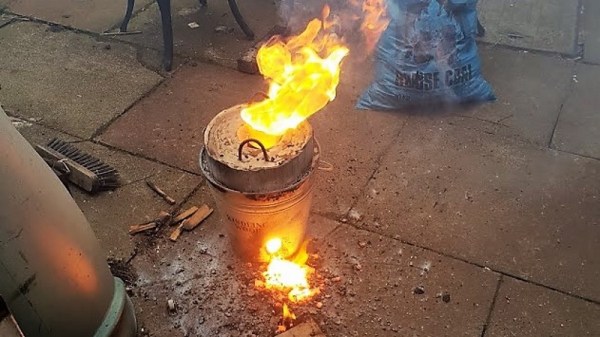
The investment mold is then created with plaster, and baked to remove water and melt out the PLA. This is crucial, as any water left in the mold can react explosively with the molten aluminium bronze.  The mold is then filled with metal and then allowed to cool. The plaster mold is destroyed, and the parts can then be removed. Final processing involves a trip through a rock tumbler before final polish with sandpaper.

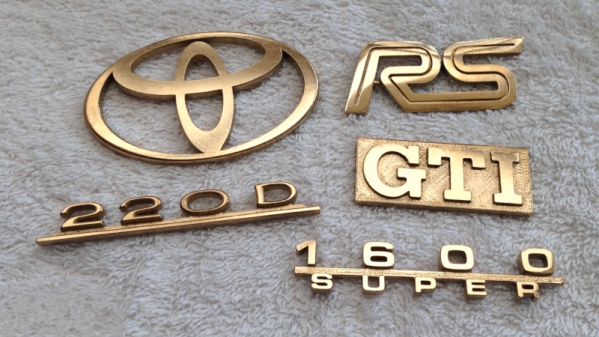
[VegOilGuy] gets impressive results, with the parts looking excellent in their bronze colour. This is an unconventional color for a car emblem, but it’s noted that this material is an excellent candidate for chrome plating to get a more OEM finish.

You might find your lost PLA casting experiments could benefit from the help of a microwave, too. Video after the break.

Continue reading “Casting Car Emblems Via 3D Printing”

Fail Of The Week: When Good Foundries Go Bad

Like many of us, [Tony] was entranced by the idea of casting metal, and set about building the tools he’d need to melt aluminum for lost-PLA casting. Little did he know that he was about to exceed the limits of his system and melt a hole in his patio.

[Tony]’s tale of woe begins innocently enough, and where it usually begins for wannabe metal casters: with [The King of Random]’s homemade foundry-in-a-bucket. It’s just a steel pail with a homebrew refractory lining poured in place, with a hole near the bottom to act as a nozzle for forced air, or tuyère. [Tony]’s build followed the plans pretty faithfully, but lacking the spent fire extinguisher [The King] used for a crucible in the original build, he improvised and used the bottom of an old propane cylinder. A test firing with barbecue charcoal sort of worked, but it was clear that more heat was needed. So [Tony] got hold of some fine Welsh anthracite coal, which is where the fun began. With the extra heat, the foundry became a mini-blast furnace that melted the thin steel crucible, dumping the molten aluminum into the raging coal fire. The video below shows the near catastrophe, and we hope that once [Tony] changed his pants, he hustled off to buy a cheap graphite or ceramic crucible for the next firing.

All kidding aside, this is a vivid reminder of the stakes when something unexpected (or entirely predictable) goes wrong, and the need to be prepared to deal with it. A bucket of dry sand to smother a fire might be a good idea, and protective clothing is a must. And it pays to manage your work area to minimize potential collateral damage, too — we doubt that patio will ever be the same again.

Continue reading “Fail Of The Week: When Good Foundries Go Bad”

Casting A 3D Printed Extruder Body In Aluminum

Creating 3D prints is great, but sometimes you need something more durable. [Myfordboy] printed a new 3D printer extruder in PLA and then used the lost PLA method to cast it in aluminum. You can see the results in the video below.

The same process has been used for many years with wax instead of PLA. The idea is to produce a model of what you want to make and surround it with a material called investment. Once the investment sets, heat melts the PLA (or wax) leaving a mold made of the investment material. Once you have the mold, you can place it in a frame and surround it with greensand. Another frame gets a half pipe placed and packed with greensand. The depression made by this pipe will provide a path for the metal to flow into the original mold. Another pipe will cut a feeder into the greensand over this pipe.

Continue reading “Casting A 3D Printed Extruder Body In Aluminum”

Lost PLA Casting Brings Out The Beauty Of Macromolecules

Biochemistry texts are loaded with images of the proteins, nucleic acids, and other biopolymers that make up life. Depictions of the 3D structure of macromolecules based on crystallography and models of their most favorable thermodynamic conformations are important tools. And some are just plain beautiful, which is why artist [Mike Tyka] has taken to using lost-PLA casting to create sculptures of macromolecules from bronze, copper, and glass.

We normally don’t cover strictly artistic projects here at Hackaday, although we do make exceptions, such as when the art makes a commentary on technology’s place in society. In [Mike]’s case, not only is his art beautiful and dripping with nerd street cred, but his techniques can be translated to other less artsy projects.

kcsa_5_big
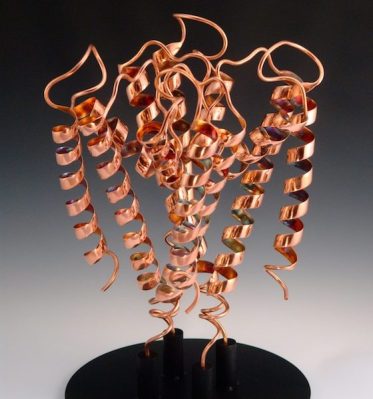
For “Tears”, his sculpture of the enzyme lysozyme shown in the banner image, [Mike] started with crystallographic data that pinpoints every peptide residue in the protein. A model is created for the 3D printer, with careful attention paid to how the finished print can be split apart to allow casting. Clear PLA filament is used for the positive because it burns out of the mold better than colored plastic. The prints are solvent smoothed, sprues and air vents added, and the positive is coated with a plaster mix appropriate for the sculpture medium before the plastic is melted out and the mold is ready for casting.

[Mike]’s sculpture page is well worth a look even if you have no interest in macromolecules or casting techniques. And if you ever think you’ll want to start lost-PLA casting, be sure to look over his build logs for plenty of tips and tricks. “Tears” is executed in bronze and glass, and [Mike]’s description is full of advice on how to handle casting such vastly different media.

Thanks to [Dave Z.] for the tip.

Lost PLA Casting With A Little Help From Your Microwave

lost-pla

[Julia and Mason] have been perfecting their microwave-based lost PLA casting technique over at Hackaday.io. As the name implies, lost PLA is similar to lost wax casting techniques. We’ve covered lost PLA before, but it always involved forges. [Julia and Mason] have moved the entire process over to a pair of microwaves.

Building on the work of the FOSScar project, the pair needed a way to burn the PLA out of a mold with a microwave. The trick is to use a susceptor. Susceptors convert the microwave’s RF energy into thermal energy exactly where it is needed. If you’ve ever nuked a hot pocket, the crisping sleeve is lined with susceptor material. After trying several materials, [Julia and Mason] settled on a mixture of silicon carbide, sugar, water, and alcohol for their susceptor.

The actual technique is pretty simple. A part printed in PLA is coated with susceptor. The part is then placed in a mold made of plaster of paris and perlite. The entire mold is cooked in an unmodified household microwave to burn out the PLA.

A second microwave with a top emitter is used to melt down aluminum, which is then poured into the prepared mold. When the metal cools, the mold is broken away to reveal a part ready to be machined.

We think this is a heck of a lot of work for a single part. Sometimes you really need a metal piece, though. Until metal 3D printing becomes cheap enough for everyone to do at home, this will work pretty well.