Bench Supplies Get Smaller Thanks To USB-C

Bench power supplies are an indispensable tool when prototyping electronics. Being able to set custom voltages and having some sort of current limiting feature are key to making sure that the smoke stays inside all of the parts. Buying a modern bench supply might be a little too expensive though, and converting an ATX power supply can be janky and unreliable. Thanks to the miracle of USB-C, though, you can build your own fully-featured benchtop power supply like [Brian] did without taking up hardly any space, and for only around $12.

USB-C can be used to deliver up to 100W but is limited to a few set voltage levels. For voltages that USB-C doesn’t support, [Brian] turns to an inexpensive ZK-4KX buck-boost DC-DC converter that allows for millivolt-level precision for his supply’s output. Another key aspect of using USB-C is making sure that your power supply can correctly negotiate for the amount of power that it needs. There’s an electronic handshake that goes on over the USB connection, and without it there’s not a useful amount of power that can be delivered. This build includes a small chip for performing this negotiation as well.

With all the electronics taken care of, [Brian] houses all of this in a 3D-printed enclosure complete with a set of banana plugs. While it may not be able to provide the wattage of a modern production unit, for most smaller use cases this would work perfectly. If you already have an ATX supply around, though, you can modify [Brian]’s build using that as the supply and case too.

Continue reading “Bench Supplies Get Smaller Thanks To USB-C”

Hydraulic Lifting Workbench To Save Your Back

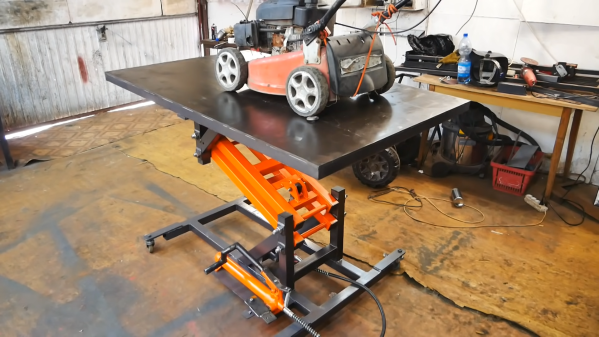
Working on heavy mechanical machines at awkward heights can be a real back breaker. [Workshop From Scratch] knows this all to well, so he built himself a very clean hydraulic lifting workbench to use around the workshop.

As we’ve come to expect from this aptly named channel, everything on the device has been built from scratch. Though he did use an off-the-shelf manually operated hydraulic piston. The lifting mechanism consists of a parallel bar linkage which allows the benchtop to stay parallel through its entire range of motion. The hand lever of the hydraulic piston was converted to a foot pedal for comfort, and the base has some sturdy trolley wheels to move it around the workshop. Raising the table is admittedly quite slow due to the manual pumping required, but it gets the job done eventually.

Making your own tools and equipment provides a lot of satisfaction, especially if you end up using it a lot. [Workshop From Scratch] builds some excellent tools, like this magnetic drill press, magnetic vice and a workshop crane. We hope to see many more.

Continue reading “Hydraulic Lifting Workbench To Save Your Back”

A DIY Electronics Lab You Can Show Off With Pride

It’s hardly a secret that getting into a serious electronics habit can be detrimental to your bank account. A professional grade lab is simply unobtainable for many a tinkerer, and even mid-range hardware can set you back considerably. Which is why many folks just starting out will attempt to salvage or build as much of their equipment as possible. It might not always be pretty, but it’ll get the job done.

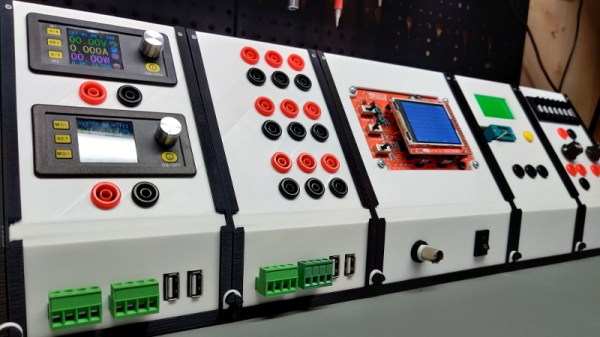
But this project by [Chrismettal] could end up completely reinventing the home electronic workspace. Using 3D printed frames, low-cost components, and a sprinkling of custom PCBs, this modular electronics workbench has all the bells and whistles an aspiring hardware hacker could need. As an added bonus, it looks like something that came off the International Space Station.

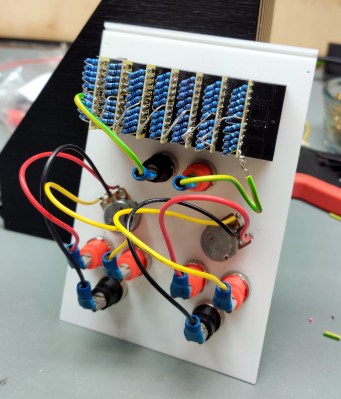
Inside the resistor substitution module.

This is one of those projects that simply can’t be done justice in a few paragraphs. If you’ve ever wanted to put together a dedicated electronics workbench but were put off by the cost of individual components, read though the fantastic documentation [Chrismettal] has prepared for the EleLab_v2. Is it all top-of-the-line hardware? No, of course not. But it’s more than suitable for the kind of work people in this community usually find themselves involved in on a weekend.

So what’s included? Naturally [Chrismettal] has created a power supply module, in both variable and fixed flavors. But there’s also a module for a resistor substitution, a component tester, and even a digital storage oscilloscope. You can mix and match the modules suit your needs, and if you want to create entirely new ones, the FreeCAD sources are available to get you started.

We’ve seen low-cost power supply modules before, and naturally we’re no strangers to cheap DSO kits. But this project wraps those devices and gadgets up into a form factor that anyone would be happy to have on their bench. We’re exceptionally interested in seeing new modules developed for the EleLab_v2, and doubt this is the last time you’ll see this impressive project grace these pages.

[Thanks to BrunoC for the tip.]

Iron Pipe Makes A Great Workbench

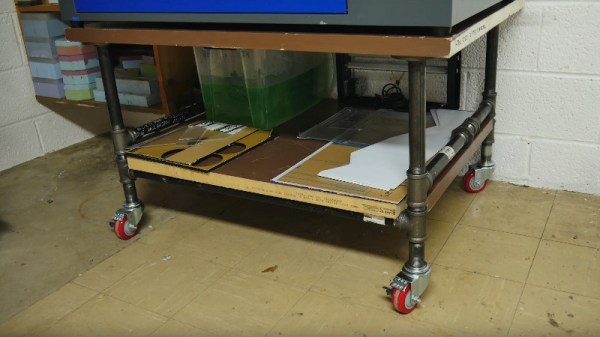
It’s a frequently encountered problem in any workshop; how do you make a bench? And once you’ve made a bench, how do you put it on wheels to move it about? [Eric Strebel] needed a cart for his laser cutter, so he designed his own in an unexpected material: malleable iron pipe.

The attraction of iron pipe is its ready availability and ease of assembly. [Eric] created a sturdy table complete with a worktop made from a solid door in a very short time. T pieces and joiners were used, along with a hefty set of flanges for the tabletop itself. The casters are the expanding stem variety, with a compressed rubber insert expanding to hold them securely in place.

The result as can be seen in the video below is a really neat trolley for the cutter, followed quickly by another workbench. It would be interesting to know more about this material, parameters such as its wall thickness and lateral strength, because in a table without any cross-bracing it becomes important to avoid an untimely collapse.

The most common material for benches seems still to be wood, indicating that for such a technophile community we can be surprisingly conservative in our choices. Sometimes though, benches are made from the most surprising things.

Continue reading “Iron Pipe Makes A Great Workbench”

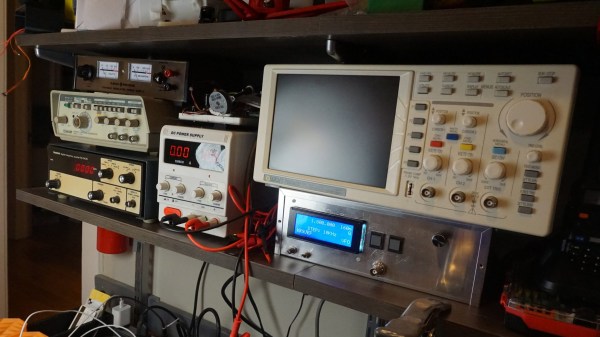
What Does An Electronics Tinkerer’s Workbench Need?

Ever been in a situation where you’re not sure where to begin building your own electronics workbench or improve your existing one? [Jeff Glass] writes in with a blog post as detailed as it is beautifully long, chronicling each and every part of his own home lab in order to give us some ideas on how to get one started.

Despite [Jeff] using his own workbench tools accrued over 10 years of working in the field as prime example, his guide takes into account that you don’t need the latest and most expensive in order to get working. Affordable examples of the tools presented are suggested, along with plenty of links to follow and what to look for in each one of them. He even goes on and aside to note the lack of affordable versions of bench-top multimeters, seeing how the portable counterparts are so cheap and plentiful in contrast.

However, contrary to [Jeff]’s claims, we would argue that there are things you could do without, such as the oscilloscope. And you could use a regular soldering iron instead of a soldering station if you are in a pinch. It just depends on the type of work you’re looking to do, and simpler tools can work just fine, that’s what they’re there for after all. That’s not to say his advice is all bad though, just that every job has different requirements, and he notes just that in the final notes as something to keep in mind when building your own lab.

Lastly, we appreciate having a section dedicated to shop safety and the inclusion of soldering fume extractors in the recommendations. We’ve talked about the importance of fire safety when working with these tools at home before, and how soldering is not the only thing that can produce toxic fumes in your shop. With no shortage of great tips on how to build your own fume extractors, we hope everybody’s out there hacking safely.

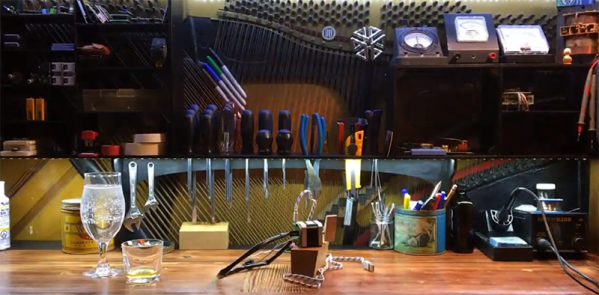
Recycled Piano Becomes Upcycled Workbench

Pianos are free, in case you’re not hip to the exciting world of musical instrument salvage. Yes, the home piano, once the pinnacle of upper middle class appreciation of the arts, is no longer. The piano your great aunt bought in 1963 is just taking up space, and it’s not like the guy on Craigslist giving away a free piano has a Bösendorfer.

It’s out of this reality of a surplus of cheap used pianos that [luke] built a new desk. He got it a while ago, but after getting it into his house, he realized it was too old to be tuned anymore. Or at least it was uneconomical to do so. This piano became a workbench, but after a while [luke] wanted something with a little more storage.

The process of converting this piano to a desk began with taking a few photos and putting them into Fusion 360. A series of panels and brackets were modeled in box jointed plywood, and the entire thing was cut out of 6mm Baltic birch plywood at the Vancouver Hack Space.

There are a few nice features that make this desk a little better than an Ikea special. There’s a Raspberry Pi mounted to the shelves, because the Pi still makes a great workbench computer. There’s a power supply, and hookups for 12 V, 5 V, and 3.3 V from an ATX power supply. This is controlled with an awesome antique power switch mounted to the side of the piano. Slap a few coats of black paint on that, and [luke] has an awesome, functional workbench that also has out-of-tune sympathetic strings. Not bad.

You can check out the entire build video below. Thanks [Jarrett] for sending this one in.

Continue reading “Recycled Piano Becomes Upcycled Workbench”

From Plastic Bottle To Plastic Brush

We first saw someone turn a plastic bottle into plastic ribbon about four years ago. Since then, we’ve wondered what this abundant, sturdy material could be used for besides just tying things together.

[Waldemar Sha] has answered that question with his excellent brush made from scrap wood and plastic bottle rope. Turning seven 1-litre bottles into curly bristle fodder was easy enough, but they have to be straight to brush effectively. No problem for [Waldemar]. He wound it all up on a  spinning homemade jig that’s anchored in a bench vise. The jig is designed to slide into a small electric sandwich grill he had lying around, and he just flips it after a while so the rope straightens evenly.

We really like the way he secured the bristles into the brush base. After drilling the holes, he sawed lengthwise channels that are deep enough for a bamboo skewer. Each group of bristles is hung over the skewer and down through the hole, and everything is glued in place before the handle is added. Sweep past the break to watch him tidy his workbench, and then learn how to make your own plastic rope.

Is there a better use of recycled plastic than making tools? Check out this joiner’s mallet made from milk jugs. Continue reading “From Plastic Bottle To Plastic Brush”