3D Print Your Way To A Glass Cockpit Simulator

Today’s commercial aircraft are packed to the elevators with sensors, computers, and miles and miles of wiring. Inside the cockpit you’re more than likely to see banks of LCDs and push buttons than analog gauges. So what’s that mean for the intrepid home simulator builder? Modern problems require modern solutions, and this 3D printed simulator is about as modern as it gets.

Published to Thingiverse by the aptly named [FlightSimMaker], this project consists of a dizzying number of 3D-printed components that combine into a full-featured desktop simulator for the Garmin G1000 avionics system. Everything from the parking brake lever to the push buttons in the display bezels was designed and printed: over 200 individual parts in all. Everything in this X-Plane 11 compatible simulator is controlled by an Arduino Mega 2560 with the SimVim firmware.

To help with connecting dozens of buttons, toggle switches, and rotary encoders to the Arduino, [FlightSimMaker] uses five CD74HC4067 16-channel multiplexers. The display is a 12.1 inch 1024 x 768 LCD panel with integrated driver, and comes in at the second most expensive part of the build behind the rotary encoders. All told, the estimated cost per display is around $250 USD.

Even if you aren’t looking to build yourself a high-tech flight simulator, there’s plenty of ideas and tips here that could be useful for building front panels. We particularly like the technique used for doing 3D-printed lettering: the part is printed in white, spray painted a darker color, and then the paint is sanded off the faces of the letters to reveal the plastic. Even with a standard 0.4 mm nozzle, this results in clean high-contrast labels on the panel with minimal fuss.

Of course, while impressive, these panels are just the beginning. There’s still plenty more work to do if you want to build an immersive simulation experience. Including, in the most extreme cases, buying a Boeing 737 cockpit.


What Does An Electronics Tinkerer’s Workbench Need?

Ever been in a situation where you’re not sure where to begin building your own electronics workbench or improve your existing one? [Jeff Glass] writes in with a blog post as detailed as it is beautifully long, chronicling each and every part of his own home lab in order to give us some ideas on how to get one started.

Despite [Jeff] using his own workbench tools accrued over 10 years of working in the field as prime example, his guide takes into account that you don’t need the latest and most expensive in order to get working. Affordable examples of the tools presented are suggested, along with plenty of links to follow and what to look for in each one of them. He even goes on and aside to note the lack of affordable versions of bench-top multimeters, seeing how the portable counterparts are so cheap and plentiful in contrast.

However, contrary to [Jeff]’s claims, we would argue that there are things you could do without, such as the oscilloscope. And you could use a regular soldering iron instead of a soldering station if you are in a pinch. It just depends on the type of work you’re looking to do, and simpler tools can work just fine, that’s what they’re there for after all. That’s not to say his advice is all bad though, just that every job has different requirements, and he notes just that in the final notes as something to keep in mind when building your own lab.

Lastly, we appreciate having a section dedicated to shop safety and the inclusion of soldering fume extractors in the recommendations. We’ve talked about the importance of fire safety when working with these tools at home before, and how soldering is not the only thing that can produce toxic fumes in your shop. With no shortage of great tips on how to build your own fume extractors, we hope everybody’s out there hacking safely.

Bottle Organ Breakdown

A keen-eyed commenter pointed us to a homemade bottle organ that plays like a piano. The complexity gets turned up with foot-powered bellows and custom keys, but the magic of [Mike] and [Simon Haisell]’s garage-built instrument is not lost in the slightest. We also have the video below the break and there is a bottle organ performance by [Coyote Merlot].

The working concepts are explained well in the video, and that starts with the bellows. In the first few seconds of the video, we see an organist swaying as he plays, and it would be accurate to say the music moves him. The wobbling is to pedal a couple of levers that squeeze a pair of air sacs and slide under wheels that look like a hardware store purchase. The spring-return mechanism is a repurposed bungee cord and you know we dig that kind of resourcefulness. Each bellow valve is made with traditional leather flaps of the type that predate bungee cords and camera phones. These air pumps inflate a big reservoir in the back that provides continuous pressure to a manifold where each of the thirty-six keys control a valve responsible for one bottle. The pair built every wooden part we mentioned with the explicit purpose of creating this organ.

Continue reading “Bottle Organ Breakdown”

Say What You Will, A Fursuit Is A Lot Of Work.

One thing [Dr. Cockroach]’s build log shows is that a fursuit isn’t an easy thing to make.

Furries came out of early American comics and grew into the subculture the internet just can’t leave alone today. Many people take on an avatar of their furry self when participating in this subculture, and one of the prize achievements is to design, commission, or build a fur suit. What [Dr. Cockroach]’s build shows is why some of these suits can easily fetch 10,000USD. It really is a labor of love. It’s also brings up one of his goals in this project, to discover cheaper ways to construct these suits, so other people who share his hobby have a more financially accessible process to join in.

We were fascinated at the construction process. A base was built out of soft foam around a mock head. On this base more foam was layered and carved before the shape of his avatar, Marcus, started to take form. His wife found the testing process particularly humorous, but when he was happy with the arrangement and the movable jaw he began working on the pattern.

The pattern making process is very clever. He layers the foam base with masking tape and then peels it off. It’s easy to then cut the tape strategically until it lays flat. We can definitely see ourselves using this trick to do anything from sheet metal to duplicating plastic forms.

Then comes quite a lot of difficult stitching. We’d never thought about it before, but if you’re trying to simulate fur a lot of attention has to be paid tot he direction the fur lays; further increasing the difficulty.

Wherever your opinion lies, no hacker can turn down a detailed build log, and there are tricks to be learned anywhere if enough attention is paid.

ArrBot Is A Fast Way To Get Out Standing In A New Field Of Robotics

[Junglist] correctly points out that agricultural robotics is fast on its way to being the next big thing (TM) and presents his easy to build ArrBot platform so others can get hacking fast. 

The frame is built out of the same brackets and aluminum tubing used to add handrails to stairwells on buildings. Not only is this a fast way to do it, the set-up can be guaranteed to be sturdy since hand rails are often literally standing between life and death. The high ground clearance allows for all sorts of sensors and devices to be mounted while still being able to clear the plants below. 

For motion hub motors driven by an ODrive were re-purposed for the task. He explored turning the wheels as well, but it seems like  differential steer and casters works well for this set-up. ROS on an Nividia Jetson runs the show and deals with the various sensors such as a stereoscopic camera and IMU.

We’re excited to see what hacks people come up with as research in this area grows. (Tee-hee!) For example, [Junglist] wants to see the effect of simply running a UV light over a field rather than spraying with pesticides or fungicides would have.

Why Is Your Cellphone Not A More Useful Computer?

Sometimes when you are browsing randomly through the tech feeds, up pops an article that just crystallizes a nascent thought that had been simmering below the surface for a long time, and is enough to make you sit up and say “Yes! I agree completely with that!”. Such a moment came with [Cheapscatesguide]’s post: “My Fantasy: A Cellphone I can Use as a Desktop Computer“, in which the pertinent question is asked that if smartphones are so powerful, why are they not much better at being more than, well, smartphones?

Readers with long memories may recall that the cellphone-as-computer idea is one that has been tried at least once before. The Motorola Atrix appeared in the early years of this decade, and was a high-end smartphone that could be slotted into both desktop replacement and netbook-style base stations and used as a Linux-based personal computer. Unfortunately it was both eye-wateringly expensive and disappointingly slow due to a hobbled operating system, so it failed to set the market alight. There was a brief moment when unsold Atrix netbook docks were available on the surplus market and became popular platforms as a Raspberry Pi desktop interface, but this experiment seems to have put paid to the idea of one device to truly rule them all.

If we had to hazard a guess as to why this has failed to happen, we’d finger both the manufacturer’s desire not to undermine their lucrative sales in other sectors, and both their and the carriers’ desire to lock down the devices as much as possible. A manufacturer such as Apple will for example never  produce an iPhone that can replace a desktop, because it would affect their MacBook sales. Oddly in another form we’re nearly there, this piece is being worked on with a Chromebook, a device that has a useful browser, a functional Android layer, and (because it’s a 64-bit model) an officially supported and useful Debian layer. We don’t expect this to translate into a phone any time soon though.

From another angle, we’ve asked in the past why we aren’t hacking old cellphones.

Moto Atrix lapdock picture: ETC@USC [CC BY-SA 2.0].

Via Hacker News.

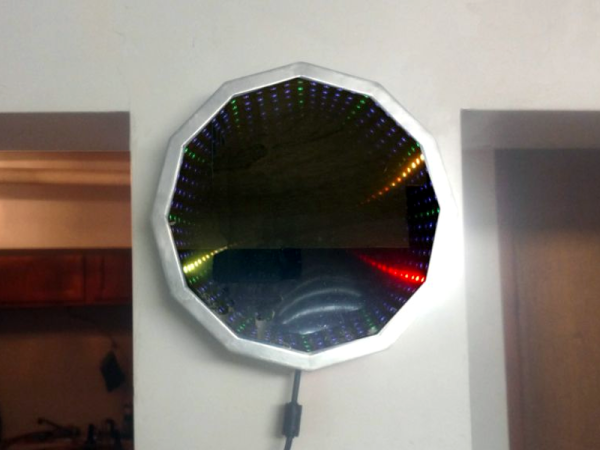
It’s About Time We Saw Another Infinity Mirror Clock

Have you made an infinity mirror yet? They’re pretty much a rite of passage project at this point. But unlike that DIY power supply, most of them serve no function beyond looking cool (not that there’s anything wrong with that). Might as well make it do something, right?

[How Do You – DIY] has a built a few mirrors because he likes experimenting with the effects of different reflective surfaces in various positions. This time, he’s built a clock from the ground up. Basic infinity mirror rules apply here, though he used semi-transparent reflective film on both sides for greater effect and put an adjustable warping bar in the back so the trail curves toward the center. The actual timekeeping is done by an Arduino Nano.

The RGB LEDs on his strip were a few millimeters too far apart for his liking, so he added a few dozen hours to the build by cutting it apart and painstakingly placing them all around the wood frame. Then he Dremeled a groove for each set of three wires that link the LEDs so that they sit flush. The final product is beautiful, and it’s a shame that this LED-holding frame is hidden away inside the equally well-crafted aluminium frame.

Don’t waste another minute — sweep past the break to check out the build video. If it’s a portable and functional conversation piece you want, make a set of infinity mirror coasters.

Oh, and did we mention that we’re running a clock contest? Hint, hint.

Continue reading “It’s About Time We Saw Another Infinity Mirror Clock”