The Man Whose ‘Scopes We All Wanted To Own: Walter LeCroy

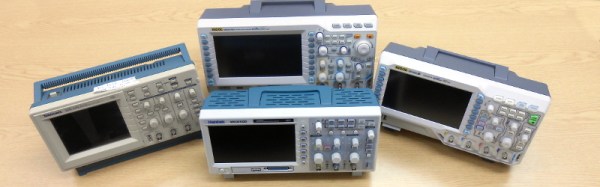
We’re sorry to say that back in May we missed the passing of Walter LeCroy, the man whose name appeared on some of the most desirable and higher-spec oscilloscopes to be found. If you’ve never used a LeCroy ‘scope then you’ll still have benefited from his work, as a pioneer of storage oscilloscopes even the more modest instruments which now grace our benches owe much to his legacy.

The linked article about his life comes from the successor to his company, and describes his early experience in scientific instrumentation and in particular in the field of high-energy physics,before the development of the first digital storage oscilloscopes. In particular it mentions the 1971 “Waveform Digitizer”,a device that used a transmission line and a series of sample-and-hold circuits to grab and digitize a sequence of readings with a single ADC. It goes on to describe the model 9400 series from the 1980s which with its successors are probably are what come to mind for many of us when thinking of a LeCroy ‘scope, the familiar big square box with integrated computer-style CRT, floppy drive, and small printer.

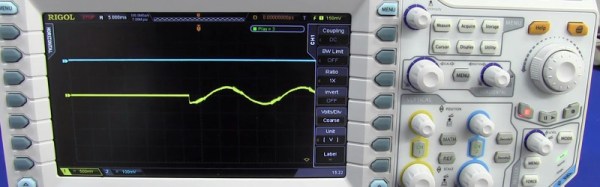
Here in 2023 it’s not beyond the bounds of possibility to design your own digital oscilloscope simply by pairing a fast microcontroller with an appropriately expensive ADC chip. To look back at the effort required to produce one with a high bandwidth using 16-bit microcomputer parts and 1980s silicon is to be reminded that we stand upon the shoulders of giants.

Thanks [Daniel Valuch] for the tip.

The completed oscilloscope in parts, with the screen in the front connected with prototyping wires, protoboarded buttons on the right, and the BlackPill board somewhere behind

DIY STM32 Scope Is Simple, Cheap, And Featureful

Would you like to have a small digital oscilloscope? Do you have a spare BlackPill (STM32F401) board and a TFT display laying around? [tvvlad1234] presents us with a simple and educational digital storage oscilloscope design that barely needs any components for you to build one, and it’s packed with features just like you would expect from a self-respecting open-source project. Not just that — it can even stream data to your computer, in a format compatible with the TekScope software!

The same scope design, but now on a self-etched board
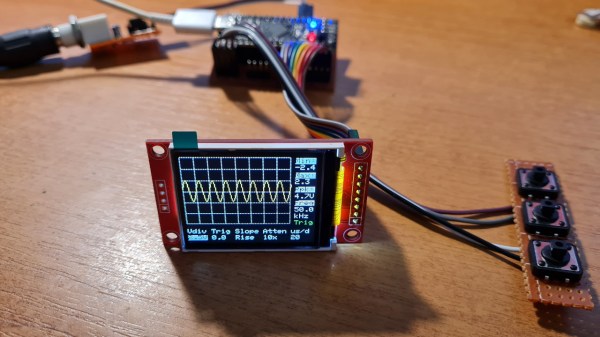
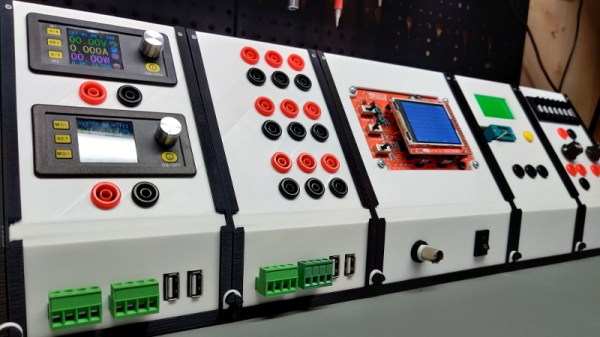
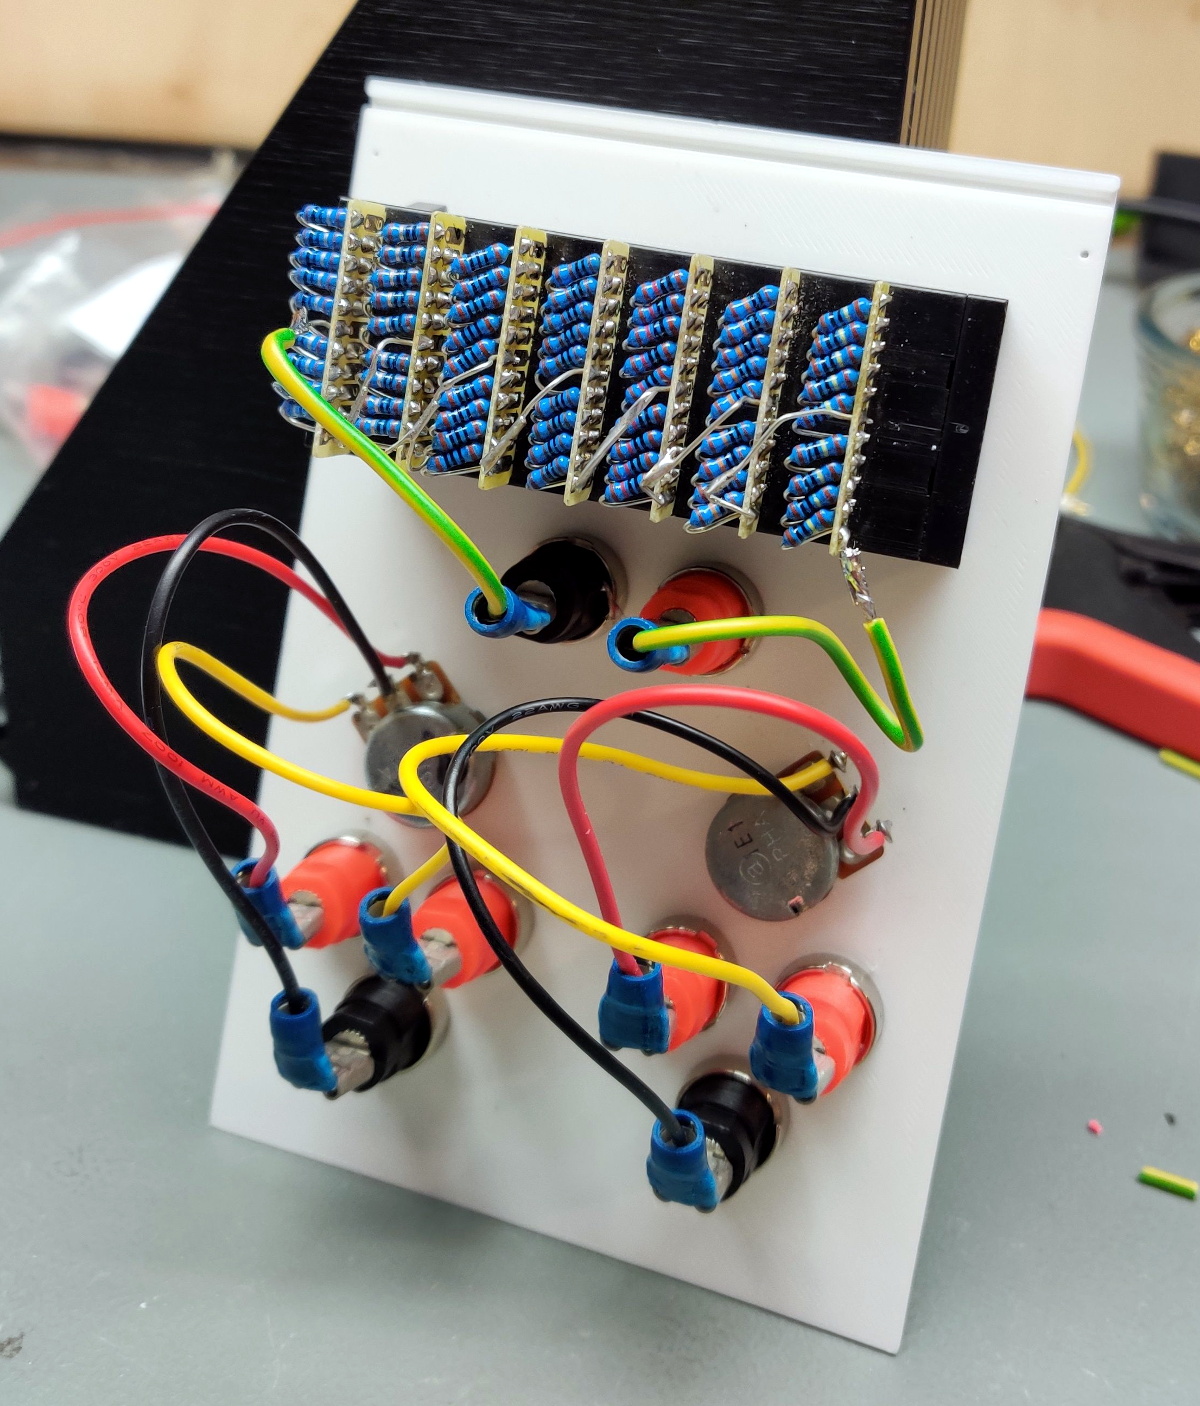
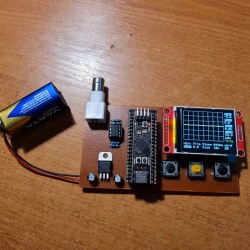
It’s hard to overshadow just how easy this scope is to build, use, and hack on. You really don’t need much in the way of parts, a protoboard will do, though you can also etch or order your own PCBs. The front-end is super straightforward to find components for and assemble, a few opamps and resistors is all you need. So after jumper-wiring the LCD and three push buttons to your BlackPill, you’re golden.

Of course, the simple frontend results in the input range being from -3.3 V to 3.3 V, but as you could guess, this is exactly the kind of project where you could tweak the resistors and even upgrade it later on. Are you a bit lost in how oscilloscopes work? [tvvlad1234] has an explainer for you, too!

This build could easily take up a honorary “temporary turned permanent” place on your bench, thanks to its McGyver-esque qualities. It’s also, quite possibly, a better scope than the red “soldering kit” ones we’ve seen online. All in all, it’s a strong contender in the “simple and powerful DIY scope” arena, before this, we’ve seen one built with an Arduino Nano, and one with a Pi Pico.

A DIY Electronics Lab You Can Show Off With Pride

It’s hardly a secret that getting into a serious electronics habit can be detrimental to your bank account. A professional grade lab is simply unobtainable for many a tinkerer, and even mid-range hardware can set you back considerably. Which is why many folks just starting out will attempt to salvage or build as much of their equipment as possible. It might not always be pretty, but it’ll get the job done.

But this project by [Chrismettal] could end up completely reinventing the home electronic workspace. Using 3D printed frames, low-cost components, and a sprinkling of custom PCBs, this modular electronics workbench has all the bells and whistles an aspiring hardware hacker could need. As an added bonus, it looks like something that came off the International Space Station.

Inside the resistor substitution module.

This is one of those projects that simply can’t be done justice in a few paragraphs. If you’ve ever wanted to put together a dedicated electronics workbench but were put off by the cost of individual components, read though the fantastic documentation [Chrismettal] has prepared for the EleLab_v2. Is it all top-of-the-line hardware? No, of course not. But it’s more than suitable for the kind of work people in this community usually find themselves involved in on a weekend.

So what’s included? Naturally [Chrismettal] has created a power supply module, in both variable and fixed flavors. But there’s also a module for a resistor substitution, a component tester, and even a digital storage oscilloscope. You can mix and match the modules suit your needs, and if you want to create entirely new ones, the FreeCAD sources are available to get you started.

We’ve seen low-cost power supply modules before, and naturally we’re no strangers to cheap DSO kits. But this project wraps those devices and gadgets up into a form factor that anyone would be happy to have on their bench. We’re exceptionally interested in seeing new modules developed for the EleLab_v2, and doubt this is the last time you’ll see this impressive project grace these pages.

[Thanks to BrunoC for the tip.]

Choosing A ‘Scope: Examining Bandwidth

A few weeks ago I asked the Hackaday community for some help and advice in buying a new budget oscilloscope. Thank you very much to those of you who responded both here online and in person among my friends closer to home. I followed the overwhelming trend in the advice I received, and bought myself a Rigol DS1054z, an instrument with which I am very happy. It’s a nominally a 50 MHz scope, but there’s a software hack that can bring it up to 100 MHz. How fast can it go?

My trusty Cossor, its 2 MHz bandwidth as yet unverified.

This question became a mini scope-shootout after a conversation with my Hackaday colleague [Elliot] about measuring oscilloscope bandwidth, and then my fellow Oxford Hackspace members producing more than one scope for comparison. You know who you are, thank you. I found myself with ready access to several roughly equivalent models and one very high-end one in specification terms representing different strata of test equipment manufacture, and with the means to examine their performance.

Continue reading “Choosing A ‘Scope: Examining Bandwidth”

Ask Hackaday: Help Me Choose A ‘Scope

If there is one instrument that makes an electronic engineer’s bench, it is the oscilloscope. The ability to track voltages in the time domain and measure their period and amplitude is one akin to a light in the darkness, it turns a mere tinkerer with circuits into one in command of them. Straightforward add-on circuits can transform a basic oscilloscope into a curve tracer, frequency response display, and much more, and modern oscilloscopes offer a dizzying array of useful measurement features unimaginable to engineers only a few years ago. And I need your help to pick a new one.

Continue reading “Ask Hackaday: Help Me Choose A ‘Scope”

Flashed The Wrong Firmware? Swap Out The LCD To Match!

We always joke about the hardware guys saying that they’ll fix it in firmware, and vice-versa, but this is ridiculous. When [Igor] tried to update his oscilloscope and flashed the wrong firmware version in by mistake, he didn’t fix it in firmware. Instead, he upgraded the LCD display to match the firmware.

See, Siglent doesn’t make [Igor]’s DSO any more; they stopped using the 4:3 aspect ratio screens and replaced them with wider versions. Of course, this is an improvement for anyone buying a new scope, but not if you’ve got the small screen in yours and can’t see anything anymore. After playing around with flashing other company’s firmware (for a similar scope) and failing to get it done over the JTAG, he gave up on the firmware and started looking for a hardware solution.

It turns out that a few SMT resistors set the output screen resolution. After desoldering the appropriate resistors, [Igor] bought a new 7″ LCD screen online only to find out that it has a high-voltage backlight and that he’d need to build an inverter (and hide the noisy circuit inside his oscilloscope). Not daunted, he went digging through his junk box until he found a backlight panel of the right size from another display.

Yet more small soldering, and he had frankensteined a new backlight into place. Of course, the larger LCD won’t fit the case without some cutting, double-sided tape, and a healthy dose of black tape all around insulates the loose electricals. Et voilá!

We have to hand it to [Igor], he’s got moxie. It’s an ugly hack, but it’s a definite screen upgrade, and a lesser hacker would have stopped after flashing the wrong firmware and thrown the thing in the trash. We’d be proud to have that scope sitting on our desk; it’s a definite conversation starter, and a badge of courage to boot.

Connecting An Old Scope To A Computer

Scope

A friend of [Michael]’s said his company was getting rid of some old lab equipment and asked him if he wanted a very large and very old digital storage oscilloscope. A ‘hell yes’ and we’re sure a few beers later, [Michael] found an old Gould 200 MHz four-channel scope on his bench. Even 20 years after its production it’s still a capable tool, but the serial ports on the back got [Michael] wondering – would it be possible to plot the screen of the scope on his computer?

The scope has three ports on the back – GPIB, miscellaneous I/O, and RS423. The latter of those ports is similar enough to RS232 that a USB to Serial converter just might work, and with the help of a null modem cable and a terminal, [Michael] was able to connect to this ancient scope.

In the manual, [Michael] found a the serial commands for this scope. The most useful of these is a command that prints out the contents of the scope’s trace memory as a series of 1-byte integers. With a short bit of PERL programming, [Michael] can create a PDF plot of whatever is on the scope’s screen. It’s formatted perfectly for Gnuplot, MATLAB, or even Excel.

Awesome work, and especially useful given these old scopes are slowly making their way to a technological boneyard somewhere.