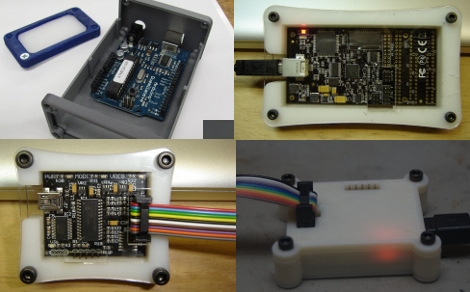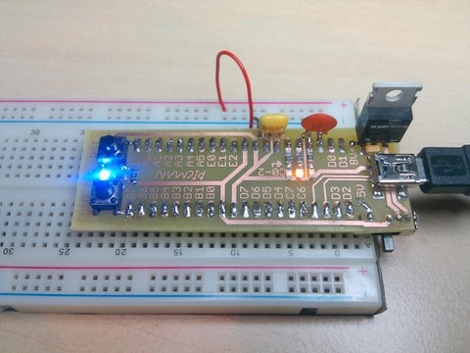
[Ytai Ben-Tsvi] wanted a rapid prototyping tool that could be easily and cheaply built at home. He came up with the PICMAN, a breadboard compatible PIC based board that has everything you need to get the ball rolling. He’s using a PIC18LF4553 which has built-in USB support that can be used with a bootloader for programming. The board also features a voltage regulator for non-USB power sources, some indicator LEDs, a user-defined button, and a reset button. The chip is on the underside and a combination of through-hole and surface-mount parts make for a one-sided PCB that can easily be etched using the toner transfer method. You will need a PIC programmer to burn the bootloader firmware the first time but once that’s done this becomes a self-contained package.
Day: April 13, 2010
Laser Cut And Printable Cases
If you’re like us you’ve got quite a few prototyping tools that are bare PCB boards. If you’re using them a lot you might want to protect them with some type of case but the lack of mounting holes can make this difficult. One popular solution to this problem is to design a case for a perfect fit, then cut it with a laser or print it out of plastic. We’ve got examples of both.
[Stewart Allen] set to work designing laser cut cases for the AVR Dragon and the Bus Pirate V2go after seeing our post about on-the-go prototyping. We think this is especially important if you have an AVR Dragon as it’s been known to bite the dust if the bottom is shorted out. If you have access to a laser cutter you can download is DXF files and the models and cut your own.
If you don’t have a laser cutter but can get some time with a 3D printer check out the Bus Pirate V2go printed case and the Arduino printed case.
Mechanical Scanning Television
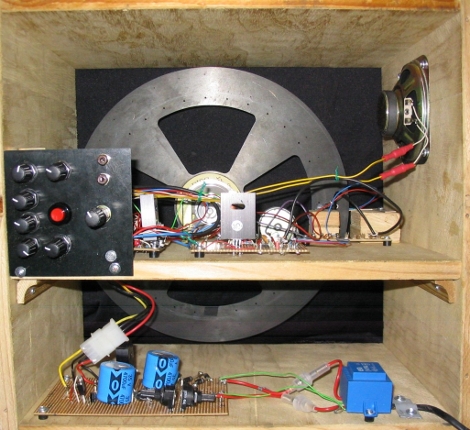
This project explores the early days of television. Above you see a view from the back side of a mechanically scanning television. The black disk spins and the holes, aligned in a spiral pattern, create vertical scan lines for projected light to shine through. In this case, [Eckhard Etzold] is using red, green, and blue LEDs to create a color picture. As you can seen in the video after the break it does a pretty good job. The main problem being that the scanning disc on a mechanical TV has to be much larger than the actual image. How big would the disk need to be and how fast would it spin to produce a forty inch image? We still think this is a better method than transmitting video data in parallel.
Tiny Tube Amp For Headphones
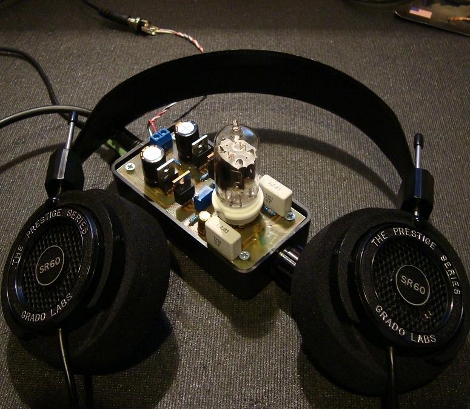
We like to check in from time to time on the scratch-built tube amp scene. [Rogers Gomez] recently posted his build of a headphone tube amp. This is somewhat related to his work from 2008, but this time around it’s simple enough to serve as an entry into amplifier construction for beginners. The PCB layout is clean and simple, makes for easy board etching, and it’s small enough to fit into an enclosure that can pass as a headphone accessory. Only one tube is needed, with a total parts bill coming in around the $50 mark. If you build it, heed his advice on testing with a pair of cheap headphones before you risk plugging in your prized pair.
Still want an amp but don’t care to source the vacuum tube? [Giovanni], who sent in the original tip, build one a while back and housed it in an external CD-ROM enclosure.
Giant Robotic Giraffe Getting A Giant Robotic Facelift
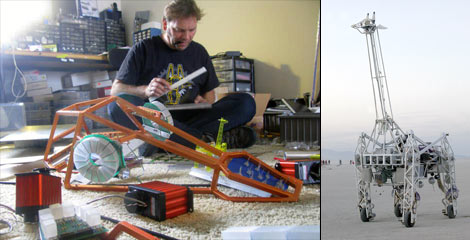
If you’ve had the opportunity to attend the annual Bay Area Maker Faire, you’ve likely encountered Russell the Electric Giraffe. Modeled after a small Tamiya walking toy scaled up to the height of an actual giraffe, Russell was created by [Lindsay Lawlor] in 2005 originally as an “art car” providing a better vantage point from which to enjoy the Burning Man arts festival. In the intervening five years, the Electric Giraffe has enjoyed face time in dozens of parades, trade shows, magazines and television appearances.
Scattered about [Lawlor’s] living room floor at the moment are the giraffe’s dismantled steel skull and several massive Torxis servos (the red boxes in the photo above) — Russell is being upgraded. One of [Lawlor’s] goals in returning to Maker Faire each year is that he not simply present the same exhibit time and time again; the robot is continually evolving. Initially it was little more than a framework and drivetrain, and had to be steered by bodily shoving the entire 1,700 pound beast. Improvements to the steering and power train followed, along with a “skin” of hundreds of addressable LEDs, cosmetic improvements such as a new paint job, and technological upgrades like interactivity, radio control and speech. His goal this year is to bring expressive animatronic movement to the giraffe’s head and jaw, hence the servos, push rods and custom-machined bits currently strewn through his living space-cum-laboratory.
Continue reading “Giant Robotic Giraffe Getting A Giant Robotic Facelift”