Tricks For Mass-Producing Laser-Etched Art

Art is a funny thing. Sometimes, it’s best done in a one-off fashion and sold for a hugely inflated price. Othertimes, it’s more accessible, and it becomes desirable to sell it in great quantity. [Wesley Treat] has been doing just that, and he’s shared some of his tricks of the trade on YouTube.

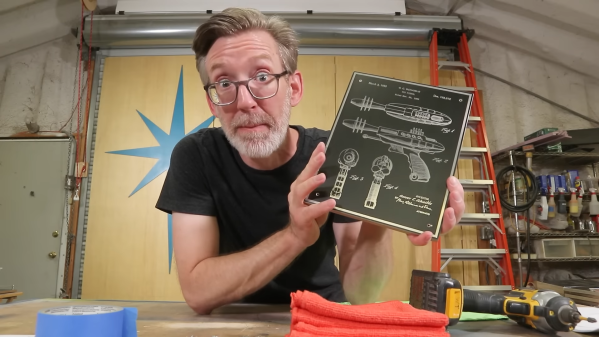
The video concerns some retro-futuristic raygun artwork panels that [Wesley] made in a recent video. The panels proved mighty popular, which meant he had a new problem to contend with: how to make them in quantity. His initial process largely involved making them in a one-off fashion, and that simply wouldn’t scale.

[Wesley] starts right at the beginning, demonstrating first how he produces stacks of blanks for his art panels. For production scale, he used pre-painted matte aluminium panels to speed the process. It’s followed by a sanding step, before the panels go into a laser etching jig to get imprinted with [Wesley’s] maker’s mark. Panels are then drilled via CNC, etched with their front artwork, and then fitted with a front acrylic panel, similarly cut out on the laser cutter. Then it’s just a matter of packing and shipping, a logistical hurdle that many small businesses have had to overcome.

[Wesley] does a great job of examining what it takes to scale from building one of something to many. It’s a topic we’ve looked at a few times in the past. Video after the break.

Continue reading “Tricks For Mass-Producing Laser-Etched Art”
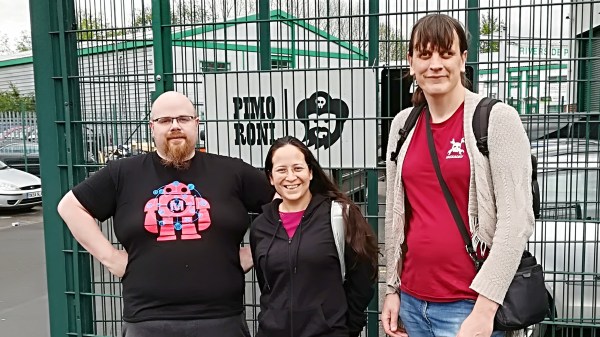
A Bubble Machine Built From Scrap

Not every project has to be an AI-powered particle accelerator using lasers. Sometimes simple projects can be very satisfying, and a simple project can be a great gateway to introduce a friend or a child to our hacker ways. That’s why we noticed [Crazy Science’s] bubble machine upcycled from a CD and a water bottle. It isn’t likely to figure in anyone’s Ph.D. dissertation any time soon, but that isn’t the point

Once you see the pictures, you can probably figure out how to build it. For extra points, consider scrounging everything from stuff you already have. We were curious about drilling holes in the CD as we’d imagine they’d crack with an ordinary drill bit. Apparently, a soldering iron will pierce the disk, but we would advise doing that in a well-ventilated area.

Continue reading “A Bubble Machine Built From Scrap”

Field Trip! Hackaday Visits Pimoroni

If you have a Raspberry Pi and have any interest in its peripherals, you may be familiar with the grinning pirate logo of the British company, Pimoroni. The Sheffield, UK based outfit first established a niche for itself as one of the go-to places for much of the essentials of Pi ownership, and has extended its portfolio beyond the Pi into parts, boards, and components across the spectrum of electronic experimentation. Their products are notable for their distinctive and colourful design language as well as their  constant exploration of new ideas, and they have rapidly become one of those companies to watch in our sphere. On our way up to Newcastle for Maker Faire UK, we passed close enough to the Pimoroni HQ to be able to ask nicely if we could drop in and have a tour.

[Paul] showing off some of the Pimoroni attention to design detail. This artwork is hidden behind a display panel on the finished product.
Paul showing off some of the Pimoroni attention to design detail. This artwork is hidden behind a display panel on the finished product.
The Pimoroni HQ can be found in a nondescript unit with a discreetly placed sign on an industrial estate after a short drive through the city from the motorway. Inside it’s the same as thousands of other units, a set of offices at the front and a cavernous warehouse behind, except this one is filled with the kinds of goodies that get our blood pumping! And we’re told this toybox warehouse is soon to be joined by another nearby unit, as the Pimoroni business is expanding.

Our guide was the company co-founder Paul Beech, whose work you will be familiar with even if this is the first time you’ve heard his name;  Paul was the designer of the Raspberry Pi logo! The company is not exclusive to that platform but it’s fair to say they have a strong connection with the Pi, starting in 2012 with as their website puts it: “One laser cutter and a kettle” on which they produced the first of their iconic PiBow laser-cut sandwich Raspberry Pi cases.

Continue reading “Field Trip! Hackaday Visits Pimoroni”

Sandwich Robot Keeps You Fed So You Can Keep Hacking

Food. A necessary — often delicious — interruption of whatever project you’re currently hacking away at. Ordering takeout gets expensive and it’s generally unhealthy to subsist solely on pizza. With the Sandwich-O-Matic, a simple voice command fulfills this biological need with minimal disturbance of your build time.

Built for a thirty-six hour hackathon, the Sandwich-O-Matic is controlled by a Photon and an Arduino. The backend is running node, hosted on AWS, and Google Cloud was used for voice to text recognition. This thing is a fully automated and voice controlled sandwich building station. A DC motor services the toaster, while the rest of the device is actuated by servos. Simply tap the ‘begin recording’ button on the site, tell it your ingredient choices, and off it goes.

Continue reading “Sandwich Robot Keeps You Fed So You Can Keep Hacking”

Brew A Cup Of Coffee Without Electricity!

So, wether you’ve blown your house’s breakers while cranking up the power on your latest project or a storm has brought low the local power grid, what do you do if you desperately need coffee with no electricity to power your coffee maker? Make like [austiwawa]: crack it open and bust out the tea lights.

Removing the bottom of the coffee maker is simply done, exposing the resistance heating element. Improvising a jig to hold the coffee maker over an arrangement of five tea lights, the candle flames slowly do the work of heating the element to set the maker in motion.

It’s a solution for after the apocalypse… as long as you can find tea lights, coffee plus a grinder, and for some reason don’t want to use the quick and efficient method of brewing over an actual fire (though kitchen hearths are a rarity these days). Now we kind of want to see this adapted for all kinds of other heat sources. Reflected sunlight anyone?

Continue reading “Brew A Cup Of Coffee Without Electricity!”

Bring Doping, Microfluidics, Photovoltaics, And More Into The Home

Can you make a spectrometer for your home lab all from materials you have sitting around? We might not believe it from a less credible source, but this MIT course does indeed build a spectrometer from foam board using two razor blades as the silt cover and a writable CD as the diffraction grating. The coolest part is removing the metal backing of the CD.

mit_experiments_thumbHackaday reader [gratian] tipped us off about the course available from MIT courseware called Nanomaker. It boils down some fairly complicated experiments to the kind one can do in the home lab without involving thousands of dollars of lab equipment. The whole point is to demystify what we think of as complicated devices and topics surrounding photovoltaics, organic photovoltaics, piezoelectricity and thermoelectricity.


Spectrometers are used to analyze the wavelengths of a light source. Now that you have a measurement tool in hand it’s time to build and experiment with some light sources of your own. Here you can see an LED that is the topic of one of the course labs.

If you have a bit of background in chemistry this is a good step-by-step guide for getting into these types of experiments at home. It reminds us of some of the really cool stuff [Jeri Ellsworth] was doing in her garage lab, like making her own EL panels.

Continue reading “Bring Doping, Microfluidics, Photovoltaics, And More Into The Home”

HardWino Takes The Effort Out Of Happy Hour

A personal bartender is hard to come by these days. What has the world come to when a maker has to build their own? [Pierre Charlier] can lend you a helping hand vis-à-vis with HardWino, an open-source cocktail maker.

The auto-bar is housed on a six-slot, rotating beverage holder, controlled by an Arduino Mega and accepts drink orders via a TFT screen. Stepper motors and L298 driver boards are supported on 3D printed parts and powered by a standard 12V DC jack. Assembling HardWino is a little involved, so [Charlier]  has provided a thorough step-by-step process in the video after the break.

Continue reading “HardWino Takes The Effort Out Of Happy Hour”