Making The Case For In-circuit Debugging Tools

in_circuit_debugging_of_pic_microcontrollers

If you are in the market for a PIC microcontroller programmer, you may want to consider a model with an In-Circuit Debugger (ICD). [Rajendra] put together a great tutorial on using an ICD when debugging PIC firmware, which makes a pretty convincing argument for owning one.

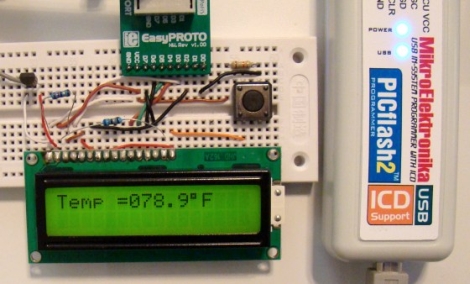
In his tutorial, he happens to be using a MikroElektronika PICflash2, but he says that there are plenty of other ICDs out there if you are not keen on this particular model. The PICflash2 not only acts as an ICD, but as the name suggests it works as an ICSP as well.

[Rajendra] walks us through a short debugging session using some simple code that reads data from an LM34DZ temperature sensor, displaying the results on an LCD screen. While he isn’t actually hunting for bugs, he does show how easy it is to step through the PIC’s code one statement at a time, evaluating variables and registers along the way.

[Rajendra] does point out that using an ICD does occupy a few I/O pins while running, limiting your resources just a bit. We think that being able to debug code as it runs is pretty reasonable tradeoff if you don’t necessarily need each and every pin available for use.

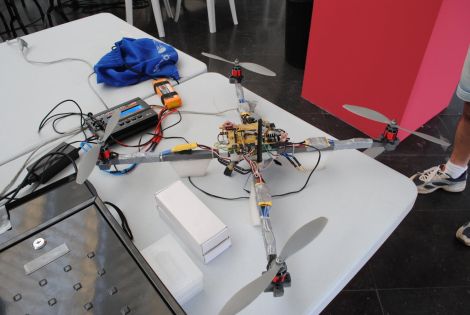
Fonera-based Quadcopter Can Be Controlled From A Web Browser

fonera_html_controlled_quadcopter

[Tiakson] just wrapped up the construction of a quadcopter which piqued our interest due to the unexpected mix of hardware he used.

A good portion of the copter is made up of the essential bits we have come to expect from a quad rotor system. Instead of using an Xbee or hobby wireless controller however, [Tiakson] opted to use an old Fonera router running OpenWRT to control the system. He wrote special software that allows him to direct the quadcopter using an HTML 5 interface, adding a few kernel tweaks along the way that enabled him to emulate I2C ports over GPIO pins.

The Fonera takes in data from Wii nunchuck and Motion+ sensors, relaying commands to the on-board PIC 16F976 microcontroller. The PIC is used to manage the electronic speed controller modules using PWM, which the Fonera could not handle on its own.

This is a great use for a old router, and the cost is obviously far cheaper than buying off the shelf wireless control modules. We would love to hear how much extra weight the Fonera adds, as well as if there is any controller lag introduced by the web-based interface.

Continue reading to see a quick demo video of the quadcopter in action.

Continue reading “Fonera-based Quadcopter Can Be Controlled From A Web Browser”

How To Take A Travelling Electronics Lab On The Road With You

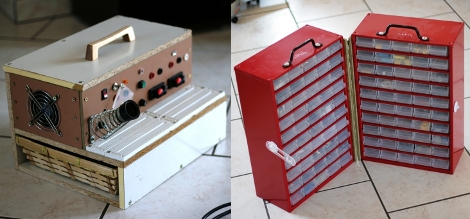
If you’re a frequent traveler, or if you don’t have a garage or basement and find your kitchen table is doomed to serve most of its life as an electronics bench this hack is for you. [Robovergne] came up with a mobile electronics lab (translated) in order to help preserve the Wife Acceptance Factor for his hobby.

The project comes in two parts. On the right you see the pair of component storage cabinets. These are high-quality examples that fully enclose each drawer (cheaper cabinets are open at the back). This way, [Robovergne] was able to connect two of them together with a piano hinge, and add some carrying handles to the top.

The second half of the project is the bench itself. It features a lab supply, soldering iron transformer and holder, and some breadboards for good measure. The base of the unit houses a drawer which carries the bulk of his tools. Now he can pack up and clear out the living room in one single trip.

Workshop Lights So Bright, They Will Give You Sunburn

workshop_led_lighting_control

There are few things more frustrating than trying to tinker at your workbench with suboptimal lighting. [Jeremy] was toiling away in his workshop one afternoon when he decided that he finally had enough, and set out to overhaul his lighting setup.

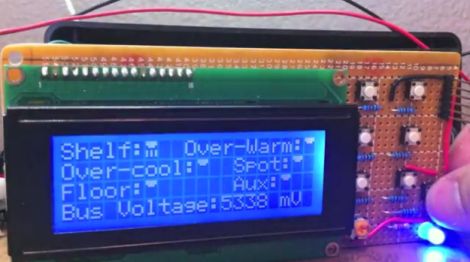
His workshop is incredibly bright now, sporting a handful of under the shelf CCFL tubes to complement the mixture of cool and warm LEDs that are mounted on the ceiling. One thing we really liked about his setup is that he added a handful of LEDs to the bottom of his workbench, aimed at the floor – perfect for those times when a tiny screw or SMD component goes missing.

Everything is controlled by an ATMega 328 that he shoved into a project box, allowing him to tweak the lighting to suit his needs using a few simple buttons and a small LCD panel.

[Jeremy] says that the entire thing is “overkill” and that it is decidedly the messiest wiring job he has ever done. For something that was put together hastily in an afternoon, we think it’s just fine. The only thing we’re left wanting is some schematics and source code.

As far as the overkill comment goes, say it with me: There. Can. Never. Be. Too. Many. LEDs!

Stick around to watch [Jeremy] give a demonstration of how the system operates.

[via Adafruit blog]

Continue reading “Workshop Lights So Bright, They Will Give You Sunburn”

Here’s A Button, Call Someone Who Cares…

call_someone_who_cares_button

[Les] had thousands of dollars of expensive IP Telephone infrastructure at his fingertips, so he figured he might as well play around a bit – after all, what good is all that equipment if you can’t have a little fun?

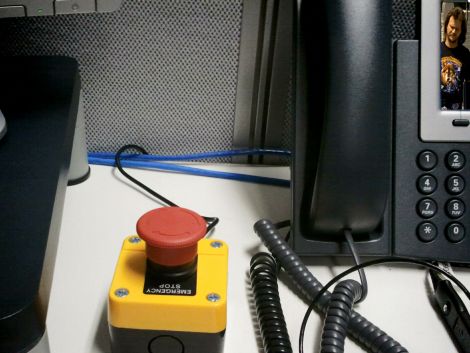
Inspired by the “Awesome Button” featured on Make, he started thinking about what sort of feature he would like to have available at the push of a button. He must have had Travis Tritt on the brain the day he started building his creation, since he named it the “The Call Someone Who Cares Button”.

[Les] picked up an “emergency stop” button from eBay, wiring it to a TeensyUSB, just as it was done in the Make article. He mapped the button to the pause/break key, then whipped up a bit of C#code that listens for that key to be pressed. When toggled, the button sets forth a series of events that gets his boss on the line ASAP.

It’s a fun little project, and while I might have built a button that introduces fake static and echo into the line before dumping the call, I think it’s pretty cool all the same.

Since it seems that just about everyone has built some derivation of the Awesome Button, share yours with us in the comments, and be sure to stick around to see a quick video demo of the CSWC button in action.

Continue reading “Here’s A Button, Call Someone Who Cares…”

Toy Robot Hand Vastly Improved, Now More Offensive

YouTube user [onefivefour] posted a video of his hacked up toy robot hand. These cheap robot hands usually only use one wire to move all five fingers. [onefivefour] improved upon the design and added five servos to allow independent control of each digit.

The servos are controlled by a PICAXE microcontroller, and [onefivefour] is willing to share the code. A few pressure sensors in the fingertips would turn this build into a great test bed for future development. It would also be great for an [Anakin Skywalker] Halloween costume if anyone on the planet ever wanted that specific costume.

[onefivefour] says he only spent $6 on his and while there’s more money sunk into the servos, it was probably a good investment. We love seeing hacked up pieces of plastic like the fully functional Wall-E or the dancing Androids. If you’ve got a toy hack in the works, drop us a line on our tip form.