Retrotechtacular: The Mother Of All Tech Demos

Most bits of a computer we take for granted today – the mouse, hypertext, video conferencing, and word processing – were all invented by one team of researchers at Stanford in the late 60s. When the brains behind the operation, [Douglas Engelbart], showed this to 1000 computer researchers, the demo became known as The Mother of all Demos. Luckily, you can check out this demo in its entirety on YouTube.

Even though [Englebart]’s demo looks incredibly dated today, it was revolutionary at the time. This was the first demonstration of the computer mouse (side note: they call the cursor a ‘bug’), a chorded keyboard, and so many other technologies we take for granted today. During the presentation, [Englebart] was connected to the SDS 940 computer via the on-line system 30 miles away from Stanford. Yes, this pre-ARPANET, what is normally cited as the precursor to the Internet.

Sadly, most of [Englebart]’s researchers became disillusioned with the time sharing /mainframe paradigm shown in this demo. Those researchers wanted a more decentralized means of computing, so they went off to Xerox PARC where they helped create the first personal computers. Still, most of the ideas from 1968, such as the mouse, hypertext, and word processing, were in those little Xerox boxes.

On a more philosophical note, [Englebart] began his demo with the question, “If, in your office, you as an intellectual worker were supplied with a computer display, backed up by a computer that was alive for you all day and was instantly responsive to every action you had, how much value could you derive from that?” In the 44 years since this Mother of all Demos, we’ve gotten to the point where we already have a computer on our desks all day that is able to do any task imaginable, and it certainty improved our quality of life.

There are a few great resources covering the Mother of all Demos, including the Douglas Engelbart Institute’s history page and the Stanford Mousesite. Looking back, it’s not only amazing how far we’ve come, but also how little has actually changed.

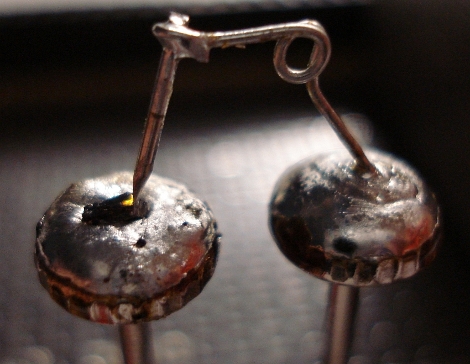
Homemade Silicon Carbide LED

Here’s an LED indicator which was made at home out of a Silicon Carbide (SiC) crystal (Internet Archive Mirror). The concept is simple, but a bit of trial and error goes into getting that tiny amber spot to light up.

The guesswork comes in finding the right piece of crystal. First [KOS] broke it into tiny pieces, then he started poking the chunks with electrified probes to see if he could get some light out of them. Once an active area was found he needed a base for the crystal. The image above shows the two nails which he used. This provides a large mounting area that also acts as a heat sink to make sure the LED won’t burn itself out. There’s a solder blob which he kept molten with his iron until the crystal could be pushed into place. That holds it securely as the pin which serves as the cathode is positioned.

The whole setup is soldered to some protoboard and is ready to use. This is the second time we remember seeing this technique used to fabricate LEDS. The first time was an accident.

Blu-ray CNC Looks Great For Branding And Engraving

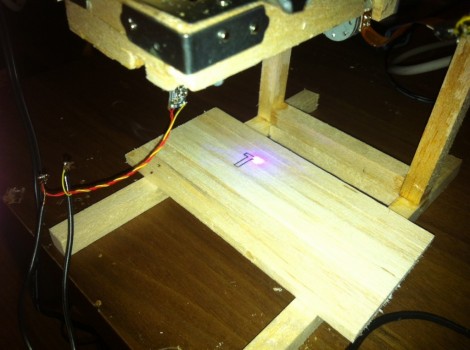
[Nav] got the bug for a tiny little laser cutter. He pulled off the build, and has just finished the second rendition which makes some nice improvements. He’s was hoping for a laser cutter, but we think this really shines when it comes to branding objects like the scrap wood seen above.

This joins a long line of optical drive parts builds. For instance, we saw this plotter that used the lens sleds from some CD-ROM drives. You may think that [Nav] doesn’t need to worry about the Z axis since this is a laser but you’d be wrong. The focal point of the light needs to hit at the right place to cut efficiently, and this is often the trouble with laser cutters. As material is burned away the laser becomes less efficient if you don’t adjust the lens for vertical position. That’s why we think it’s best as an engraver, but the original build writeup for his cutter does show some success cutting letters in dark paper.

Check out a clip of this design being burnt into the wood after the break.

Continue reading “Blu-ray CNC Looks Great For Branding And Engraving”

Open Source Graphics Card

Even though NVidia and ATI have been open-source friendly for a while now, there still isn’t a true open-source graphics card. [Anton] and [Per] are trying to fix that by building his own graphics card around an FPGA. The project is called ORSoC, and it’s available on opencores.com.

The guys are building the ORSoC graphics card around a Digilent Atlys FPGA dev board. So far, he can draw lines, textured triangles, bitmap or vector fonts, and throw a few 3D meshes up on the screen. This project isn’t intended to run advanced OpenGL or Steam on Linux, but for all the work that into this graphics accelerator, it’s an amazing piece of work.

There are a few demos after the break; a cube rotating in 3D and a demo drawing and translating polygons and a few textures. The ORSoC is a bit slow, but that’s an artifact of the build not being optimized for the FPGA the team is using. If you’d like to test this graphics card, there’s a Git available. As a bonus you don’t even need an FPGA to play around with this project. There’s also a software emulation of all the functions. Very neat.

Continue reading “Open Source Graphics Card”

Large-scale Arduino Controlled Greenhouse Does Some Serious Farming

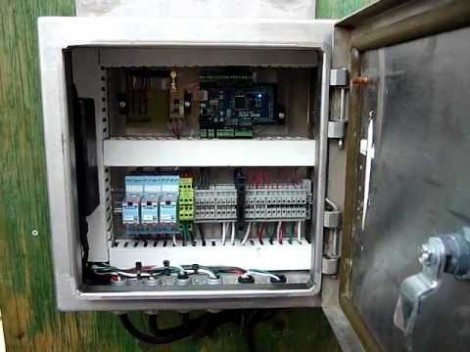
[Instrument Tek] isn’t messing around with a hobby-sized greenhouse. In fact if it were any bigger we’d call it a commercial operation. But what interests us is the professional-quality greenhouse automation he built around and Arduino board.

The greenhouse is about what you’d expect to see at a nursery, except the footprint is somewhere around 10’x10′. It’s a stick-built frame with walls made of poly. Professional greenhouses monitor and regulate temperature and humidity and this one does just that. The video after the break starts off by showing the controller box. It has temperature, humidity, and light sensors that allow the Arduino to judge growing conditions. If it gets too hot, some slats are opened and a fan exhausts air from the structure. If it gets to cold, a series of light fixtures are energized. They contain heat lamps, as this setup is in northern Alberta, Canada and it can get quite cold some nights. The drip system is also automated, with a solenoid to turn water on and off.

In addition to that 3:26 show-and-tell, we’ve embedded a 27-minute video that shows how to build the controller box. So you can start you plants indoors on the rack, then populate the greenhouse when they get large enough.

Continue reading “Large-scale Arduino Controlled Greenhouse Does Some Serious Farming”

Home Automation With RC Wall Plugs And Raspberry Pi

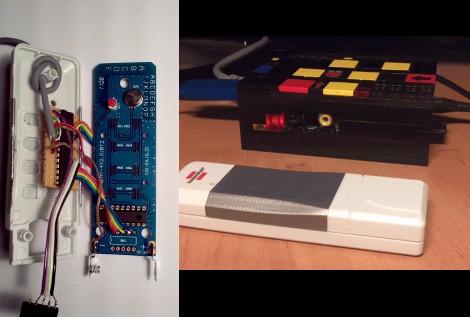
[Jake] took some cheap hardware and figured out a way to use it as a huge home automation network. He’s chose a Raspberry Pi board to connect the radio controlled power outlets to his network. He wrote about his project in two parts, the first is hacking the RC outlet controller and the second is using the Raspberry Pi to manipulate it.

These RC outlets are a pass-through for appliances that connect to mains (lamps, consumer electronics, christmas trees, etc). Often the protocol used by the cheap-as-dirt remote is difficult to work with, but [Jake] really hit it out of the part on this one. In addition to simulating button presses for up to fifteen devices on the remote, he replaced the DIP switch package. This lets him change the encoding, essentially allowing the one device to control up to 32 sets of outlets. Theoretically this lets him command 480 devices from the Raspberry Pi. Since that board is a web server it’s just a matter of coding an interface.

Some of the inspiration for this hack came from the whistle-controlled appliance hack.

Tearing Apart A Hot Glue Gun For A 3D Printer

If you’re building a 3D printer, the most complicated part is the extruder. This part uses a series of gears to pull plastic filament off of a spool, heats it up, and squirts it out in a manner precise enough to build objects one layer at a time. [Chris] made his own extruder out of a hot glue gun and made it so simple we’re surprised we haven’t seen this build before.

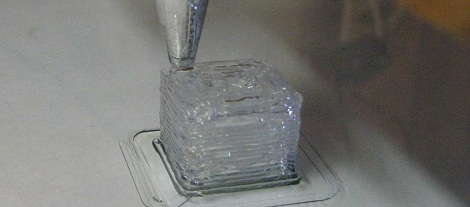
The basic operations of a plastic extruder – pushing a rod of plastic through a heated nozzle – already exists in a hot glue gun available for $3 at WalMart. To build his printer, [Chris] tor apart the hot glue gun and mounted the nozzle on a piece of plywood. The hot glue sticks are fed into the nozzle with the help of a 3D printed gear and a stepper motor driver.

After the break, you can see [Chris]’s hot glue gun RepRap printing a 10cm cube. It’s not fast, but the quality is exceptional, especially considering he made it out of a hot glue gun.

Continue reading “Tearing Apart A Hot Glue Gun For A 3D Printer”