Detecting Cosmic Rays With 18 Geiger Tubes

What do you do if you have 18 Geiger tubes lying around? [Robert] had an interesting idea to build a cosmic ray detector and hodoscope to observe the path cosmic rays take while flying through his lab.

[Robert]’s cosmic ray detector works by detecting the output 9 Geiger tubes on the y-axis and 9 Geiger tubes on the x-axis with a coincidence circuit. When a cosmic ray flies through the detector, it should trigger two tubes simultaneously. By graphing which of the two tubes were triggered on an array of 81 LEDs, [Robert] not only knows when a cosmic ray is detected, but where the cosmic ray was.

The detectors do pick up a little background radiation, but thanks to [Robert]’s coincidence circuit, he can be fairly certain that what he’s recording are actually high-energy cosmic rays.

Before building the 9×9 hodoscope, [Robert] built a similar drift hodoscope that simply plots the path a cosmic ray takes through an array of Geiger tubes. You can check out videos of both these cosmic ray detectors after the break.

Continue reading “Detecting Cosmic Rays With 18 Geiger Tubes”

Two Software Defined Radio Hacks From Our Resident SDR Guru

It seem [Balint] is becoming somewhat of a SDR guru around these parts; in the past few months, he’s gotten a USB TV tuner receiver working with GNU Radio, started a software defined radio tutorial YouTube channel, and even used this project to listen in on conversations between airplanes and air traffic control. This time, [Balint] is back using this cheap USB TV tuner for radio direction finding and running HDSDR in Linux and OS X.

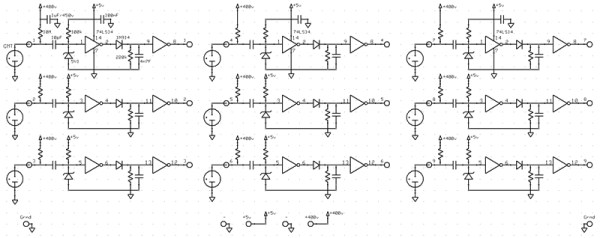
[Balint]’s radio direction finding presentation goes over traditional means of direction finding using the doppler effect and mechanically rotated antennas. Because [Balint] is dealing with frequencies around 150MHz (about 2 meter wavelength), building a physical direction finding setup requires spinning antennas at around 40,000 RPM; much to fast for any hardware build. [Balint]’s solution was to attach 4 antennas around the circumference of a circle and electronically switch between them many thousands of times a second. [Balint] put up a wiki page going over all the theory and implementation details of his build.

[Balint] also put wrote up a neat app to control software defined radios – including the Realtek TV dongle –  over a network. Spread over a wide enough geographic area, it could become extremely easy for anyone to play air traffic controller. The BorIP Server can also be used to run HDSDR in Linux and OS X under Wine; just connect HDSDR to the network loopback on the same machine, and you get around Wine’s distaste for accessing hardware natively.

Awesome work, and we can’t wait to see what comes out of [Balint]’s laboratory next.

Edit: instead of the dongle, [Balnt] is using a ‘real’ software radio board. A lot of people are messaging him asking if the same method of direction finding is possible with the dongle. Here’s what [Balint] has to say:

The trick, as I see it, would be to create some (more or less simple) additional hardware to take the clock signal straight off the dongle’s on-board oscillator and divide it down for use with the antenna switch, i.e. 28 MHz à tens of kHz (this is the bit that’s done in ‘software’ on the FPGA). One problem still remains however: the counter needs to remain calibrated against the known direction the antenna was pointing at the time – otherwise a stop/start of the data stream from the dongle will mean the direction will go out of sync by 90/180/270 degrees each stop/start. Perhaps someone will figure out an elegant solution for this slight hurdle!

So there you go. Up for a challenge?

ArduSat Puts Arduino Experiments In Space

CubeSats are nothing new – hundreds have been launched into Earth orbit by schools and universities over the past decade. Like anything cool, an Arduino eventually gets thrown into the mix. That’s what the folks behind ArduSat are doing: they’re launching an Arduino-laden satellite into orbit with a bunch of sensors to enable anyone to become a citizen space scientist.

On board the ArduSat is a suite of sensors including a spectrometer, Geiger counter, IR light sensor, electromagnetic wave sensor, a temperature sensor, gyroscope, accelerometer, magnetometer, GPS unit, CO2 sensor, and of course a few cameras. The rewards for this Kickstarter are fairly interesting: backers who pledge $500 are able to buy a week’s worth of time using the ArduSat sensors for your own personal experiment.

As for how this Arduino-powered satellite is getting a ride up to Low Earth Orbit, the team plans to send an application into NASA for the CubeSat Launch Initiative ride-along program. If NASA selects the ArduSat, it’ll get a ride into space along with other CubeSats on a larger commercial launch. If the ArduSat isn’t selected by NASA, the team behind this satellite has secured funding to piggyback on a commercial launch.

Tip ‘o the hat to [HackTheGibson] for sending this in.

Multimeter Add-on Lets You Measure Tiny Resistance Values

This multimeter add-on is called the Half Ohm. It allows you to measure small resistance values, and can be used to track down shorts on a PCB.

The board acts as a pass-through for both probes. When your meter is set to measure voltage and nothing is connected to the probes the display will read out the level of the coin cell that powers the add-on. When you are probing, the value in millivolts is actually showing the resistance in milliohms. This works for any measurement less than one Ohm. Interestingly enough, it will help you zero in on a solder bridge. By probing the two shorted tracks you can find the issue by following the falling resistance values.

[Jaanus] published several posts leading up to the final version of the board. Check out this category link for his blog if you’re interested in reading through them.

HDTV Antenna That Can Hang In A Window

We can’t wait to give this one a try. We’ve got a DIY HDTV antenna hanging out in the attic which was made from some scrap wood and eight metal coat hangers. It works great but it’s pretty ugly and not everyone has an attic to hide it in (not to mention the signal drop caused by the roof shingles). This is a fractal antenna anchored to some clear plastic so you can just hang it in the window and start picking up the over-the-air channels without much effort.

The pattern was modeled in SketchUp then printed out on two pieces of paper. One piece had it printed on both sides, which makes it easy to glue on a sheet of aluminum foil, then follow the pattern on the opposite side to cut out the important parts. The other template was used as an aligment guide when gluing the foil to the clear plastic. A coaxial adapter was then attached using nuts and machine screws. If you build it, let us know how it comes out!

Drop-in Board For NES ROM Chip Makes Cartridge Reprogrammable

Here’s the guts from [Dext0rb’s] Super Nintendo cartridge. It’s easy to pick out the dark-colored board which lets him reflash SNES ROMs via USB. We’ve seen this done a number of times, but this is a much cleaner option than hacks that just add a dead-bug-style memory chip.

The board he designed has a double-row of pin headers sized to fit the footprint vacated by the original ROM chip. The board has a mini-USB connector which can be accessed through a hole he cut in the side of the cartridge enclosure. This is in the right place so that you cannot plug it in when it’s being used in the SNES (which would cause damage). The ATmega32u4 chip handles USB connectivity and programs the 32 megabit flash chip which stores the ROM. He’s posted a few articles on the blog portion of his site which you’ll find interesting. We suggest starting with this hardware teaser.

Jamming Gripper That’s Super Easy To Build

This is the simplest version of a jamming gripper that we’ve seen yet. The only component that might not be readily available is the pump in the upper left, but the rest is all hardware or grocery store stuff. It’s based on the concept we saw from a research video where the air in a bladder full of coffee grounds is removed to grip an item. In this case the bladder is a party balloon which is held in place by parts from a cheap shower head. A theaded-to-barbed right angle connector makes it easy to connect the vinyl tubing up to the pump.

The video after the break shows that this works quite well for small items. But we see a lot of downward force is exerted to firmly embed them in the grounds. We’re not sure if this is par for the course, or if it would work a bit better if more air were in the bladder initially. This other jamming gripper build uses a servo to release pressure from the system, and we think that might be of help here too.

Continue reading “Jamming Gripper That’s Super Easy To Build”