Roomba 4000 Teardown Ready For Your Doomba Build

In addition to getting a haircut, [Dino] spent his week editing an old video of him tearing down a Roomba 4000. These robots can be picked up for just a few dollars on eBay, making them one of the cheapest bodged up robotics dev platforms available.

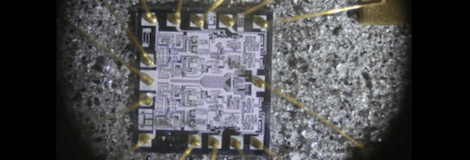
After [Dino] goes over how to unscrew the cover and disassemble the Roomba 4000, he goes over the layout of the motherboard and takes a look at the sensors. The wheels on the Roomba are actually very neat pieces of technology with a very cool planetary gear system that is the perfect drive system for your next robot build.

There are a ton of ways to use the electronics in Roombas for a few interesting robotics projects. [Dino] built 2/3rds of a all terrain rocker bogie robot – just like the Curiosity rover – out of a Roomba, and a small two wheeled indoor robot using a Parallax Propeller. If you’re a redditor there’s always the possibility of building a Doomba, but we think [Patrick] has a better idea than a knife strapped to a vacuum cleaner.

As always, [Dino]’s vidia after the break.

Continue reading “Roomba 4000 Teardown Ready For Your Doomba Build”

Teensy Tiny Arduino Board With An ATtiny85

Planning another Arduino build? If you’re just doing something simple like switching a relay or powering a LED, you might want to think about the Digispark. It’s a very small ATtiny-based Arduino compatible board developed and Kickstarted by [Erik].

The Digispark is based on the very popular Atmel ATtiny85, an 8 pin microcontroller that provides a quarter of the Flash storage and RAM as the ‘official Arduino’ ATMega328p. The lower storage space and RAM doesn’t mean the ’85 is a slouch, though; it can run Arduino code without a hitch, providing six pins for whatever small project you have in mind.

Right now, [Erik]’s Kickstarter is offering three Digisparks for the price of a single Arduino. At that price, it’s cheap enough to leave in a project and not be repurposed after the build is over. [Erik] is also working on a few shields for the Digispark – only RGB LED shield for now, but hopefully he’ll get some more finished by the time the Kickstarter ends.

A Perpetually Powered Wireless Outpost

For [Justin], the topic of remotely powering electronics in the field comes up often. So often in fact he decided to put up a tutorial for powering electronics from solar power and batteries, as well as sending and retrieving data with the help of a cellular connection.

The electronics [Justin] chose for his remote wireless project include an AT&T 3G connection to the Internet provided by a Beaglebone, BeagleTouch display, and BeagleJuice battery pack. Of course an Arduino had to make it into this project, so a few light sensors were wired into a few Arduino Unos and connected to the Beaglebone.

After finding a few deep cycle boat batteries, [Justin] wired up a pair of solar panels that put out about 200 mA in full sun. This equates to about 2700 mAh a day, about 300 mAh more than his Beaglebone/Arduino/3G connection/WiFi setup needs per day.

As for what [Justin] can do with his wireless outpost, it makes setting up remote sensors for agriculture a breeze, and could easily be used to automagically send pictures from a game camera straight to a web page. Pretty neat, and very useful if you need to wire up sensors in the field to the Internet.

Continue reading “A Perpetually Powered Wireless Outpost”

Taking A Look At Decapped ICs

Aside from wanting to play around with nitric acid, [Ben] really didn’t have a reason to decap a few 74xx and 4000-series logic chips. Not that we mind, as he provides a great tutorial at looking at a bare IC that isn’t covered in epoxy and resin.

Most ICs are encased in a hard epoxy shell making it very difficult to look at the circuits within. [Ben] tried to grind this epoxy off with a Dremel tool, but didn’t have much luck until he moved over to a CNC mill to remove 0.040 – 0.050″ of epoxy without breaking the bond wires.

After carving out a nice pocket above the die, [Ben] put a few drops of nitric acid on the chip to dissolve the epoxy coating.  This worked very slowly at room temperature, but after putting the chips on a hot plate the acid was able to reveal the die underneath.

After successfully removing all the epoxy and giving them an acetone bath, [Ben] took his chips over to the microscope and was able to check out the underlying circuit. He doesn’t have any idea what he could do with these decapped logic chips, but the bond wires are still intact so he could still use these chips in a build.

We’d like to see a few decapped MEMS devices, but if you have a suggestion on what [Ben] can do with his decapped chips, drop a note in the comments.

Continue reading “Taking A Look At Decapped ICs”

Building A Casting Furnace With Heat Exchanger

This completely DIY casting furnace turned out just great thanks to all the work [Biolit11] put into it along the way. He wanted to replace his older furnace with one that was more efficient, and to that end he built a heat exchanger into the design. This way the exhaust will preheat the intake air.

The furnace itself started with the shell of an old electric water heater. Excluding the design process, the majority of the build involved mold making. For circular parts he’s using quick tube, the paperboard forms used for pouring concrete footings. For more intricate parts he shaped polystyrene. They are layered in place and high-temperature cement is poured to form the permanent parts. After it hardens the polystyrene can be removed in chunks.

The heat exchanger is the part to the left. It includes several wide, flat pipes made of cement for removing the exhaust. Around those pipes a snaking metal chase carries the intake air which picks up the heat as it passes over the exhaust pipes.

For his first run with the new furnace he melted down a bunch of scrap aluminum and poured ingots.

[Thanks DC3]

The Coming Age Of ARM Chips For The Hobbyist

The days of the 8 bit Arduino may be quickly coming to a close. Sure, there will always be a place for AVRs in blinking LEDs and turning on relays, but for doing anything cool – playing MP3s, driving LCD displays, or running a CNC machine – you need the power of a 32 bit chip. [Brian Carrigan] put up a great tutorial on getting started with these bigger, more powerful micros and moving beyond what is possible with an 8 bit PIC or AVR.

These new 32 bit chips are much more powerful, but aren’t exactly hobbyist friendly. Most of the ARM chips we’ve found are stuffed into very fine pitch QFN or QFP packages that require a reflow oven to solder to a board. In fact, we can only find one through-hole Cortex M0 chip that is suited for breadboard development. This doesn’t make it easy to whip up a circuit in a few hours, so builders needing a very powerful microcontroller will be more dependent on dev boards.

Already there are a good number of ARM-based 32 bit dev boards available including the offerings from Leaf Labs, the extremely inexpensive STM Discovery boardKinetis KL25Z Freedom Board, the outrageously powerful BeagleBone, and the perpetually delayed Arduino (over) Due.

None of these boards are particularly new developments; they’ve all been around the block once or twice. However, there are many more options for 32 bit development than the current 8 bit PIC and AVR holy war. We’re going to turn the comments over to Hackaday readers with the following questions: what supersized dev board are you rolling with? What’s good for a beginner, and what should they watch out for?

Writing Javascript Without Using Any Letters Or Numbers

Did you know it’s possible to write Javascript code without using any letters or numbers at all? Well, it’s not just Javascript, but that’s the language used in this demonstration. [Patricio Palladino] shows how code can be written using just eight characters, and all of them are punctuation marks.

Typecasting is the name of the game here. By starting out with an empty array formed by a pair of square brackets, [Patricio] can generate the number zero by casting the array with the plus sign. From there he can use an exclamation point (a boolean cast) and addition to generate any number. The image above is an example of the digits 0-9. This would get very tedious for larger numbers but there’s another shortcut. Cast the digits to strings, concatenate them, then cast back to a number and you’re in business.

The technique is fascinating, and basically unreadable. As a proof of concept he wrote a parser that will convert any Javascript into this hieroglyphy. Check out his Github repository to give it a try.

[via Reddit]