Bike Alert Tells Drivers To Back Off

Bicycle commuters are often in a battle with drivers for space on the road. [Hammock Boy] does all of his commuting on two human-powered wheels, and is quite interested in not getting hit by a car. He decided to ply his hobby skills to build a device that helps keep him safe. It’s not just a tail light, it’s a sensor that shines brighter the closer a car is to the back of the bike.

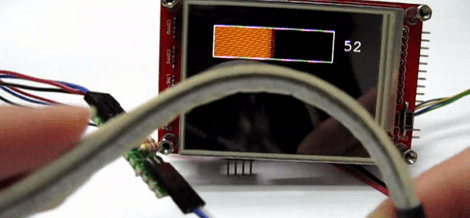
The sensor portion is the ultrasonic range finder seen in the center of the protoboard. Surrounding it is a set of LEDs. Each is individually addressable with the whole package controlled by an Arduino. The sketch measures the distance between the back of the bike and whatever’s behind it. If there’s nothing, one Red led is illuminated. If there is an object, the lights shine brighter, and in different patterns as the distance decreases.

Certainly the next iteration could use a standalone chip without the need for the whole Arduino. This could even work with two battery cells and no voltage regulator. We also think the use of any other color than Red LEDs is suspect but we do love the concept.

Color Multiplexing Through Fiber Optics

If you want to go high bandwidth, fiber optics is the way to go. From trans-oceanic cables to the yet-unseen ‘fiber to every home,’ fiber optics allows a lot more bandwidth than a copper cable. In low-bandwidth applications, fiber optic cable transmits data using one color of light. There’s a way to get more bandwidth out of a fiber optic cable, as [Shahriar] found out while experimenting with an RGB LED.

For his experiment, [Shahriar] used a BlinkM programmable RGB LED and a Sparkfun color sensor. In fiber optic lines with one light, it is possible to send many simultaneously using PWM, but noise becomes a problem at high data rates. Using an RGB LED, [Shahriar] sends three levels of Red, Green, and Blue to transmit 9 bits at a time – perfect for sending a byte with a parity check in one quick light burst.

[Shahriar]’s technique is exactly how the pros pump massive amounts of data through a single fiber optic cable. All the tools, code, and MATLAB functions are available on [Shahriar]’s site, ready to be used by anyone wanting to experiment for themselves.

In the video after the break, [Shahriar] breaks everything down, including the tools, theory, and actual circuits. It’s an amazing video demo, so thorough we’re wondering if [Shahriar] has any teaching ambitions.

Continue reading “Color Multiplexing Through Fiber Optics”

Tunes In The Icebox

A couple of years back [Bryan’s] iPod went on the fritz. It wasn’t completely broken, as long as he kept it really cold it still worked. So what was he to do with the crippled device? We’ve all heard of elevator music. [Bryan] decided to invent refrigerator music.

First he needed some speakers. A trip to the Goodwill store netted him a pair for under $5. They need A/C power, and the project depends on sensing when the door to the refrigerator is open. He killed two birds with one stone by adding a light socket outlet adapter. This provides a place to plug in the speakers’ power adapter, and it only gets juice when the door is opened. The gimpy iPod just constantly loops through the tracks stored within, but you’ll only hear it when the door is open and the speakers receive power. Of course the iPod will eventually run its own battery down so [Bryan] ran an extension cord out the side of the door to a wall outlet. This interrupts the door seal and we wish there were another way to keep it contained within.

New STM32 Discovery Board Can Now Be Programmed On Linux

Last Wednesday I posted a video review of the new STM32F0-Discovery board which is built around an ARM Cortex-M0 chip. I speculated that it should work with the open source project aimed at programming these discovery boards. I tested it out and a connection could be made, but no code could be flashed. So I spent a few hours over the weekend and added support.

My updates are already in the stlink repository. After cloning the code, you can use three commands to compile the software (./autogen.sh, ./configure, make). That’s assuming you have all of the necessary dependencies (I had to install libusb-1.0-0-dev) and that you add the udev rule suggested in the documentation (also found in the repository). The program st-util connects to the board and provides a listening port for an ARM debugger (I’m using arm-none-eabi-gdb from CodeSourcery G++ Lite).

When I first started testing, the chip id was reporting as 0. It turns out the register address polled for this information was wrong. After finding that in the almost-900 page reference manual I went through the painstaking process of finding the hex values necessary to properly memory map the device. From there I also updated the blink example to generate an ELF file compatible with the Cortex-M0 chip. So out of the gate you should be able to use an ARM cross compiling toolchain to compile the example, connect to the board with this utility, then use the debugger from the toolchain to connect and flash that example to RAM.

There’s lots more to be done. To fully utilize the chip it is necessary to use a startup file and linker script when compiling. I’ve done nothing in this area, but I hope to work on some tutorials as I get further along. Of course if you have your own successes developing for this board using a Linux machine we want to hear about it!

Tracking Small Changes In Video To See Someone’s Pulse

[Gil] sent in an awesome paper from this year’s SIGGRAPH. It’s a way to detect subtle changes in a video feed from [Hao-Yu Wu, et al.] at the MIT CS and AI lab and Quanta Research. To get a feel for what this paper is about, check out the video and come back when you pick your jaw off the floor.

The project works by detecting and amplifying very small changes in color occurring in several frames of video. From the demo, the researchers were able to detect someone’s pulse by noting the very minute changes in the color of their skin whenever their face is pumped full of blood.

A neat side effect of detecting small changes in color is the ability to also detect motion. In the video, there’s an example of detecting someone’s pulse by exaggerating the expanding artery in someone’s wrist, and the change in a shadow produced by the sun over the course of 15 seconds. This is Batman-level tech here, and we can’t wait to see an OpenCV library for this.

Even though the researchers have shown an extremely limited use case – just pulses and breathing – we’re seeing a whole lot of potential applications. We’d love to see an open source version of this tech turned into a lie detector for the upcoming US presidential debates, and the motion exaggeration is  perfect for showing why every sports referee is blind as a bat.

If you want to read the actual paper, here’s the PDF. As always, video after the break.

Continue reading “Tracking Small Changes In Video To See Someone’s Pulse”

Making Flex Sensors On The Cheap

When [Michelle] was making a sign language translation glove, she needed a bunch of flex sensors. These flex sensors cost about $10 a pop, meaning her budget for the project was eaten up by these bendy potentiometers. Since then, [Michelle] figured out a great way to make extremely inexpensive bend sensors using anti-static bags and masking tape, allowing her to start her project once again.

The build works by sandwiching Velostat plastic bags – the same electrically conductive bags all your components arrive in – between layers of masking tape. A jumper wires is attached to a strip of Velostat attached to a piece of masking tape. Between two of these anti-static/masking tape assemblies, another piece of Velostat is placed. After laminating all these pieces together, [Michelle] had a primitive yet very functional flexible potentiometer.

After attaching one of these flex sensors to an analog input of her dev board of choice, she had a wonderful and inexpensive flexible sensor. You can check out this sensor in action after the break.

Continue reading “Making Flex Sensors On The Cheap”

Potting Electronics With Silicone

If you want to improve the reliability of your electronics, just cover them in silicone or epoxy. Potting, as this technique is called, protects your project from impact and loose wires, but most of the time ends up as a gloppy mess. [Charles] figured out an awesome way to make pro-looking potted electronics using silicone and a few supplies from the emergency room.

On one of [Charles]’s trips to the ER, a nurse put Tegaderm on a wound and he noticed his skin could breathe. Figuring Tegaderm would also allow silicone to breathe, he asked for a sample and went back to the lab. After putting a few globs of silicone on a PCB, [Charles] wrapped the whole thing in Tegaderm. Much to his surprise, the silicone cured and made a smooth, glossy protective covering on his board.

[Charles] put up a Picassa album of his Tegaderm/silicone potted electronics, and we’ve got to say they’re looking very professional. This technique could also be applied to [Charles]’ glass PCB touch sensor, allowing for the creation of clear (or at least tranlucent) PCBs.

After the break, you can check out [Charles] potting his ATtinyISP board in silicone with Tegaderm. One word of warning, though: don’t use a silicone that uses acetic acid to cure – that’s a death sentence to electronics. Luckily, there’s an easy test to see if your particular brand of silicone produces acetic acid while curing. Just squeeze a bit of silicone on a piece of scrap, and if it smells like vinegar after a while, don’t use it.

Continue reading “Potting Electronics With Silicone”