Peltier Campfire Generator Put Out 14W (kind Of)

peltier-campfire-generator

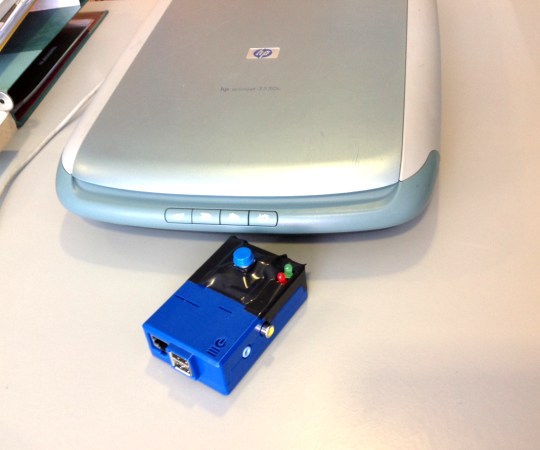
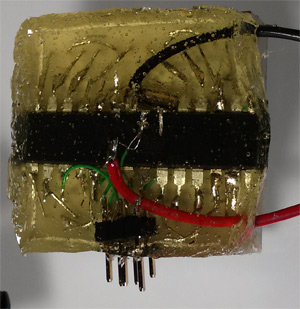
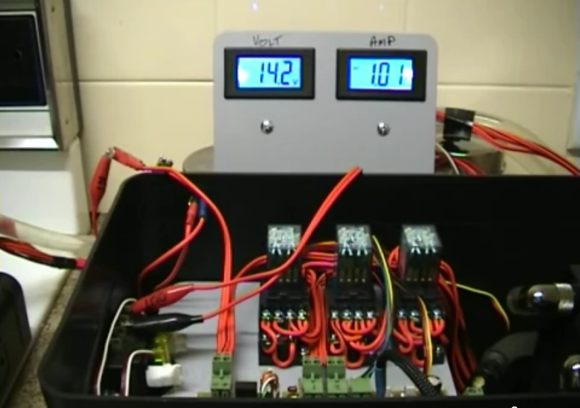
This is the control and monitoring hardware which [Jack] built for his campfire electricity generator. He’s done an amazing job to get this far. You can see he’s pulling 1 Amp at 14.2 Volts off of the system. But there one gotcha that’s still plaguing him.

The rig uses a big metal plate as a heat sink over the campfire (which is simulated by a cooking stove for testing). On the back of that plate is an array of Peltier coolers which generate electricity based on the temperature difference from one side to the other — it’s the same theory behind candle generators. The cold side has a heat sink with water running through it. What you see above are three relays which switch between using the Peltiers in series or in parallel based on their voltage output. You can’t really make it out there but there’s a radiator and recirculating pump to the right which are used to cool the water. The gotcha we mentioned is that the radiator can’t quite keep up with the heat of the fire. To get the results seen above [Jack] is running cold water from the tap through the radiator. But maybe if this were used in the winter the water could be circulated through a big box full of snow. Just keep shoveling it in to keep up the electrical potential!

After the break we’ve embedded part four of the project video as it shows off the array of peltier coolers quite well. You will also see part five (radiator and recirculating pump testing) from which this image was taken.

Continue reading “Peltier Campfire Generator Put Out 14W (kind Of)”

Prototyping A Low-resolution Handheld Gaming Rig

low-res-arduino-gaming

[Jason] has been hard at work on this Arduino-based low-res gaming platform. He even had a fab house deliver circuit boards to pull everything together. It’s a little small in his hands, and the graphics are limited to the 8×8 pixels provided by the display. But it still looks like a lot of fun and the code was written to make adding new games quite painless.

The board hosts an ATmega328 which drives the bi-color LED display using a pair of TPIC6B595 shift registers. Control is provided by a collection of buttons to either side of the display. The unit is powered by three AAA batteries held in a pack soldered to the back side of the PCB.

The image above shows [Jason] giving a Space Invaders game a try. The clip after the break shows respectable action, sound from a piezo buzzer, and it even scrolls your score at the end of the game. But you’re not limited to just one title. Adding new games is as easy as implementing a class in a new header file. You can get a feel for how this is set up by viewing the source code repo.

This reminds us of the Pixel Bros low-res system.

Continue reading “Prototyping A Low-resolution Handheld Gaming Rig”

One-button Scan To Email Using Raspberry Pi

one-button-scan-to-email-raspberry-pi

We’ve come across extremely expensive photocopiers that also fax, scan to email, and generally have too many features to list. [Eduardo Luis] figured out how to implement some of this type office magic using very inexpensive components. Specifically, he can press one button to scan a document and send it to an email address.

The user controls patch into the RPi GPIO header. There’s the button we already mentioned, a red LED for “System Busy”, and a green one for “System Status”. A set of scripts montor the button and drive the LEDs. When it’s time to scan, the RPi uses the scanimage package to capture a .PNM file, then converts it to .JPG before sending it via email using the mutt package.

We’d love to see a character LCD and a few more buttons added to the setup. This way you could select between different recipients (or even send via fax). And there’s always the possibility of connecting a printer to the other USB port on the RPi to make it work as a photocopier too.

You can catch a demo video after the jump.

Continue reading “One-button Scan To Email Using Raspberry Pi”

Motorized Binocular Chair Has You Stargazing In Comfort

motorized-binocular-chair-for-stargazing-in-comfort

It seems like something out of The Red Green Show but this motorized stargazing chair is a serious piece of astronomical hardware. It has a shelf that places a set of high-power binoculars directly in the user’s line of sight. The elevation is easy to adjust. And a power drill lets you take the whole thing for a spin.

The base has been outfitted with cogs and a chain from an old bicycle. The gear reduction lets a power drill rotate the platform. This worked well enough but [Gary] found that making fine adjustments was rather difficult and more often than not he ended up moving the binoculars to avoid overshooting when adjusting the platform with the drill. Luckily he didn’t give up on the idea. On the eighth and final page of his build log he refines the rotating setup with the help of an ice cream maker. It’s gear box is used as a speed reducer so that a very slow drill speed results in an extremely small heading correction. Now he can view the stars in peace, freed from frustration by a well-refined hack.

Weather Station Graphs History On Webpage

weather-station

Kudos go out to [Jose] for his work getting so many different components to talk to each other in this Arduino weather station that using a Raspberry Pi to display the data online.

The components shown above make up the sensor package. There’s an Arduino with a custom shield that interfaces the barometric pressure sensor, real-time clock chip, a digital temperature sensor, and a humidity sensor. On top of that shield is an XBee shield that lets this push data back to the base station. [Jose] also rolled in an LCD character display and a few buttons so that the user may view weather data without heading to the web.

A Raspberry Pi board makes up the other half of the XBee pair. It harvests the incoming data from the radio module using a USB to Serial converter cable. You can see the data log on the webpage linked above. Just choose the “LIVE” menu option and click on “Daily” to get a better overview of humidity and pressure changes.

8×8 LED Matrix Pendant Sealed In A Block Of Epoxy

8x8-led-pendant

This is the back side of [Dmitry Grinberg’s] 8×8 LED matrix pendant. He had seen the other projects that used a 5×7 grid but wasn’t really satisfied with the figures that can be drawn in that confined area when each pixel has only the option of being on or off. His offering increases the drawing area and includes the ability to display each pixel at several different levels.

He’s using an ATmega328 microcontroller soldered directly to the pins on the back of the LED module. He mapped out the IO in his firmware to make the soldering as easy as possible. To protect the hardware he fashioned a mold around the edges of the LED package using duct tape. The tape held epoxy in place as it hardened, encasing the microcontroller and holding the power wires and ICSP header tightly.

After the break you can see about six seconds of the device in action. The four levels of brightness for each pixel really do make quite a difference!

Continue reading “8×8 LED Matrix Pendant Sealed In A Block Of Epoxy”

The PICnDuino Review

picnduino

For those of you that can’t make a decision between buying an Arduino and a PIC processor, [Brad] has come up with a novel solution, the PICnDuino. We’ve featured him before with his [Retroball] project, but this time Brad has been full funded on Kickstarter, and is pre-selling boards for delivery in March.

[HAD], specifically I, was fortunate enough to be sent one of the boards to try out early. I’ve worked with an Arduino before, but never a PIC processor, so read on to see if it was actually as easy as the tutorial video (at the end of the article) would have you believe it is to get started. Continue reading “The PICnDuino Review”