Making A Tape Echo The Traditional Way

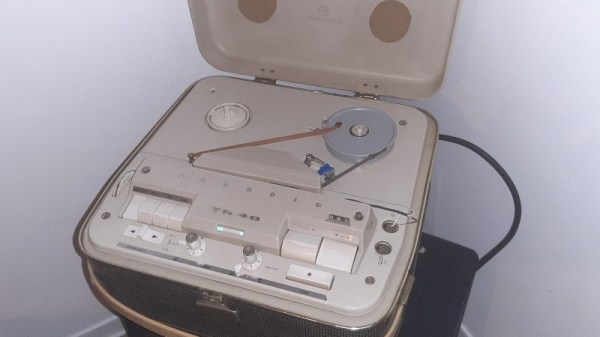
[Juan Nicola] has taken inspiration from the musician hackers of old and re-purposed a reel-to-reel tape recorder into a tape-echo for his guitar with a built-in valve amplifier (video in Spanish).

The principle is to record the sound of the guitar onto a piece of moving magnetic tape, then to read it back again a short time later.  This signal is mixed with the live input and re-recorded back onto the tape further back.  The effect is heard as an echo, and this approach was very popular before digital effects became readily available.

[Juan] installed a new read-head onto his Grundig TK40 and managed to find a suitable mechanical arrangement to keep it all in place.  He has since updated the project by moving to a tape loop, allowing an infinite play-time by re-using the same piece of tape over and over.

Turning tape machines into echo effects is not a new idea, and we’ve shown a few of them over the years, but every one is slightly different!

Both versions are shown after the break.  YouTube closed-caption auto-translate might come in handy here for non-Spanish speakers.

Continue reading “Making A Tape Echo The Traditional Way”

Guitar Effect Built From An Old Record Player

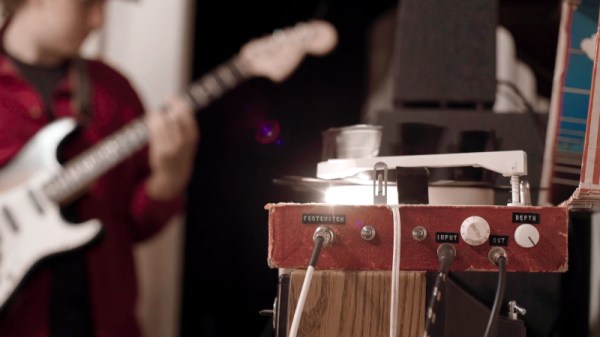
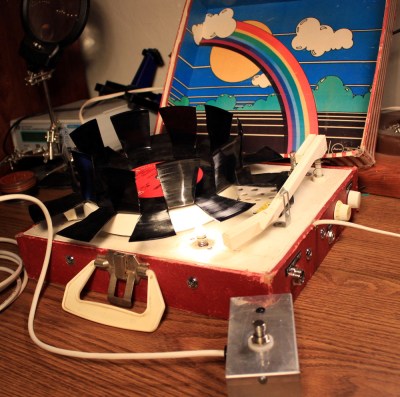
With little more than a gutted record player, a light bulb, and the legendary 555 timer IC, [Jacob Ellzey] has constructed this very slick optical tremolo effect for his guitar. By modulating the volume of the input signal, the device creates the wavering effect demonstrated in the video after the break.

The key is a vinyl record with large tabs cut out of it. As the record spins, these voids alternately block and unblock a small incandescent bulb. A common GL5537 photoresistor, mounted on the arm that originally held the player’s needle, picks up the varying light levels and passes that on to the electronics underneath the deck. An important note here is that different spacing and sizing of the cutouts will change the sound produced by the effect. [Jacob] has already produced a few different designs and plans on experimenting with more now that the electronics are completed.

Under the hood there’s a voltage divider and low gain amplifier connected to the photoresistor, and also a 555 timer circuit that’s driving the incandescent bulb. Once he was done fiddling with them, the circuit was moved to a neat little protoboard. A pair of potentiometers mounted through the side of the record player allow for adjusting the depth of the effect itself, as well as the output volume. Naturally, there’s also an external foot pedal that allows keying the effect on and off without taking your hands from the guitar.

As is usually the case, everything was going well on this project until the final moments, when [Jacob] found that the circuit and bulb were both browning out when powered from the same transformer. As a quick fix, he gutted a Keurig and used its transformer to drive the light bulb by itself. With independent power supplies, he was ready to rock.

Of course this isn’t the first time we’ve seen a piece of consumer electronics modified into a guitar effect, but if you’re looking for something a bit more built for purpose, there’s plenty of high-tech options to keep you busy.

Continue reading “Guitar Effect Built From An Old Record Player”

Mechanical Tremolo Does Things The Old-School Way

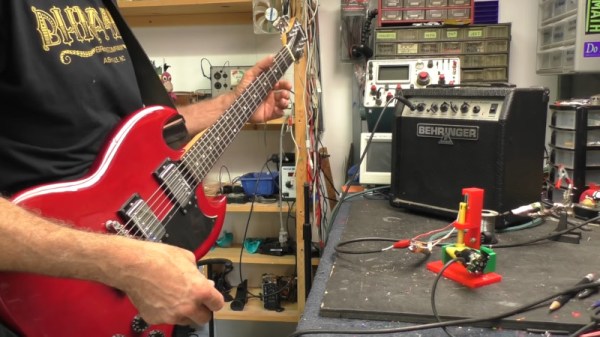
The word “tremolo” has a wide variety of meanings in the musical lexicon. A tremolo effect, in the guitar community at least, refers to a periodic variation in amplitude. This is often achieved with solid state electronics, but also recalls the sounds created by Hammond organs of years past with their rotating Leslie speakers. [HackaweekTV] decided to do things the old fashioned way, building a mechanical tremolo effect of his own (Youtube link, embedded below).

Electronically, the signal is simply passed through a linear audio potentiometer. The effect is generated by rapidly cycling this potentiometer up and down. The motion is achieved through a geared motor salvaged from a Roomba, which turns a cam. A sprung follower sits on top of the cam, and is attached to the potentiometer.

There were some challenges in development. Rigidity of the frame was an issue, and the follower had issues with snagging on the cam. However, with some careful iteration they were able to get everything up and running. The final project sounds great, and with the amplifier turned up, there’s no need to worry about the sound of the moving parts.

Naturally, you can always build a tremolo with a 555 instead. Video after the break.

Continue reading “Mechanical Tremolo Does Things The Old-School Way”

Wah-Wah-Won’t, To Wah-Wah-Will

This is the tale of [Chris], who discovered he was no [Jimi Hendrix] in his youth, and shelved his trusty wah-wah pedal as a result. Many years later as a bassist with more modest aims he brought it out of retirement and built a blend pedal kit to allow him to bring in a bit of wah to the mix when he wanted it, but as more of a Voodoo Grown-Up than the full Voodoo Chile.

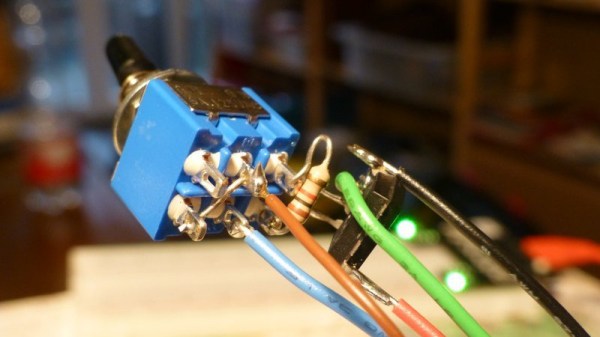
The kit worked and he should have been happy with it, but for one thing. As he increased the mix on the loop box instead of getting more wah he simply got less volume. A bit of detective work reached the conclusion that the old pedal was inverting everything, and that he needed to put in a circuit to correct that when needed. A single op-amp and a switch, with the op-amp circuit dead-bug-style on the back of the switch, completed the modification.

Wah pedals seem to be a recurring feature here. We’ve brought you one made of Lego among many others, as well as one repurposed as a synth controller.

Hackaday Prize Entry: DIY Guitar Multieffects

Guitar effects and other musical circuits are a great introduction to electronics. There’s a reason for this: with audio circuits you’re dealing with analog signals and not just the ones and zeros of blinking a LED. Add in the DSP aspects of audio effects, and you have several classes of an EE degree wrapped up in one project.

For his Hackaday Prize entry, [randy.day] is building a guitar multieffect. Instead of just a single distortion, fuzz, or chorus circuit, this tiny little PCB is going to have several flavors of pitch shifting, a flanger, chorus, echo, harmony, and stranger ‘digital-ish’ effects like bitcrushing.

This effects unit is built around a PIC32 and a TI audio codec which processes the audio at 64k 32-bit samples/second. This takes care of all the audio processing, but the hard work for a guitar pedal is actually the enclosure and mechanicals – it’s a hard life for stage equipment. For the foot pedal input, [randy] is using a magnetic position sensor, but there’s no word if he’ll be using a fancy die-cast enclosure or a plastic injection molded unit.

The 2015 Hackaday Prize is sponsored by:

Improving A Cheap Guitar Pedal

pedul

If something doesn’t suit your needs, just change it. That’s a motto we live by, and it looks like [Doug] took up the same creed when he modified a cheap effects pedal.

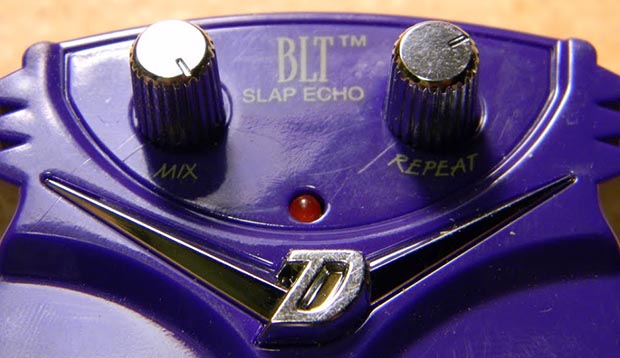
The victim of [Doug]’s soldering iron is a Danelectro BLT Slap Echo – a tiny, cheap pedal in Danelectro’s mini ‘food named’ pedal series. Stock, this pedal’s slap back echo is set to a fixed amount of time. [Doug]’s mod changes that.

The mod consists of desoldering a single SMD resistor and replacing that with a 50k pot [Doug] had lying around. After mounting the pot between the two stock knobs, the new and improved pedal had a variable length echo. There are a few more mods possible with this pedal – changing some of the resistors on the filter for a better sound, or even connecting the rate pot to a wah-style rocker pedal for some wobbly Echoplex or Space Echo action.

You can check out [Doug]’s gallery of pics here.

An EQ Display For A Pedal Board

EQ

There are a lot of tinkerers out there who got their start in electronics with musical hacks. Surprisingly though, we don’t see many submissions to our tip line covering boost circuits for electric basses, rewiring guitar electronics, or even more complex effect pedals. [Deadbird], though, is bucking that trend with an EQ display stomp box that fits neatly on his pedal board.

[Deadbird]’s build isn’t a graphic equalizer that can change the volume of different frequency bands; instead, he used the MSGEQ7 chip to listen in on the signal his guitar is producing and display that on a 128×64 graphic backlit display.

The entire project was prototyped on a breadboard with an Arduino. After he got all the components working – a momentary switch to turn the pedal on and off, 1/4″ jacks for the input and output, and a power supply – [Deadbird] took an Arduino prototyping shield and made everything more permanent. Now he’s got an attractive pedal on his board that shows the signal coming from his guitar in seven neat bands.