DIY Hearing Aid

DIY Hearing Aid

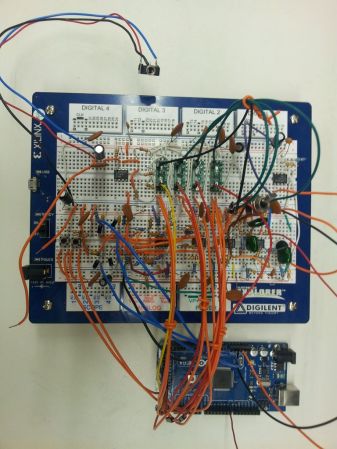
Hearing aids are expensive little devices, typically costing a few thousand dollars each. They need to be highly integrated to fit in the ear, while still providing signal processing to ensure good audio quality.

This DIY hearing aid does some intelligent signal processing. It uses an electret to capture audio, then uses a pre-amplifier to increase the gain 100 times. The next stage consists of four filters, dividing the input signal by frequency into four parts. These are passed into four LTC6910 programmable gain amplifiers, which allow an Arduino to control the gain of each channel. The LTC6910 takes 3 digital inputs that are used to set the gain value.

To determine which gain to use for each frequency band, the Arduino needs to know how much power is in each band. This could be done using a Fast Fourier Transform, but that would require quite a bit of processing power. Instead, an envelope detector averages the signal, which can be read by an analog input on the Arduino. Using this information, the hearing aid can boost specific frequencies when it detects conversation.

This hearing aid won’t quite fit in your ear, but there is a lot of interesting signal processing going on. The schematic, Arduino source code, and a MATLAB simulation are provided.

LEDmas Tree

led christmas tree

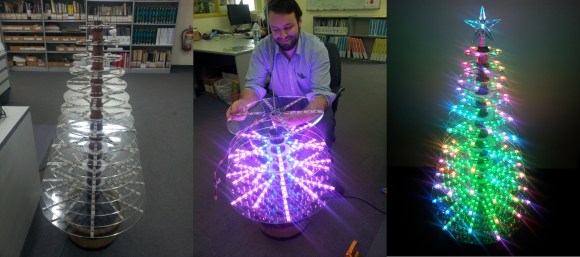
[Nick] is a bit of an LED fanatic. So when his boss asked him to help make an LED Christmas tree for work, he jumped at the opportunity!

It’s a beautiful build, making use of laser(?) cut plexiglass disks, wooden “trunks” made using a lathe, and a TON of RGB LEDs. Unfortunately—because it turned out so nice—the company is thinking of selling it as a product next year, so [Nick] isn’t allowed to divulge much more information behind the build. Regardless, it looks fantastic , and we’re sure you could hack your own.

He was allowed to take a video of it though, so check it out after the break! He also has a ton of other very cool LED projects on his blog at www.hownottoengineer.com

Continue reading “LEDmas Tree”

Hackaday Links: December 15, 2013

hackaday-links-chain

Want to get a hold of a gaming controller attachment for iOS at a rock bottom price? [Dark GOD] learned that Amazon is closing out the Gameloft DUO Gamer hardware for $6 because the hardware is no longer supported by the operating system. He shows how to make it work using a Cydia app. [Thanks ProMan]

[Frank Zhao] had a cheap HDMI switch which had problems with a sagging power rail. His solution was to hack in a USB port to inject some power.

This security hack uses an Arduino with LCD screen to display a QR code. Scan it with an Android device and you no longer need keys! Here’s the code repo and a demo video.

It’s interesting to see how many places the WS28xx pixels are popping up. Here’s a crowdfunding campaign that uses a matrix of the pixels as a portable gaming display. Look somewhat familiar? We’ve seen [Retro Brad’s] earlier hardware (made to play Super Pixel Bros.) that used an LED module instead. This is probably a lot easier to drive since it uses serial data instead of multiplexing.

Next is some robot building inspiration. [IronJungle] has been hard at work building a rover that uses compass bearings for navigation.

We liked seeing a drop-in replacment uC for Ikea Dioder projects, but if you need more power under the hood, take command of those colored lights with a Raspberry Pi.

Those lucky enough to have access to a laser cutter will find this Inkscape extension for living hinges useful.

Finally, POTUS threw down the gauntlet, encouraging everyone to learn how to program by pointing them toward the Hour of Code program. We’ve long thought that everyone should have some level of coding education. Do you agree with us? Of course, getting something like this into schools is a monumental challenge, so it’s nice to see extra-curricular offerings. We also believe that Hackerspaces are among the best driving forces for getting kids a tech education. [via Adafruit]

Build An In Line Network Bandwidth Monitor

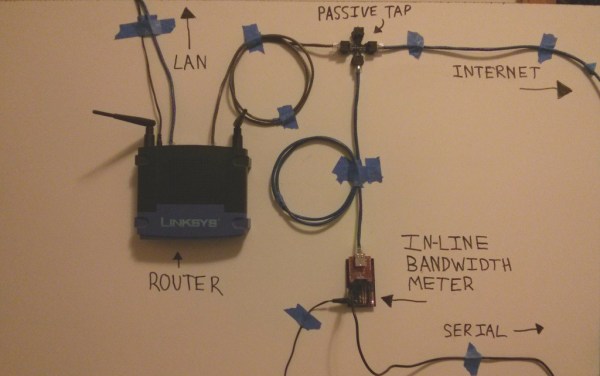
[Kurt] likes to know what’s going on with his network. He already uses bandwidth checking software on his DD-WRT capable router, but he wanted a second opinion. So he built his own network monitor. [Kurt] started by building a passive Ethernet tap. He then needed a network interface chip that would serve his purposes. The common Wiznet chips used with Arduinos didn’t allow enough manipulation of raw packet data, so he switched to a Microchip ENC624J600 (PDF). The Microchip controller allowed him to count the bytes in the raw Ethernet packets.

With the Ethernet interface complete, [Kurt] turned his attention to a microcontroller to run the show. He started with an Arduino, but the lack of debugging quickly sent him to an Atmega128 in Atmel Studio. After getting the basic circuit working, [Kurt] switched over to a PIC24F chip. With data finally coming out of the circuit, he was able to tell that his original back-of-the-napkin calculations for bandwidth were wrong. [Kurt] created a PCB to hold the microcontroller, then wrote a Python program to plot the data output from his circuit. The bandwidth plot matched up well with the plot from DD-WRT. Now he just needs a giant LED matrix to show off his current network stats!

Cast A Shadow, Play A Note

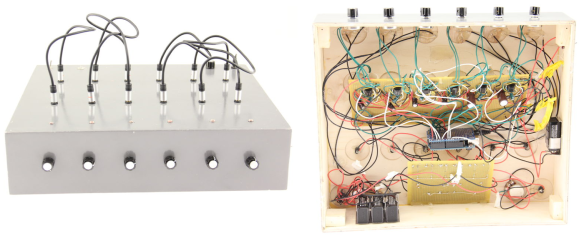
Looking for a way to entertain friends and family this holiday season? Look no further than the Arduino-powered Photocell Piano. [Asahillis] has posted this Instructable for building a 6-note musical command center.

The piano uses photoresistors to turn each note on when the player runs their hand over it. Notes can be tuned independently using potentiometers on the front of the box. The hack uses two circuits: one to generate the tones, and a second to mix them. [Asahillis] adapted [Forest Mims III]’s timeless schematics for the 555 Tone Maker and the 741 Audio Mixer to create his Photocell Piano.

When the instrument is powered on, the code takes a 5-second reading of the ambient light, and sets a threshold based on its findings. Afterward, the first note will sound, indicating the piano is ready to be played. Each note has its own if-else statement that tells it to sound when its corresponding  photoresistor reaches a value below the set threshold (when the player casts a shadow). There’s a demo video included in the guide but we couldn’t embed it here.  Check out the demo video after the break.

If you prefer to rock out with your lights out, there’s always this impressive laser harp.

Continue reading “Cast A Shadow, Play A Note”

Fubarino Contest: A Shifter With An Easter Egg

shifter

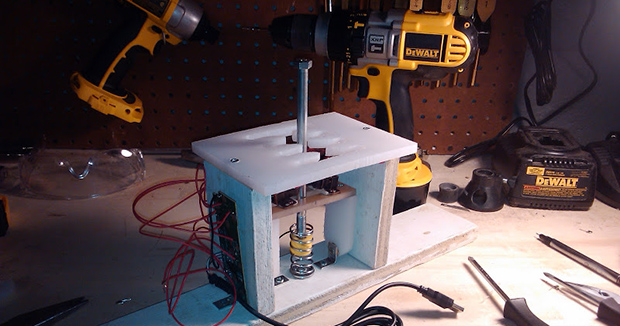
A few months years ago [Wes] shared a project of his on the Hackaday Forums (yes, we do have a forum and you should check it out). He created a shifter for some sim racing, greatly improving on any system that uses a keyboard.

The shifter is made out of some scrap wood, a cutting board cut with an H-gate shape, and a few arcade microswitches. A giant bolt locks into a few cabinet clasps for each gear position, and the set of microswitches connected to a USB game pad tell [Wes’s] virtual car what gear he should be in.

It’s a great build, but because this is an entry for our Fubarino contest, [Wes] needed to put an easter egg with the Hackaday URL in there somewhere. To solve this problem, [Wes] upgraded the electronics with a Teensy 2.0. When the gears are shifted into 1st, 3rd, 3rd, and 7th, the Teensy blinks the URL in Morse and opens up a web browser that loads up Hackaday.

Not only is it a great build, it’s also a very, very subtle easter egg for our favorite website. Demo of the egg below.

Continue reading “Fubarino Contest: A Shifter With An Easter Egg”

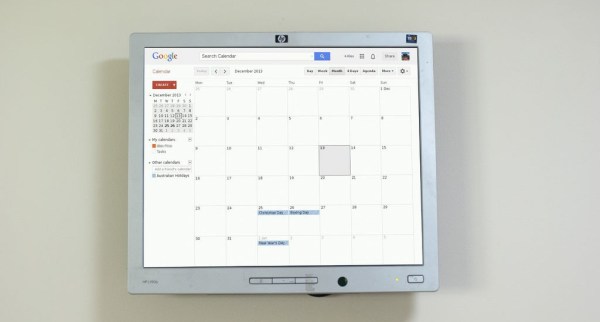
Raspberry Pi Wall Calendar

Do you let Google know every aspect of your personal and social life? Do you have a spare LCD monitor kicking around? Why not make your own Raspberry Pi Wall Calendar?

[Alex] recently bought his first home (congratulations!), which happened to have a TV wall mount in the kitchen. Personally, we don’t think TVs belong in the kitchen, and neither did [Alex]. Not wanting to tear the mount out of the wall (and thus require home renovations too soon), he devised a clever solution: why not make a digital calendar?

[Alex] connected a Raspberry Pi model B to the LCD monitor, which provides convenient access to his Google Calendar. His Instructable is both meticulous and approachable, so novice hackers should have no trouble replicating this build. The only improvement we can think to suggest is substituting a touchscreen LCD, which would allow him to interact with the schedule.

Whether you “let” Google know about your life— or it just knows—this is certainly a handy hack for the 21st century home!