Enabling An Unused Touchscreen Overlay On A Consumer LCD

uncovering-an-unused-touchscreen-on-a-consumer-lcd

When [Andrei] first got his Raspberry Pi he wanted to make it a standalone computer right away. This means the normal input devices like a mouse and keyboard, but also some type of display. To avoid waiting for shipping he ended up using a cheap vehicle backup camera screen from the local big box store. It worked great, and recently he decided he would try to convert it to run off of 5V power to simplify his setup. While snooping around inside the device he discovered an unused resistive touch overlay and figured out how to get it to work.

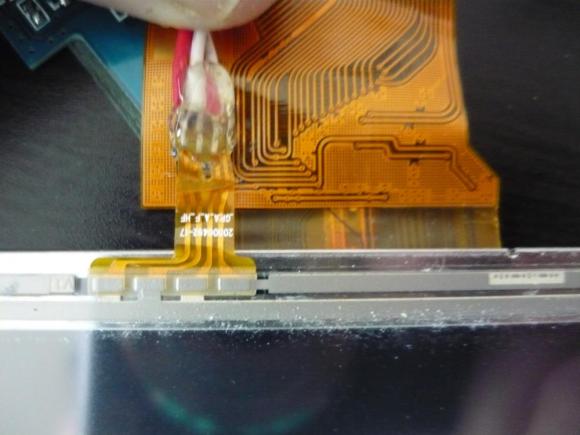
What tipped him off is the small four-conductor connector which wasn’t hooked up to anything. He carefully soldered wires onto the flexible circuit traces, then generously covered them in hot glue to help prevent movement from breaking the rigid connection. To get this working you need to measure the resistance between the conductors. Most of the time we figure the RPi GPIO header can be used directly, but for this task an intermediary is necessary. [Andrei] went with a small Arduino clone board. A bit of trial and error was all it took to get the connections right and to iron out the code which translates the values into coordinates.

Deploying An Open Source Pollution Monitoring Network

pollution-monitoring-network

[Kasey] and [Guyzmo] have been working for the past couple of years on a side project that lets them monitor pollution using a network of sensors. They’ve just decided to make the project open source, both hardware and software. The details of the system are available at their GitHub repository.

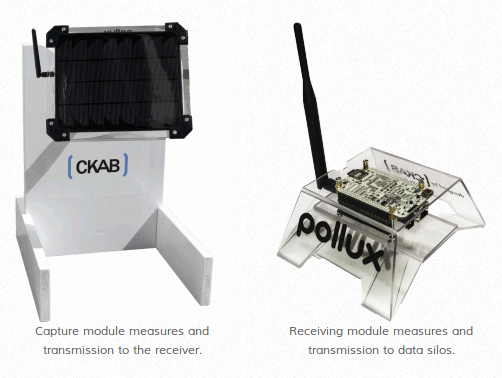
There are two main components to the system. On the right is a base station which collects the data from the array of sensor, one of which is shown on the left. Each sensor runs off of a battery, but features a PV solar panel which keeps the power source topped off. It uses an Arduino to drive the system, and an XBee radio for communications. Some info about the sensors can be found on this summary page. There’s a PM10 particle pollution sensor, temperature, sound, nitrogen, and oxygen sensors. We also wonder if any data can be gleaned from how much electricity the solar panel is able to harvest?

The base station also uses an XBee radio to poll the network, but it’s not driven by an Arduino. They’ve gone with the ARM-based BeagleBone to manage the data.

Workshop Computer Floats Above Bench And Is Nearly Wireless

all-in-one-workshop-computer

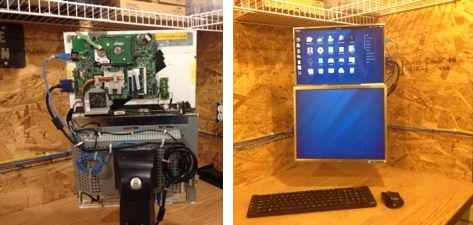
[Ezra] used the parts he had lying around to build a self-contained dual screen shop computer. What might one name such a project? Obviously you’d call it the Dr. FrankenComputer.

The lower monitor is a dell desktop flat screen. During prototyping [Ezra] used the stand to support everything. But to keep his work space clear the final version has been mounted to the wall in the corner of his lab. The upper display is the LCD from a Compaq laptop which he wasn’t using. The laptop still works and we believe that’s what is driving the Fedora system. A bracket mounted to the desktop screen’s inner skeleton supports the laptop screen and motherboard. One power supply feeds everything and connects to an outlet in the wall behind the monitors. The keyboard and mouse are wireless, as is the computer’s connection to the network.

The only thing we would worry about in our own shop is sawdust filling the heat sinks and other components of the motherboard. Perhaps his lab is electronic projects only or he has a dust cover that he uses when the system isn’t in use.

Eloquent Universal Receiver For Your Home Entertainment Equipment

home-entertainment-universal-receiver

We’re really starting to enjoy the home entertainment control hacks which use a universal receiver to act on commands from any remote. This one is especially interesting as it uses a single remote to control the system but rolls in lots of extras.

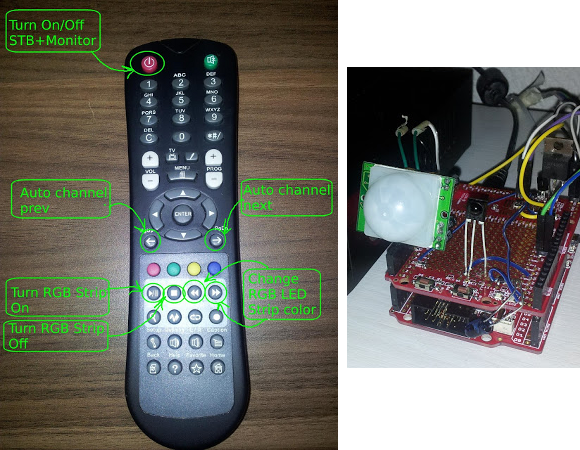
Looking at the receiver itself the white plastic dome of the PIR sensor should raise an eyebrow. Since the cable box takes a while to turn on [Ivan] included the motion sensor to switch that component on when you walk into the room. This way it’ll be ready to go by the time you sit down. It does this by sending IR signals from the PIC32 dev board. Of course the board has its own receiver to listen for the remote control commands. The remote buttons have been mapped a bit differently than originally intended. You can see in the diagram above that the normal VCR/DVD/DVR buttons have been set to control the room’s LED strips. There’s even a power consumption monitor rolled into the project. All of these features are demonstrated in the clip after the break.

This is a nearly perfect base setup. But we’d love to see it with a web interface at some point in the future.

Continue reading “Eloquent Universal Receiver For Your Home Entertainment Equipment”

EEPROM Hack Unlocks Crippled Features In Agilent Multimeter And LCR Meter

u1241a-agilent-hack

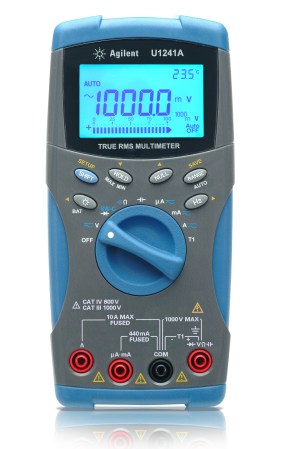
[Gnif] was doing what any good hacker does… poking around the insides of one of his tools to see how it works. While in there, he discovered that an EEPROM hack could make the Agilent U1241A function like the U1242A.

If you’re into this kind of thing the Rigol 1052e hack should have already popped to mind. That was a firmware crippled device that, when unlocked, made the cheaper model behave the same ways as it’s $400 more expensive sibling. This doesn’t have quite the same impact, as the price difference is somewhere between $20-$100. Still, this stuff is just cool, right?

A few posts down in the thread linked above [Gnif] shares the story of how he found the hack. After shorting the i2c lines of the EEPROM while powering up the meter he was able to see that the device initializes a lot of its values to 0xFF when it can’t find the stored data. The next step was to use an STM32 board to dump the EEPROM contents. With the backup file stored safely he started changing values and reflashing the chip. Through this process he discovered that switching one byte from 0x01 to 0x02 enabled the higher model’s features. It also works for upgrading the U1732C to the U1733C feature set.

This Cube Is Made For Walkin’

cubli

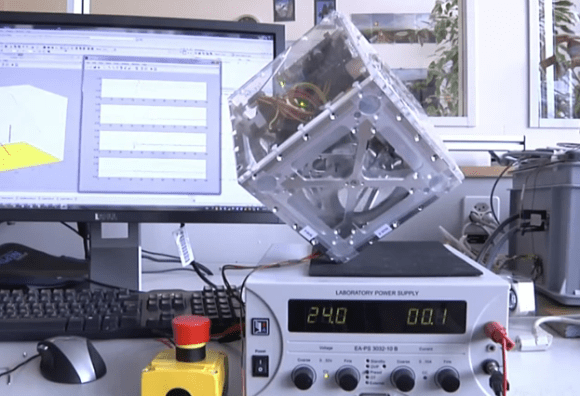
Meet Cubli, a research project which aims to make a cube that can walk around without using any appendages. It’s a research project at the Institute for Dynamic Systems and control in Switzerland. Anyone else thinking about our beloved companion cube right now?

The robotic experiments are based on angular momentum. Inside of the cube there are center mounted motors which each spin a wheel. Three of these are mounted perpendicular to each other to give the cube the ability to change its position along any axis. This is best shown by the first video after the break where just a single side of the assembly is demonstrated. A square frame starts at a rest position. You see the wheel spin up and it is suddenly stopped, which causes the momentum of the wheel to pop the square frame up onto one corner. The wheel then switches into a second mode to keep it balancing there. The final mode is a controlled fall. This theoretically will let the cube move around by falling end over end. So far they’re not showing off that ability, but the second demo video does show the assembled cube balancing on one corner.

Continue reading “This Cube Is Made For Walkin’”

Stealing Cars And Ringing Doorbells With Radio

The cheap software defined radio platforms that can be built out of a USB TV tuner aren’t getting much love on the Hackaday tip line of late. Thankfully, [Adam] sent in a great guide to cracking sub-GHz wireless protocols wide open, and ringing doorbells, opening cars, and potentially setting houses on fire in the process.

The first wireless hack [Adam] managed to whip up is figuring out how a wireless doorbell transmitter communicates with its receiver. [Adam] connected a FUNcube software defined radio dongle (although any one of the many USB TV tuner dongles we’ve seen would also work) and used GNU Radio to send the radio signals received to a WAV file. When looking at this audio file in Audacity, [Adam] saw the tell-tale signs of digital data, leaving with a string of 1s and 0s that would trigger his wireless doorbell.

The FUNcube dongle doesn’t have the ability to transmit, though, so [Adam] needed a more capable software defined radio to emulate the inner workings of a doorbell transmitter. He found one in the Ettus Research USRP, a software designed radio that’s doing a good job of keeping [Balint], Hackaday SDR extraordinaire, very busy. By sending the data [Adam] decoded with the FUNcube dongle over the USRP, he was able to trigger his wireless doorbell using nothing but a few hundred dollars of radio equipment and software ingenuity.

Doorbells are a low-stakes game, so [Adam] decided to step things up a little and unlock his son’s car by capturing and replaying the signals from a key fob remote. Modern cars use a rolling code for their keyless entry, so that entire endeavour is just a party trick. Other RF-enabled appliances, such as a remote-controlled mains outlet, are a much larger threat to home and office security, but still one [Adam] managed to crack wide open.