Automatic Rewinder Makes Kite Retrieval A Breeze

So you’ve built a fine kite, taken it to the beach, and let it ride the wind aloft on a spool of line. Eventually it has to come down, and the process of reeling all that line that was so easily paid out is likely a bigger chore than you care to face. What to do?

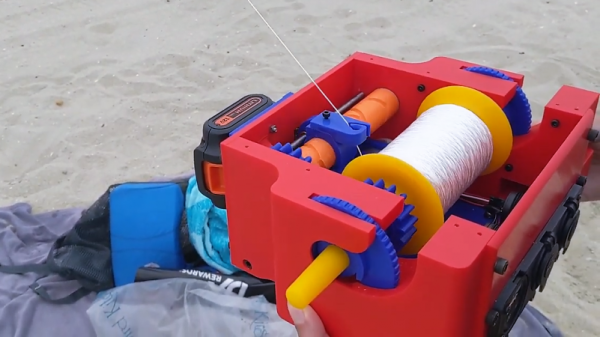
If you’re like [Matt Bilsky], the answer is simple: build a motorized kite reel to bring it back in painlessly. Of course what’s simple in conception is often difficult to execute, and as the second video below shows, [Matt] went through an extensive design and prototype phase before starting to create parts. Basic questions had to be answered, such as how much torque would be needed to reel in the kite, and what were the dimensions of a standard kite string reel. With that information and a cardboard prototype in hand, the guts of a cordless drill joined a bunch of 3D-printed parts to form the running gear. We really liked the research that went into the self-reversing screw used to evenly wind the string across the spool; who knew that someone could do a doctoral dissertation on yarn-winding? Check out the “Reeler-Inner” in action in the first, much shorter video below.

With some extra power left from the original drill battery, [Matt] feature-crept a bit with the USB charger port and voltmeter, but who can blame him? Personally, we’d have included a counter to keep track of how much line is fed out; something like this printer filament counter might work, as long as you can keep the sand out of it.

Continue reading “Automatic Rewinder Makes Kite Retrieval A Breeze”

Make A Better, Spring-Loaded SMT Tape Strip Holder

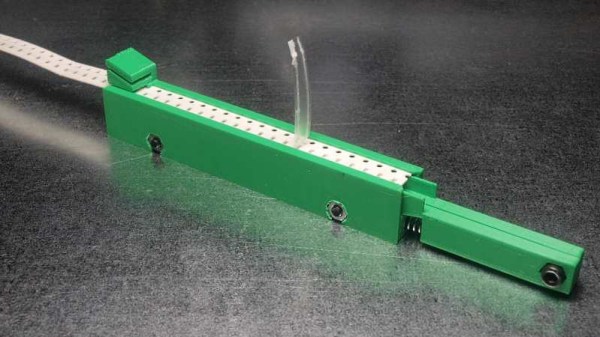
Every so often, a project is worth some extra work to see if the idea can go any further. [JohnSL] has been busy doing exactly that with his spring-loaded SMT tape holder project. Having done the original with 3D printing, he has been working on designing for injection molding. This isn’t a motorized feeder, it’s still a manual tool but it is an improvement over the usual workshop expedient method of just sticking segments of tape down to the desktop. Tape is fed into the holders from one end and spring tension holds the tape firm while a small slot allows the cover tape to be guided backward after peeling. As anyone who has used cut segments of tape to manually deal with SMT parts knows, small vibrations — like those that come from peeling off the clear cover — can cause the smaller components to jump around and out of their pockets, and any length of peeled cover gets awkward quickly.

The design allows for multiple holders to mount side-by-side.

In [JohnSL]’s design, all SMT tapes sit at an even height regardless of size or tape thickness. A central support pushes up from the bottom with tension coming from a spring pulling sideways; the central support is forced upward by cams and presses against the bottom surface of the tape. As a result, the SMT tape gets supported from below with even tension and the whole assembly maintains a narrow profile suitable for stacking multiple holders side by side. The CAD files are available online along with a McMaster-Carr part number for the specific spring he used.

After working out the kinks on 3D printed prototypes, [JohnSL] decided to see if it would be feasible to design an injection molded version and made a video outlining the process, embedded below.

Continue reading “Make A Better, Spring-Loaded SMT Tape Strip Holder”

Retrotechtacular: Tube Amplifiers

retrotechtacular-how-tube-amps-work

It’s hard to beat this vintage reel for learning about how vacuum tube amplifiers work. It was put together by the US Army in 1963 (if we’re reading the MCMLXIII in the title slide correctly). If you have a basic understanding of electronics you’ll appreciate at least the first half of the video, but even the most learned of radio enthusiasts will find something of interest as they make their way through the 30-minute presentation.

The instruction begins with a description of how a carbon microphone works, how that is fed to a transformer, and then into the amplifier. The first stage of the tube amp is a voltage amplifier and you’ll get a very thorough demo of the input voltage swing and how that affects the output. We really like it that the reel discusses getting data from the tube manual, but also shows how to measure cut-off and saturation voltage for yourself. From there it’s off to the races with the different tube applications used to make class A, B, and C amplifiers. This quickly moves onto a discussion of the pros and cons of each amplifier type. See for yourself after the jump.

Continue reading “Retrotechtacular: Tube Amplifiers”

TOBY: Reel Mower Bot evolved

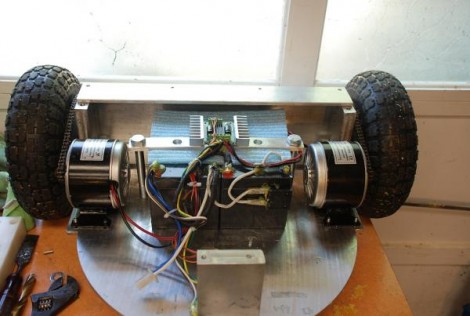
[Grayson Sigler] rolled out a new version of his robotic mower which he calls TOBY. The previous design added motors to a reel mower but he had trouble with traction. The new design is more of a utility robot platform that is used to tow the reel motor behind it. With better wheels, a much more stable base, and plenty of power this is a significant improvement.

His parts order came since we last checked in and he now has RC fully implemented. Check out the video after the break.

Continue reading “TOBY: Reel Mower Bot evolved”

Remote Control Reel Mower

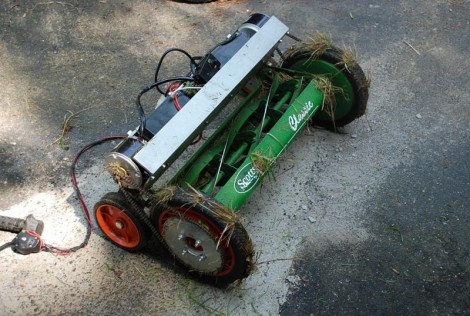
Challenged by hot days and steep turf [Grayson Sigler] modified his reel mower to use electric motors. The end product will be radio controlled but he lacked the necessary parts to make it wireless right now. Not to be deterred, he used a wired controller for prototyping and testing that should be easily replaced once the parts arrive. Sadly, the grade of his yard causes the small wheels to slip so he tried inserting screws into the tread for added traction. The small mower lacks the weight and footprint that the Lawnbot400 enjoys. That being said, solar charging is one of the future goals so this build, which he named RoMOW, wins out on the green scale. We’ve included the prototype video after the break that shows the blades spinning away.

Continue reading “Remote Control Reel Mower”