Russian Man Builds A Chainsaw Out Of A Grinder

Ready for another ill-advised tool hack we definitely do not recommend you try at home? Why not take a gander at this man’s home-made chainsaw… made out of a grinder! (translated)

What this (Russian?) man has done is modified his large electric grinder — into a chainsaw. He’s added a weld plate, some mounting locations, and now it can accept either grinding wheels, or after a few minutes of assembly, a full length chainsaw blade attachment. He’s probably pretty proud of himself, but we really hope he doesn’t end up losing a finger… or worse.

Anyway, we’re not even going to point out the lack of safety guarding in this video, because it is such an obvious bad idea in general. That being said, it actually works in the demonstration!

Stick around — don’t sweat too much though, no one gets hurt. There is one thing that can be said about this project though… It’s most definitely a hack.

Continue reading “Russian Man Builds A Chainsaw Out Of A Grinder”

DIY Bell For Your Trains Of Lionel

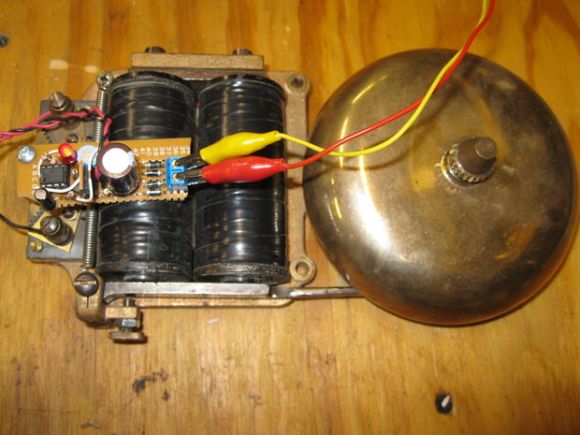
[Peter]’s dad recently rekindled his love for Lionel trains and wanted a bell to keep the crossings safe for O gauge drivers and pedestrians. Using parts he had lying around and a doorbell from the hardware store, [Peter] concocted this DIY train crossing bell at his dad’s request.
The idea was to make the bell chime about once per second. To achieve this, [Peter] used a non-repeating electro-mechanical doorbell that emits a single note on continuous press. You could also roll your own bell with a spring-loaded solenoid and something bell-like for it to strike.

[Peter]’s three-stage design uses a full-wave bridge rectifier to convert the AC from the train transformer to DC. He drops it to 5V and sends it through a 555 and some resistors to set the frequency and duty cycle. His output section translates the voltage back up to match the input desired by the doorbell.  [Peter] included a 1N4002 as a back EMF snubber to keep feedback from damaging the power MOSFET. Stick around for his demonstration video after the jump.

Continue reading “DIY Bell For Your Trains Of Lionel”

Interrupt Free V-USB

resync

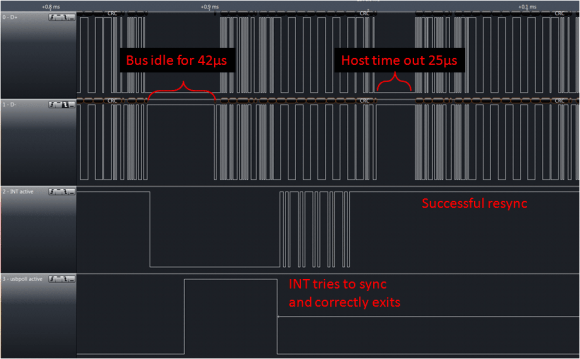
[Tim’s] new version of Micronucleus, Micronucleus 2.0, improves upon V-USB by removing the need for interrupts. The original Micronucleus was a very small implementation of V-USB that took up only 2KB. Removing the need for interrupts is a big leap forward for V-USB.

For those of you that do not know, “V-USB is a software-only implementation of a low-speed USB device for Atmel’s AVR® microcontrollers, making it possible to build USB hardware with almost any AVR® microcontroller, not requiring any additional chip.” One tricky aspect of using V-USB is that the bootloader requires interrupts, which can lead to messy problems within the user program. By removing the need for interrupts, Micronucleus 2.0 reduces the complexity of the bootloader by removing the need to patch the interrupt vector for the user program.

With the added benefit of  speeding up the V-USB data transmission, Micronucleus 2.0 is very exciting for those minimal embedded platforms based on V-USB. Go ahead and try out Micronucleus 2.0! Leave a comment and let us know what you think.

Public Transportation Display

display_cropped

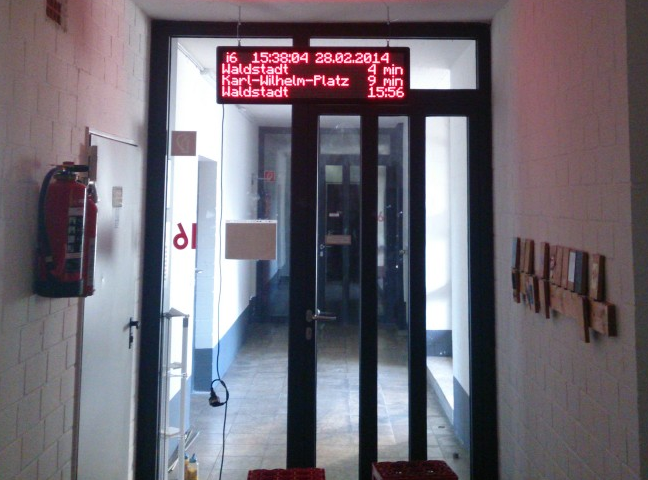
[Adrian] and [Obelix] wanted to have an easy way to know when to expect the public transportation, so they hacked an LED dot matrix display to show arrival times for stops near their dorm.

They found the display on Ebay with a defective controller which they replaced with an ATmega328p. They connected the display to the internet by adding a small TP-Link MR3020 router and connecting it to the ATmega328p via a serial line. Their local transportation office’s web page is polled to gather wait times for the stops of interest. All rendering of the final image to display to the dot matrix display is done on their PC, which then gets pushed through to the MR3020, which in turn pushes it out to the ATmega328p for final display.

[Adrian] and [Obelix] warn about setting proper watchdog timers on the display driver to make sure bugs in the controller don’t fry the dot matrix elements. Their ATmega328p dot matrix driver code can be found on [Adrian]’s GitHub page.

Check out a video of the display in action after the jump.

Continue reading “Public Transportation Display”

Retrotechtacular: Lighting The Way For Talkie Pictures With Optical Sound Recording

This week’s Retrotechtacular is a 1943 Encyclopædia Britannica film focusing on optical sound reproduction for motion pictures. Both the sound and the images are recorded on film, which is only affected by light. Therefore, the sound waves must be converted to changes in light.

This is done the way you might expect: the sound waves hit a microphone and the changes in current are amplified and used to control the intensity of light falling on the film. Three types of soundtracks are described and wonderfully demonstrated at the end of the film.

All three types are made from a series of thin bars of light, and the corresponding current value is represented by changes in either their length or their width. In the Unilateral Variable Area recording, the bars extend from the right side of the sound track. Bilateral Variable Area recorded bars emanate uniformly toward the edges from the center. In Variable Density recording, all of the bars extend from the left to right extremes, but their thickness varies.

Variable Density recording is done with a light valve, which contains a pair of delicate metallic ribbons in a magnetic field that move like shutters when the sound current flows through them. The light coming through to the film is varied by the slot created in the space between the ribbons. The light patterns are changed back to sound through a photoelectric cell, which converts the variations in light back to changing current. These changes are amplified and run through a loudspeaker. Be sure to watch to the end to catch a demonstration of the recording methods, set to what we’re pretty sure is Camille Saint-Saëns’ Danse Macabre.

Continue reading “Retrotechtacular: Lighting The Way For Talkie Pictures With Optical Sound Recording”

Woodhouse Controls Your House, Avoids Danger Zone

woodhouse

[Pat] may not be the world’s most dangerous secret agent, but he does have Woodhouse taking care of his home. [Pat] has been upgrading his sonic screwdriver home automation system these past few months. Waking up to a chilly room led him to start hacking a thermostat interface. [Pat] found that his furnace only needed one 24VAC wire to be shorted to a common during a call for heat. [Pat] was lucky in that his thermostat was low voltage. While researching a thermostat hack, we made the painful discovery that our thermostat is 120VAC, so watch for that if you try this one at home.

[Pat] connected his thermostat leads to a relay controlled by a Raspberry Pi. The Pi would read a temperature sensor and set the relay accordingly. That was fine for a quick hack, but opening an SSH window to change the temperature isn’t the most convenient thing in the world. Enter an old Asus Transformer Prime tablet. [Pat] coded up an Android Holo style interface using AJAX along with HTML/CSS/jQuery and PHP. OpenMic+ constantly listens for voice commands, and fires them off to Tasker tasks as needed. He calls the results Woodhouse, and the interface is very slick. The tablet controls and graphs temperature, [Pat’s] media center, and his lights. Woodhouse is even [Pat’s] right hand man when getting ready for those intimate moments. We can’t wait to see what [Pat] comes up with next.

Continue reading “Woodhouse Controls Your House, Avoids Danger Zone”

TDOA (Time Difference Of Arrival) Directional Antenna

tdoa-antenna-tutorial

We have posted articles in the past on directional antennas such as Yagi antennas used for transmitter hunting otherwise known as fox hunting. Those types of antennas and reception suffer from one major drawback, which is as you get close to the transmitter the S meter will go full scale. At which time the transmitted signal appears to be coming from all directions. To correct for this problem you need to use clever signal attenuators or change to a poor receiving antenna as well as tuning off frequency effectively making your receiver hard of hearing so that only the direct path to the transmitter is loudest.

There is another popular type of antenna that you can build yourself called a TDOA which stands for Time Difference of Arrival. [Byon Garrabrant N6BG]  shared a short video tutorial on the functionality of his home built TDOA antenna. Effectively this is an active antenna that uses a 555 chip or, in [Byon’s] case, a PIC chip to quickly shift between two receiving dipole antennas at either end of a shortened yardstick. In his explanation you learn that as the antenna ends move closer or farther from the source a 640 Hz generated audio tone will go from loud to very soft as the antennas become equal distance from the source. This type of directional reception is not affected by signal strength. This means you can be very close to a powerful transmitter and it will still function as a good directional antenna.

The current circuit diagram, BOM and source code are all available on [Byon’s] TDOA page.

The reason [Byon] used a programmable PIC instead of the 555 for his design is because he wants to add a few more modifications such as feeding back the audio output to the PIC in order to programmatically turn on a left or right LED indicating the direction of the transmitter. Furthermore, he plans on adding a third antenna in a triangular configuration to programmatically control a circle of 6 LEDs indicating the exact direction of the signal. When he finishes the final modifications he can drive around with the antenna array on his vehicle and the circle of LEDs inside indicating the exact direction to navigate.

We look forward to seeing the rest of the development which might even become a kit someday. You can watch [Byon’s] TDOA video after the break.

Continue reading “TDOA (Time Difference Of Arrival) Directional Antenna”