[Frank Zhao] wanted to try his hand at making a transparent circuit board. His plan was to etch the paths with a laser cutter and fill in the troughs with conductive ink. The grooves are ~0.1mm deep x ~0.8mm wide.
He used nickel ink, which is slightly cheaper than silver ink. The ink was among the least of his problems, though. At a measured resistance of several hundred ohms per inch, it was already a deal breaker since his circuit can’t function with a voltage drop above 0.3V. To make matters worse, the valleys are rough due to the motion of the laser cutter and don’t play well with the push-to-dispense nature of the pen’s tip. This caused some overflow that he couldn’t deal with elegantly since the ink also happens to melt acrylic.
[Frank] is going to have another go at it with copper foil and wider tracks. Do you think he would have fared better with silver ink and a different delivery method, like a transfer pipette? How about deeper grooves?
Fail of the Week is a Hackaday column which runs every Thursday. Help keep the fun rolling by writing about your past failures and sending us a link to the story — or sending in links to fail write ups you find in your Internet travels.
Pour-over coffee brewing is a simple and cheap hands-on alternative to using an automatic coffee maker. Although coffee aficionados often choose pour-over just for the manual brewing experience, this didn’t stop [Elias] from automating his pour-over coffee setup with an elaborate delta-robot: the DeBrew.
The coffee-brewing robot is built around a delta assembly from a 3d printer controlled by a BeagleBone Black. The BeagleBone drives stepper motors, displays information on a small open-source hardware HDMI LCD display, and serves up a web interface to control the machine. The radius of the pouring pattern, water temperature, and grind coarseness of the DeBrew can all be customized though its web interface.
For those who want to build their own pour-over robot, [Elias] has made a SketchUp drawing of the design and all of his Python source code available as open-source. Check out the video after the break where [Elias] explains how his delta pour-over bot works.
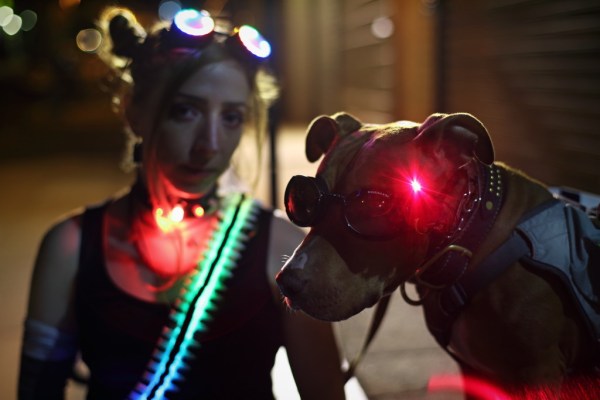
Sure, you could dress your dog up for Halloween in some pre-fab hot dog costume or a little French maid outfit, but what’s the fun in that? Hilarious as it may be, there’s no hack there. [Becky Stern] will help you out of your pet costume rut with the tutorial for her latest creation, laser dog goggles.
First things first: the laser she uses is fairly benign. You can safely stare it down for just under 30 seconds, so your pet should be okay. [Becky] offers other helpful safety suggestions, like covering the delicate battery pack with fabric to avoid scratching damage, and waiting until the adhesives are completely dry before outfitting Rover. But hey, if your dog isn’t into eye wear, don’t force it.
These are based on Doggles brand dog goggles and the Adafruit Trinket. The laser is mounted on a micro servo so that it pivots back and forth, allowing your dog to scan the ground like RoboCop or Terminator. As you might expect, [Becky]’s tutorial includes a comprehensive list of tools and great documentation. Check out her video overview after the break.
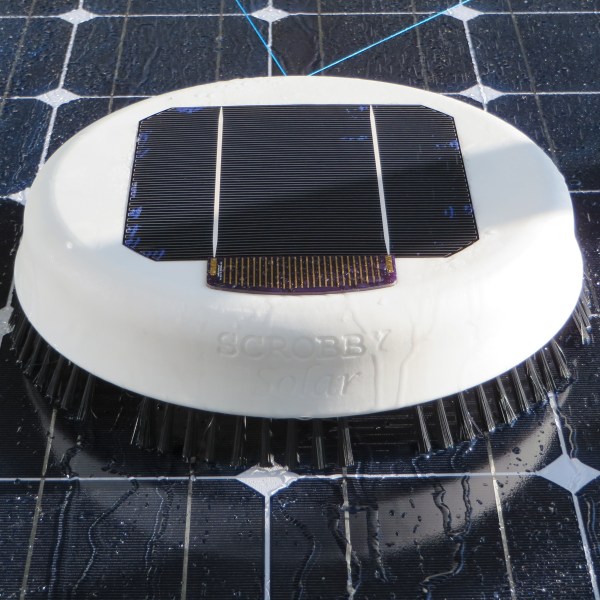
Solar panels are a great, sustainable addition to your home’s energy scheme. They’re bound to get dirty, but they can’t withstand harsh chemicals and still be effective. While there are companies that will come out and clean your installation a few times a year, the service is a recurring cost that adds up quickly. With Scrobby, his entry into The Hackaday Prize, [Stefan] sought to build a highly affordable and sustainable solution that, after installation, requires no dangerous trips back up to the roof.
Scrobby is solar-powered and cleans using rainwater. The user can set and alter the cleaning schedule over Bluetooth from their phone. [Stefan]’s prototype was built around a Teensy 3.0, but he will ultimately use custom boards based on the Freescale KL26. In addition to the Bluetooth module, there are six ultrasonic sensors, rain and temperature sensors, and motor-driven spools for tethered movement.
Make the jump to see Scrobby get his prototype bristles installed and show off his abilities in [Stefan]’s demo video. To register for updates, check out Scrobby’s website. If you hurry, you can donate to Scrobby’s Kickstarter campaign. The question is, who will clean Scrobby’s solar panels?
This project is an official entry to The Hackaday Prize that sadly didn’t make the quarterfinal selection. It’s still a great project, and worthy of a Hackaday post on its own.
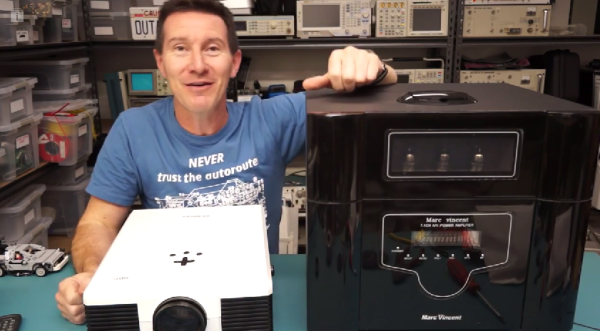
[Dave Jones] shows us just how bad audio equipment can get with his white van speaker scam teardown (YouTube link). Hackaday Prize judge [Dave] has some great educational videos on his EEVblog YouTube channel, but we can’t get enough of his rants – especially when he’s ranting about cheap electronics. Check out his world’s “cheapest” camcorder teardown for a classic example
This week [Dave] is tearing down some white van speaker scam A/V equipment. The White Van Speaker Scam (WVSS) is an international hustle which has been around for decades. A pair of guys in a white van stop you in a parking lot, gas station, or other public area. They tell you they’ve got some brand new A/V equipment in the back of their van that they’ll give you for a “great deal”. The speakers are always in fancy packaging, and have a name that sounds like it could be some sort of high-end audiophile brand worth thousands.
Needless to say anyone who buys this equipment finds they’ve been duped and are now the proud owner of some equipment which only sounds good when hitting the bottom of a dumpster. Coincidentally, a dumpster is exactly where [Dave] found his WVSS equipment.
The case of his “Marc Vincent” surround sound system turned out to be nothing more than thin chipboard hot glued together. The electronics were of such shoddy quality that few words describe them – though [Dave] is always ready to improvise. From the ultra cheap subwoofer driver to the 1990’s era vacuum fluorescent display, everything was built down to the lowest cost while still looking nice from the outside. Even the ground wire was just tack soldered to the frame. We especially liked the three vacuum tubes that weren’t even soldered in. The leads were bent over to hold them onto a PCB, while a blue LED lit the tube from below.
Click past the break to see what [Dave] found inside his “3D Optics” projector.
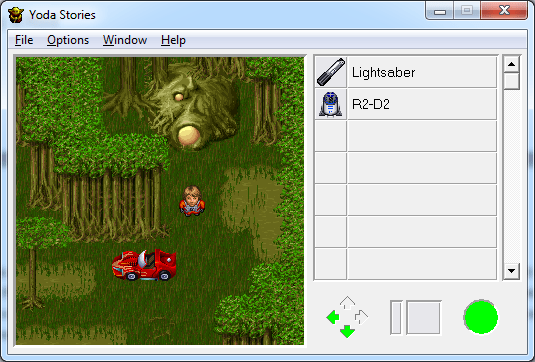
Star Wars: Yoda Stories was released by LucasArts in 1997 to minimal critical acclaim. As IGN said, “like Phantom Menace proved, just because it’s Star Wars doesn’t mean it’s good.” This didn’t stop [Zach] from playing it, and years later, taking an interest in reverse engineering the game.
[Zach]’s reverse engineering of Star Wars: Yoda Stories (google cache) takes a look at the game’s data file. This binary file is parsed by the game at run time to extract sound effects, sprites, and map tiles. Perhaps the best known game data file type was Doom’s WAD file, which had purpose built editing programs from third parties.
After a quick look at the data file in HxD, [Zach] began writing scripts in C# to extract different sections of the data file. Once the sections were found, more code was used to apply a color palette and generate bitmaps.
In the end, [Zach] managed to get a couple thousand tiles of the game’s data. He found some interesting ones, such as the sports car that he replaced the X-Wing with in his mod. The engine for an earlier Lucasarts game, Indiana Jones and His Desktop Adventures, should be very similar, and once we find the Mac install disk and a copy of ResEdit, we’ll post something on Hackaday.io.
There were two LA hackerspaces represented at our 10th anniversary party, and members from both of them were able to give a talk on the projects coming out of their labs. [Arko] from null space labs showed up with a few of his creations including CUBEX, his high altitude balloon payload and a demoscene board he’s been working on. [Tod] from Crashspace showed up with the rest of the Crash crew and helped out with the morning build-offs and labs.
A Demoscene Board
Demoscenes, for one reason or another, aren’t extremely popular in the US. In Europe, you can find teams working on programatically generated music videos year-round, coded for Commodore 64s, Amigas, even stranger computers, and x86 assembly. There’s an art to the whole thing, but for those of us on this side of the pond, there aren’t many venues to demonstrate impeccable graphics programming skill.
[Arko] wants to change this. He’s designed a demoscene board around a PIC micro with hardware graphics acceleration, USB OTG, VGA out at 640×480, and an audio out port. It’s meant to be a platform to create demos on, and already [Arko] has ported the famous Craft demo from [lft] to his platform. Edit: the Craft demo was playing on the older ATmega88 version of the board. The PIC board is a little more capable.
Being that there are so few Demo parties in the US, only building a board to play demos would be just a bit shortsighted. [Arko]’s main reason for giving this talk was to tell everyone about the LayerOne Demoparty next year just a few miles from the Hackaday Hackaspace. It coincides with the LayerOne conference, and the board itself will soon be available for sale in the Hackaday store.
Blink(1) and How To Kickstarter
When it comes to electronics and tech Kickstarters, Blink(1) defines what it means to have a minimum viable product. It’s a USB plug, a small microcontroller, and an RGB LED. That’s it. [Tod] wanted to take this simple project and learn how to turn it into a product. [Tod] emphasised the ‘learn’ part of his plan; the alternate title for this talk was, “How to Fail Multiple Times and Still Ship 20,000 Units.”
The Blink(1) started as a standard My First Arduino Sketch, blinking three LEDs, quickly moving over to a USB LED device. This rather large USB dongle sat there for a few years until he decided to turn this into a product. It turned out building a product is a lot more involved than building a kit, with considerations to the enclosure, the packaging, and the inevitable CNC mold fails. Assembly – and the success of his first Kickstarter – was also an issue. [Tod]’s friends ended up assembling most of the kits.
Despite these problems, [Tod] was still able to ship a few thousand units and is now working on another production run with SeeedStudio. It’s a remarkable story, with the Blink(1) used by Google, Disney, Microsoft, Facebook, and a whole bunch of other huge companies. The Blink(1) is also in the mainline Linux kernel, something you can’t say about a lot of Kickstarters out there.
 Fail of the Week is a Hackaday column which runs every Thursday. Help keep the fun rolling by writing about your past failures and sending us a link to the story — or sending in links to fail write ups you find in your Internet travels.
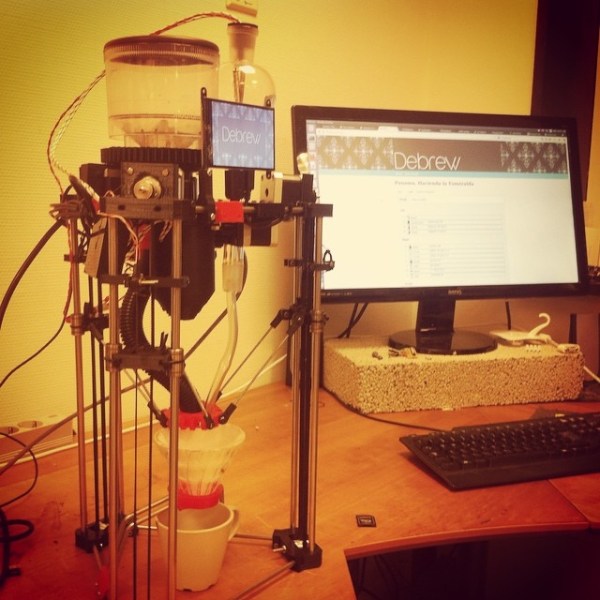
 This project is