HAL Is Duct Tape For Home Automation

HAL Home Automation

When it comes to home automation, there are a lot of different products out there that all do different things. Many of them are made by different companies, and they don’t often play very well together. This frustration ultimately led [Daniel] to develop his own Python based middleware solution to get these various components to work as a single cohesive system. What exactly did [Daniel] want to control?

First up was the door lock. [Daniel] lives in an apartment building, so there are actually two locks. First, a visitor must be allowed into the building by pressing a button on the intercom system in the apartment. Second, the apartment door has its own dead bolt lock that needs to be opened and closed. [Daniel] was able to control the building’s front door using just a transistor hooked up to an Arduino to simulate the press of the physical button. The original button remains in tact so [Daniel] can still easily “buzz” in a visitor.

The apartment’s dead bolt was a bit trickier. There are off-the-shelf solutions to control a dead bolt, but they are often expensive. [Daniel] built his own solution using a simple servo motor bolted to the door. The servo is controlled by the Arduino which is in turn controlled via two broken intercom buttons that already existed within the apartment. The buttons were originally used to either speak to or listen to a visitor before buzzing them into the building. They had never worked for [Daniel] so he re-purposed them for his own project. The whole DIY door locker is enclosed in a custom-made laser cut wooden box.

Click past the break for the rest of [Daniel’s] story.

Continue reading “HAL Is Duct Tape For Home Automation”

The $50 DMX Tester

DMX

Despite being around for about as long as MIDI, DMX, the industry standard for controlling stage lighting and smoke machines, is still an astonishing expensive protocol to work with. Where MIDI can be banged out with a simple microcontroller – with odd bit rate requirements, no less, DMX testers cost hundreds of dollars. Of course this means the market is wide open for a DIY DMX tester, and over on the projects site [Tony] has just the thing.

For the hardware, [Tony] is using few 4×4 matrix keypads for user input, and a character LCD for the display. With this, he can set any of the 512 lighting channels in a DMX setup to any one of the 256 intensity values. Setting a range of channels to any intensity is a snap, with an extremely cut down command protocol. All the processing is handled by an Arduino, which seems more than capable of handling the DMX protocol thanks to the Conceptionetics DMX library.

While it’s not a full-blown lighting console you’d find in the back of a theatre, it’s more than sufficient to test a lighting rig. It also seems pretty simple to use, just the thing if you’re trying to wrap your brain around some theatrical lighting.

Four strings drag an aluminum slug through a sandbox

CNC Zen Garden

[youtube=https://www.youtube.com/watch?v=Ge4H4Uw630o&w=580]


Meet the second version of [David’s] sand manicuring CNC machine. We saw version one about six months ago which he built for a science museum in Canada. This offering is much the same, except for the controller. The initial version demanded a full-blow computer to drive it but now that has been swapped out in favor of a Beaglebone Black.

The software has no feedback on the position of the plotter, which is an aluminum slug that [David] machined at Calgary Protospace. It needs to be in a specific position when the machine starts out, and from there patterns are traced by calculating how much spooling or unspooling of the four strings will move the slug.

There’s a bunch of other really neat art installations and projects on [David’s] webpage, it’s worth clicking through!

Developing The Grillino In 24 Hours

grillino

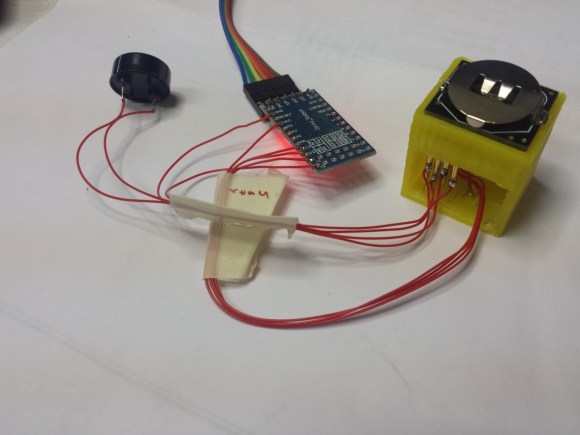
[Mastro Gippo] hit Shenzhen back in April and organized a challenge for himself: could he develop an electronic device from idea to product in only 24 hours? The result is the Grillino, a simple clone of the Annoy-a-Tron: a small, concealable device that makes chirping sounds at random intervals. It’s name was derived from a mix of the Italian word for a cricket—”grillo”—and, of course, “Arduino.”

Shenzhen was the perfect setting for his experiment, especially because [Mastro Gippo] was in town for the Hacker Camp we mentioned a few months ago. The build is pretty simple, requiring only a microcontroller, a battery, and a piezo speaker. What follows is a detailed journey of dizzying speed through the production process, from bags stuffed full of components, to 3D-printing a test jig, to searching for a PCB manufacturer that could fulfill his order overnight. Video and more below.

Continue reading “Developing The Grillino In 24 Hours”

Custom Electronics And LED Panels Brighten Up A Nightclub

ledPanels

When [Robert] is presented with a challenge, he doesn’t back down. His friend dreamed of reusing some old LED panels by mounting them to the ceiling of the friend’s night club. Each panel consists of a grid of five by five red, green, and blue LEDs for a total of 75 LEDs per panel. It sounded like a relatively simple task but there were a few caveats. First, the controller box that came with the panels could only handle 16 panels and the friend wanted to control 24 of them. Second, the only input device for the controller was an infrared remote. The friend wanted an easy way for DJ’s to control the color of the panels and the infrared remote was not going to cut it. Oh yea, he also gave [Robert] just three weeks to make this happen.

[Robert] started out by building a circuit that could be duplicated to control each panel. The brain of this circuit is an ATtiny2313. For communication between panels, [Robert] chose to go with the DMX protocol. This was a good choice considering DMX is commonly used to control stage lighting effects. The SN75176 IC was chosen to handle this communication. In his haste to get this PCB manufactured [Robert] failed to realize that the LED panels were designed common cathode, as opposed to his 25 shiny new PCB’s which were designed to work with a common anode design. To remedy this, he switched out all of the n-channel MOSFET with p-channel MOSFET. He also spent a couple of hours manually cutting through traces and rewiring the board. After all of this, he discovered yet another problem. The LED’s were being powered from the same 5V source as the microcontroller. This lead to power supply issues resulting in the ATtiny constantly resetting. The solution was to add some capacitors.

Click past the break for more on [Robert’s] LED panels.

Continue reading “Custom Electronics And LED Panels Brighten Up A Nightclub”

PirateBox, For All Your Wireless Dead Drop Needs

piratebox

Here’s an interesting idea: get a router, Android device, or Raspberry Pi, put it on its own wireless network, and allow anyone to upload and download files. That’s a PirateBox, a small node in the web of digital culture and also a really great way to distribute files at a LAN party.

We’ve seen these type of things before, but now, thanks to [David] and [Matthias], and a bunch of other people, there’s now an easy way to turn a Raspi, Android, or anything that runs OpenWrt into a wireless dead drop. Also included in the software is an image board (think chan) a chat room, UPnP media server, and a browser-based file sharing system. Want to share a “linux distro”? Just upload it to the box over WiFi and it’s available to anyone in range.

Installers are available for devices you probably have sitting around in a junk drawer. Great for that Pi you’re trying to find a use for, and figuring out how to run one of these completely off the grid is an interesting challenge, to boot.


[Furze] Sets Fire To Everything With Pyro Gloves

Pyro Build

Crazyman [Colin Furze] is back, and this time he’s setting everything on fire with his Pyro gloves. Though Hackaday readers are already a discerning bunch, this is a build we get submissions for all the time and feature fairly often. It would take an exceedingly impressive build to outshine the other fire hazards. But, as with his pneumatic Wolverine claws and his electromagnetic boots, [Furze] knows how to build the insane and then put on a good show.

The Pyro build is part of [Furze’s] 3-part celebratory X-Men extravaganza, a nod to the realm of superheroes coinciding with the release of the new X-Men film. [Furze] began with a custom reservoir cylinder that fitted with two solenoid valves: one for a pilot light and another for the big blasts. He’s also affixed a Piezo element and a AA battery, which sits in a cozy little container. The bulkier bits of the assembly sit in a backpack, hooking up, as expected, to the wrist-mounted devices. This flame cannon, however, is unique among the ones we’ve encountered here.

Continue reading “[Furze] Sets Fire To Everything With Pyro Gloves”